Fivetran
A how-to guide to export Question Stream response data to data warehouse using Shopify Flow and Fivetran.
Be sure to enable Flow on your Fairing Integrations Page!To start, enable Shopify Flow in the Fairing app, click "Integrations," find Shopify Flow, and click "Connect." Once enabled, we send a payload [survey response data] to Shopify Flow whenever someone submits a survey response.
This document outlines instructions on sending your post-purchase survey data to your data warehouse using Shopify Flow and FiveTran.
Getting Started:
- Create a FiveTran account and set your database as your destination.
- Install Shopify Flow. We’ll be using Flow’s send http request functionality.
- In FiveTran, select Add Connector --> Webhook
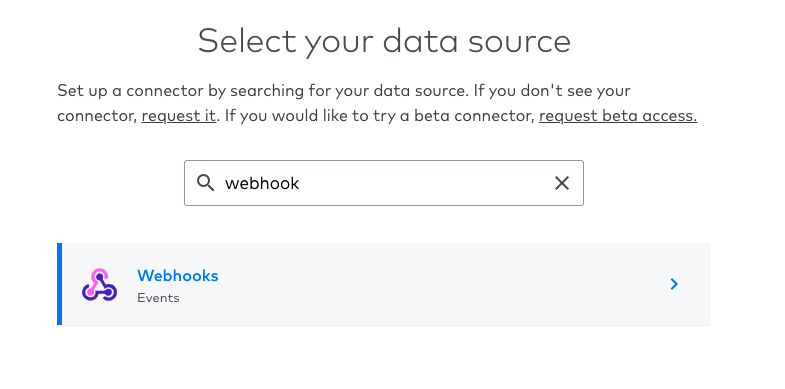
Select Webhook
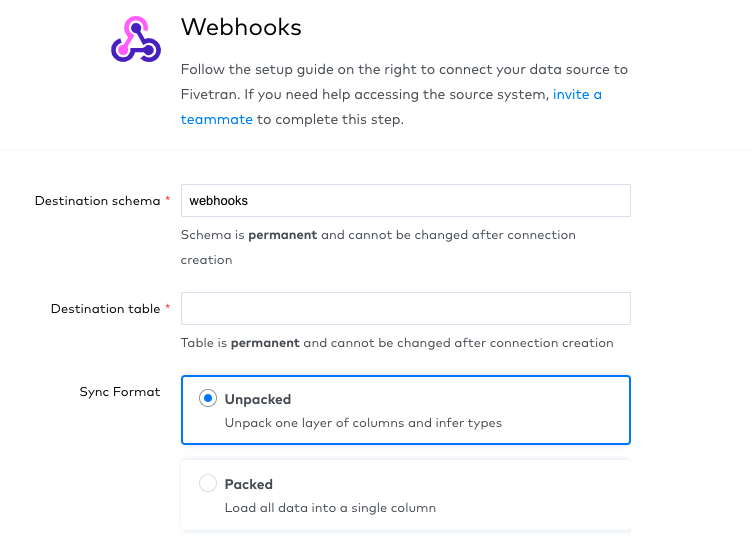
On the following page, you'll be presented with options to setup your Webhook connection.
- Set your Destination scheme (this will most likely be
public) - Add your table name (e.g. fairing_responses)
- Sync Format should be
Unpackedgiven you want the JSON object we'll pass through to FiveTran to be split into multiple columns
Keep scrolling and until you get to Webhook URL. Copy the URL as you'll need to paste into your Shopify Flow. Select Save and Test.
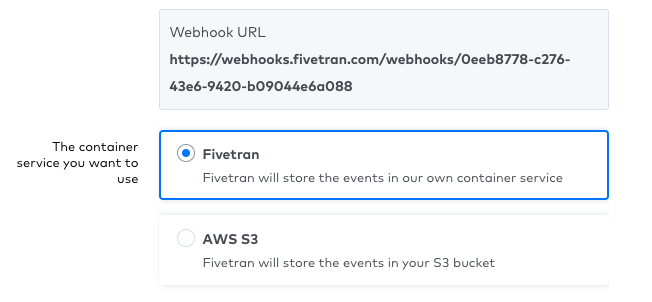
Fivetran Webhook URL
Create a new workflow
In Shopify Flow, create a new workflow with Enquire - New Survey Response as your trigger. Next, add External - Send http request as your action.
Next, fill in the available fields with the below information:
- HTTP Method: Post
- URL: paste the webhooks URL you copied from StitchData
- Headers: Key: Content-Type, Value: application/json
- Body: this is where you’ll input what attributes you want to pass from Fairing and Shopify to your database. If you used “order_id” as your primary key, make sure you include that. The below JSON can be copied into the body section and will pass your order id, order name, survey question, and survey response.
// The EnquireLabs trigger offers the following fields:

{
	"coupon_amount": {{trigger.couponAmount}},
	"count_code": "{{trigger.couponCode}}",
	"coupon_type": "{{trigger.couponType}}",
	"customer_name": "{{trigger.customerName}}",
	"customer_email": "{{trigger.email}}",
	"order_number": "{{trigger.orderNumber}}",
	"order_total": {{trigger.orderTotal}},
	"question": "{{trigger.question}}",
	"question_id": "{{trigger.questionId}}",
	"referring_site": "{{trigger.referringSite}}",
	"response": "{{trigger.response}}",
	"response_was_other": "{{trigger.responseWasOther}}",
	"utm_campaign": "{{trigger.utmCampaign}}",
	"utm_content": "{{trigger.utmContent}}",
	"utm_medium": "{{trigger.utmMedium}}",
	"utm_source": "{{trigger.utmSource}}",
	"utm_term": "{{trigger.utmTerm}}"
}

// The following fields are formatted for stores that started using
// Shopify Plus on or after August 31, 2021:
{
	{{couponAmount}},
	{{couponCode}},
	{{couponType}},
	{{customerName}},
	{{email}},
  {{orderNumber}},
  {{order.totalReceivedSet.shopMoney.amount}},
  {{question}},
  {{questionId}},
  {{referringQuestionID}},
  {{referringSite}},
  {{response}},
  {{responseWasOther}},
  {{utmCampaign}},
  {{utmContent}},
  {{utmMedium}},
  {{utmSource}},
  {{utmTerm}}
}


// Relevant Shopify Fields:
{
	"customer_id": {{customer.id}},
	"order_id": {{order.id}},
  "lifetime_duration": {{customer.lifetimeDuration}},
  "lifetime_spend": {{customer.totalSpentV2.amount}},
  "order_created_at": "{{order.createdAt}}"
}

// Relevant Shopify Fields for stores that started using
// Shopify Plus on or after August 31, 2021:
{
  {{customer.id}},
  {{order.id}},
  {{customer.lifetimeDuration}},
  {{customer.totalSpentV2.amount}},
  {{order.createdAt}}"
}

// Combine fields to create desired payload. For example:
{
	"customer_id": {{customer.id}},
	"order_id": {{order.id}},
	"question_id": "{{trigger.questionId}}",
	"question": "{{trigger.question}}",
	"response": "{{trigger.response}}",
	"response_was_other": "{{trigger.responseWasOther}}",
}

// Or (For the new Flow):
{
  {{customer.id}},
  {{order.id}},
  {{questionId}},
  {{question}},
  {{response}},
  {{responseWasOther}},
}
Below is a screenshot of what the workflow should look like:
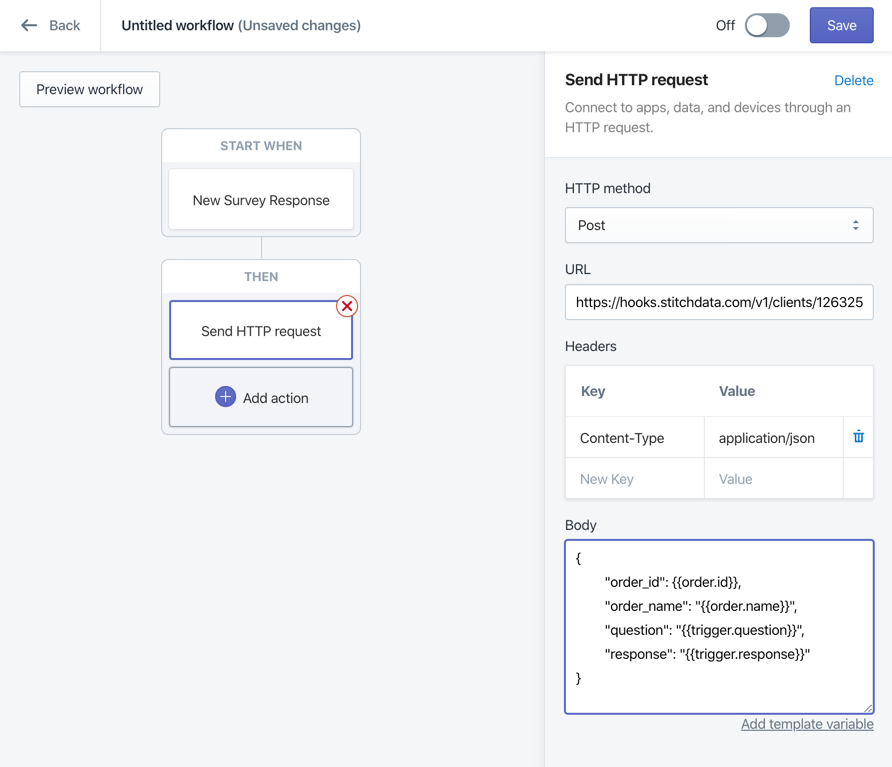
Shopify Flow Workflow
Below is a screenshot of what the workflow should look like for stores that started using Shopify Plus on or after August 31, 2021:
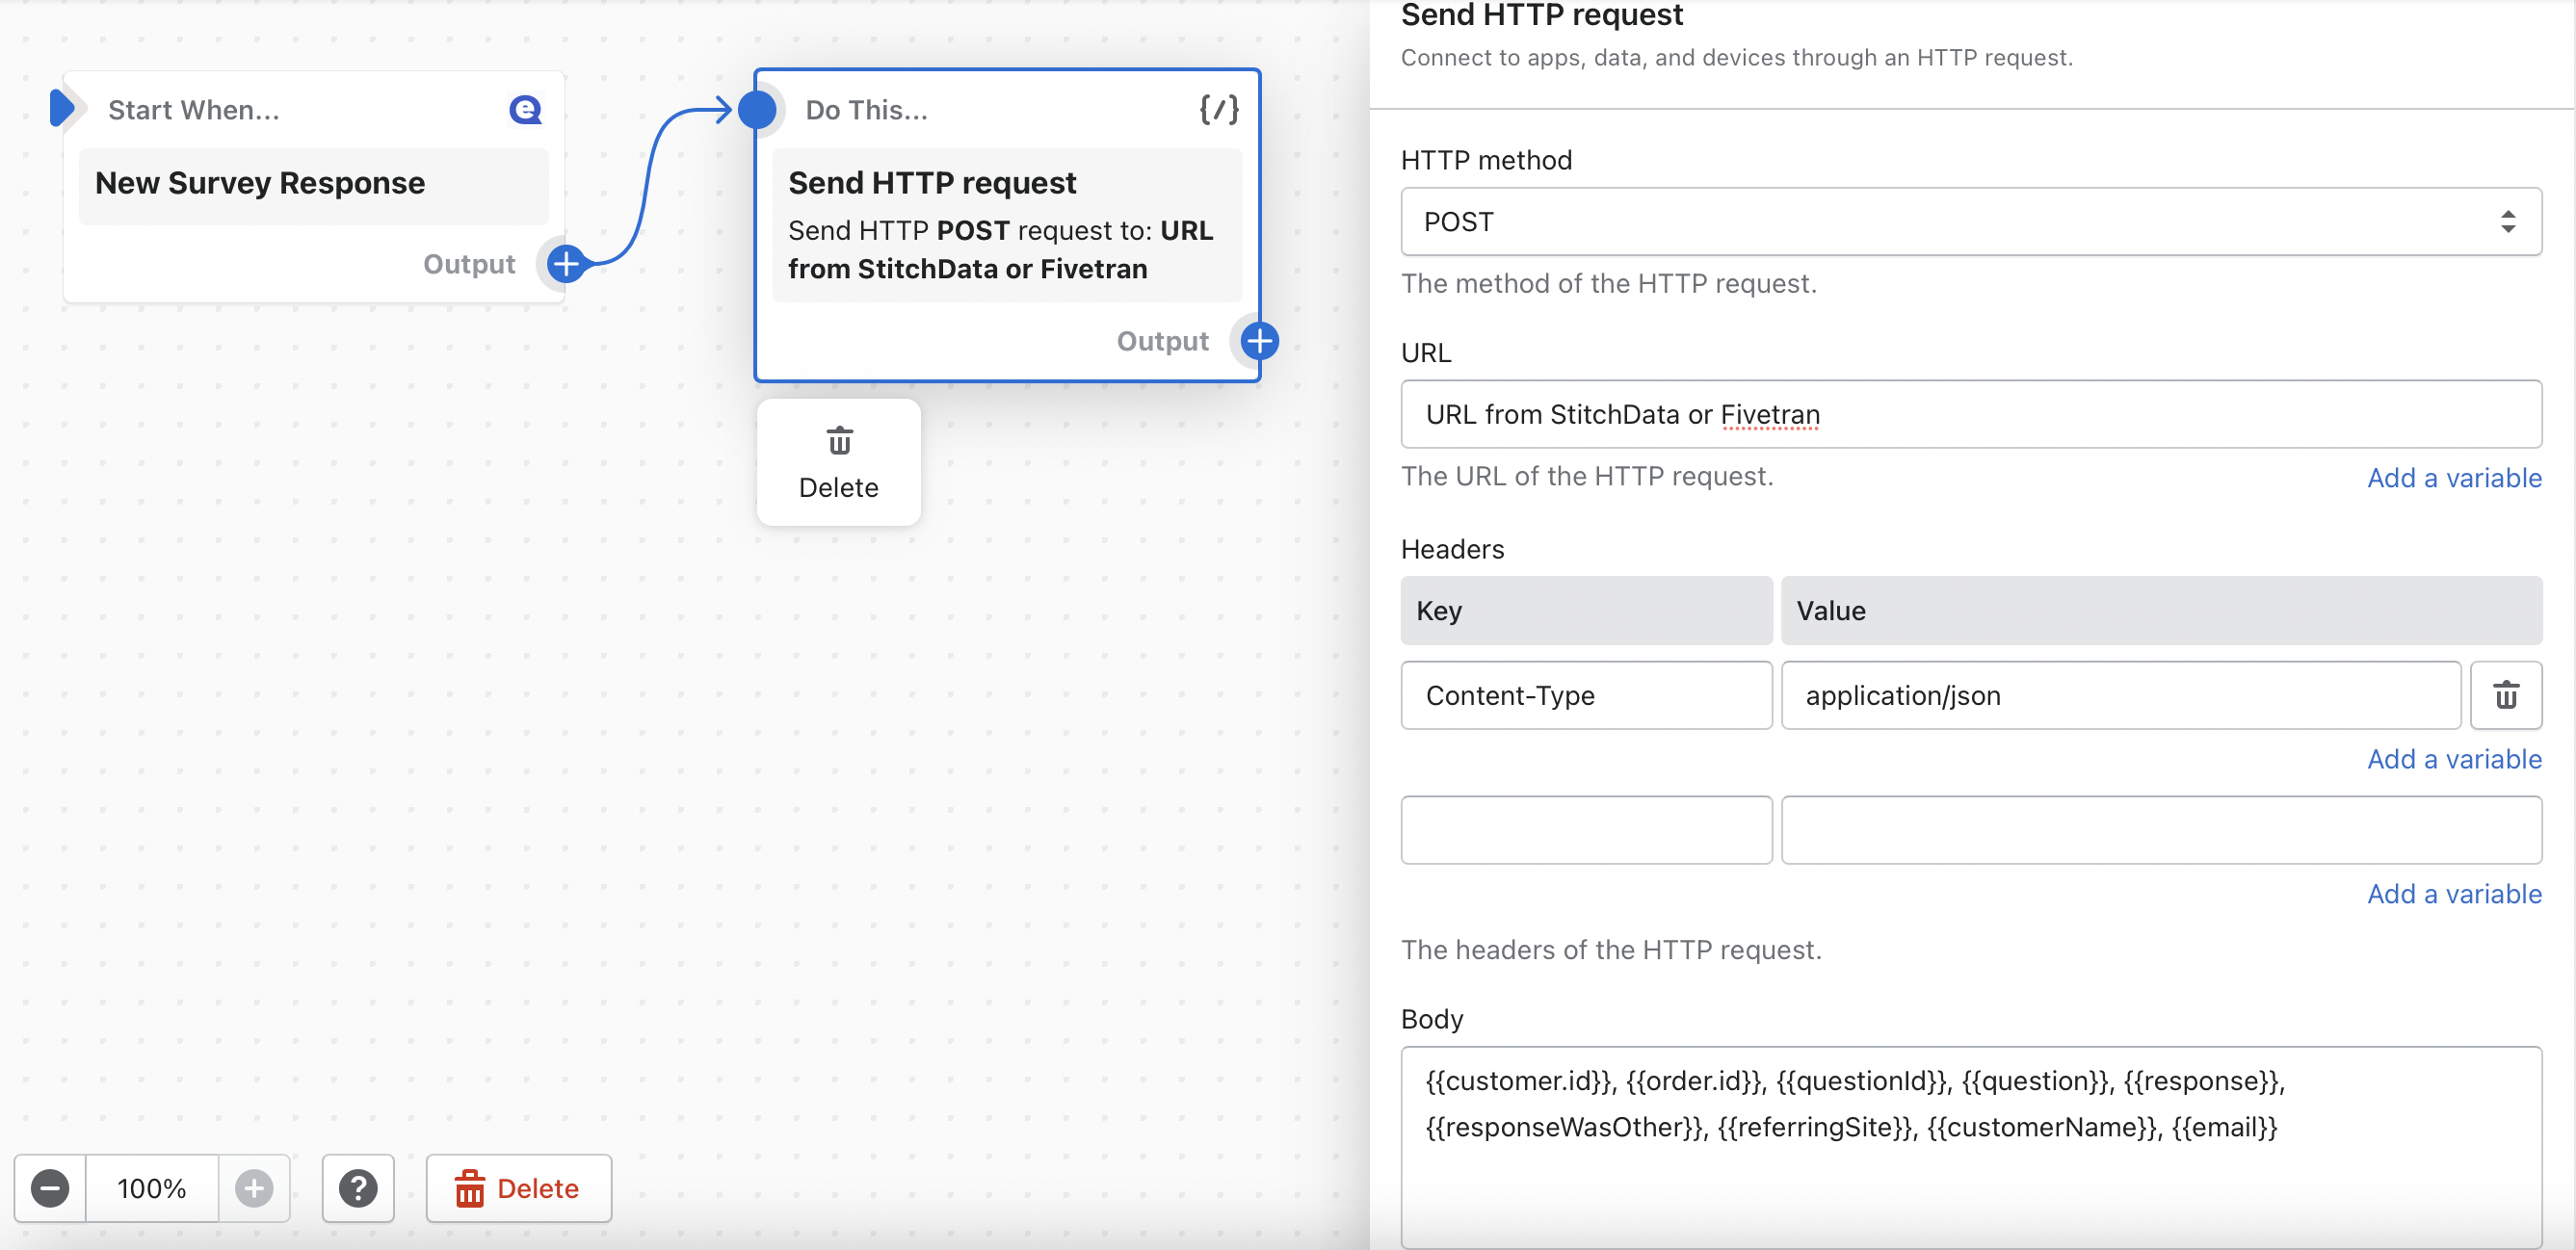
New Shopify Flow Workflow
After you’ve filled in all the fields, click “Save” located in the upper right-hand corner and name your new workflow. To set your workflow live, simply click the on/off toggle next to the save button.
You’re all set. Fairing survey data will now start feeding into your database. If you have any questions, don’t hesitate to reach out to us at [email protected].
Updated 4 months ago