
Install with Google Tag Manager
How to deploy Fairing's custom snippet with GTM
Step 1: Create GTM Variable
If you do not already have one, create a User-Defined Variable in GTM that can be mapped to Fairing's CUSTOMER_ID. The variable should be an internal ID that uniquely identifies a customer or account, e.g. an email address.
If the variable is not already available in your data layer, we recommend temporarily saving the variable in sessionStorage. See instructions here.
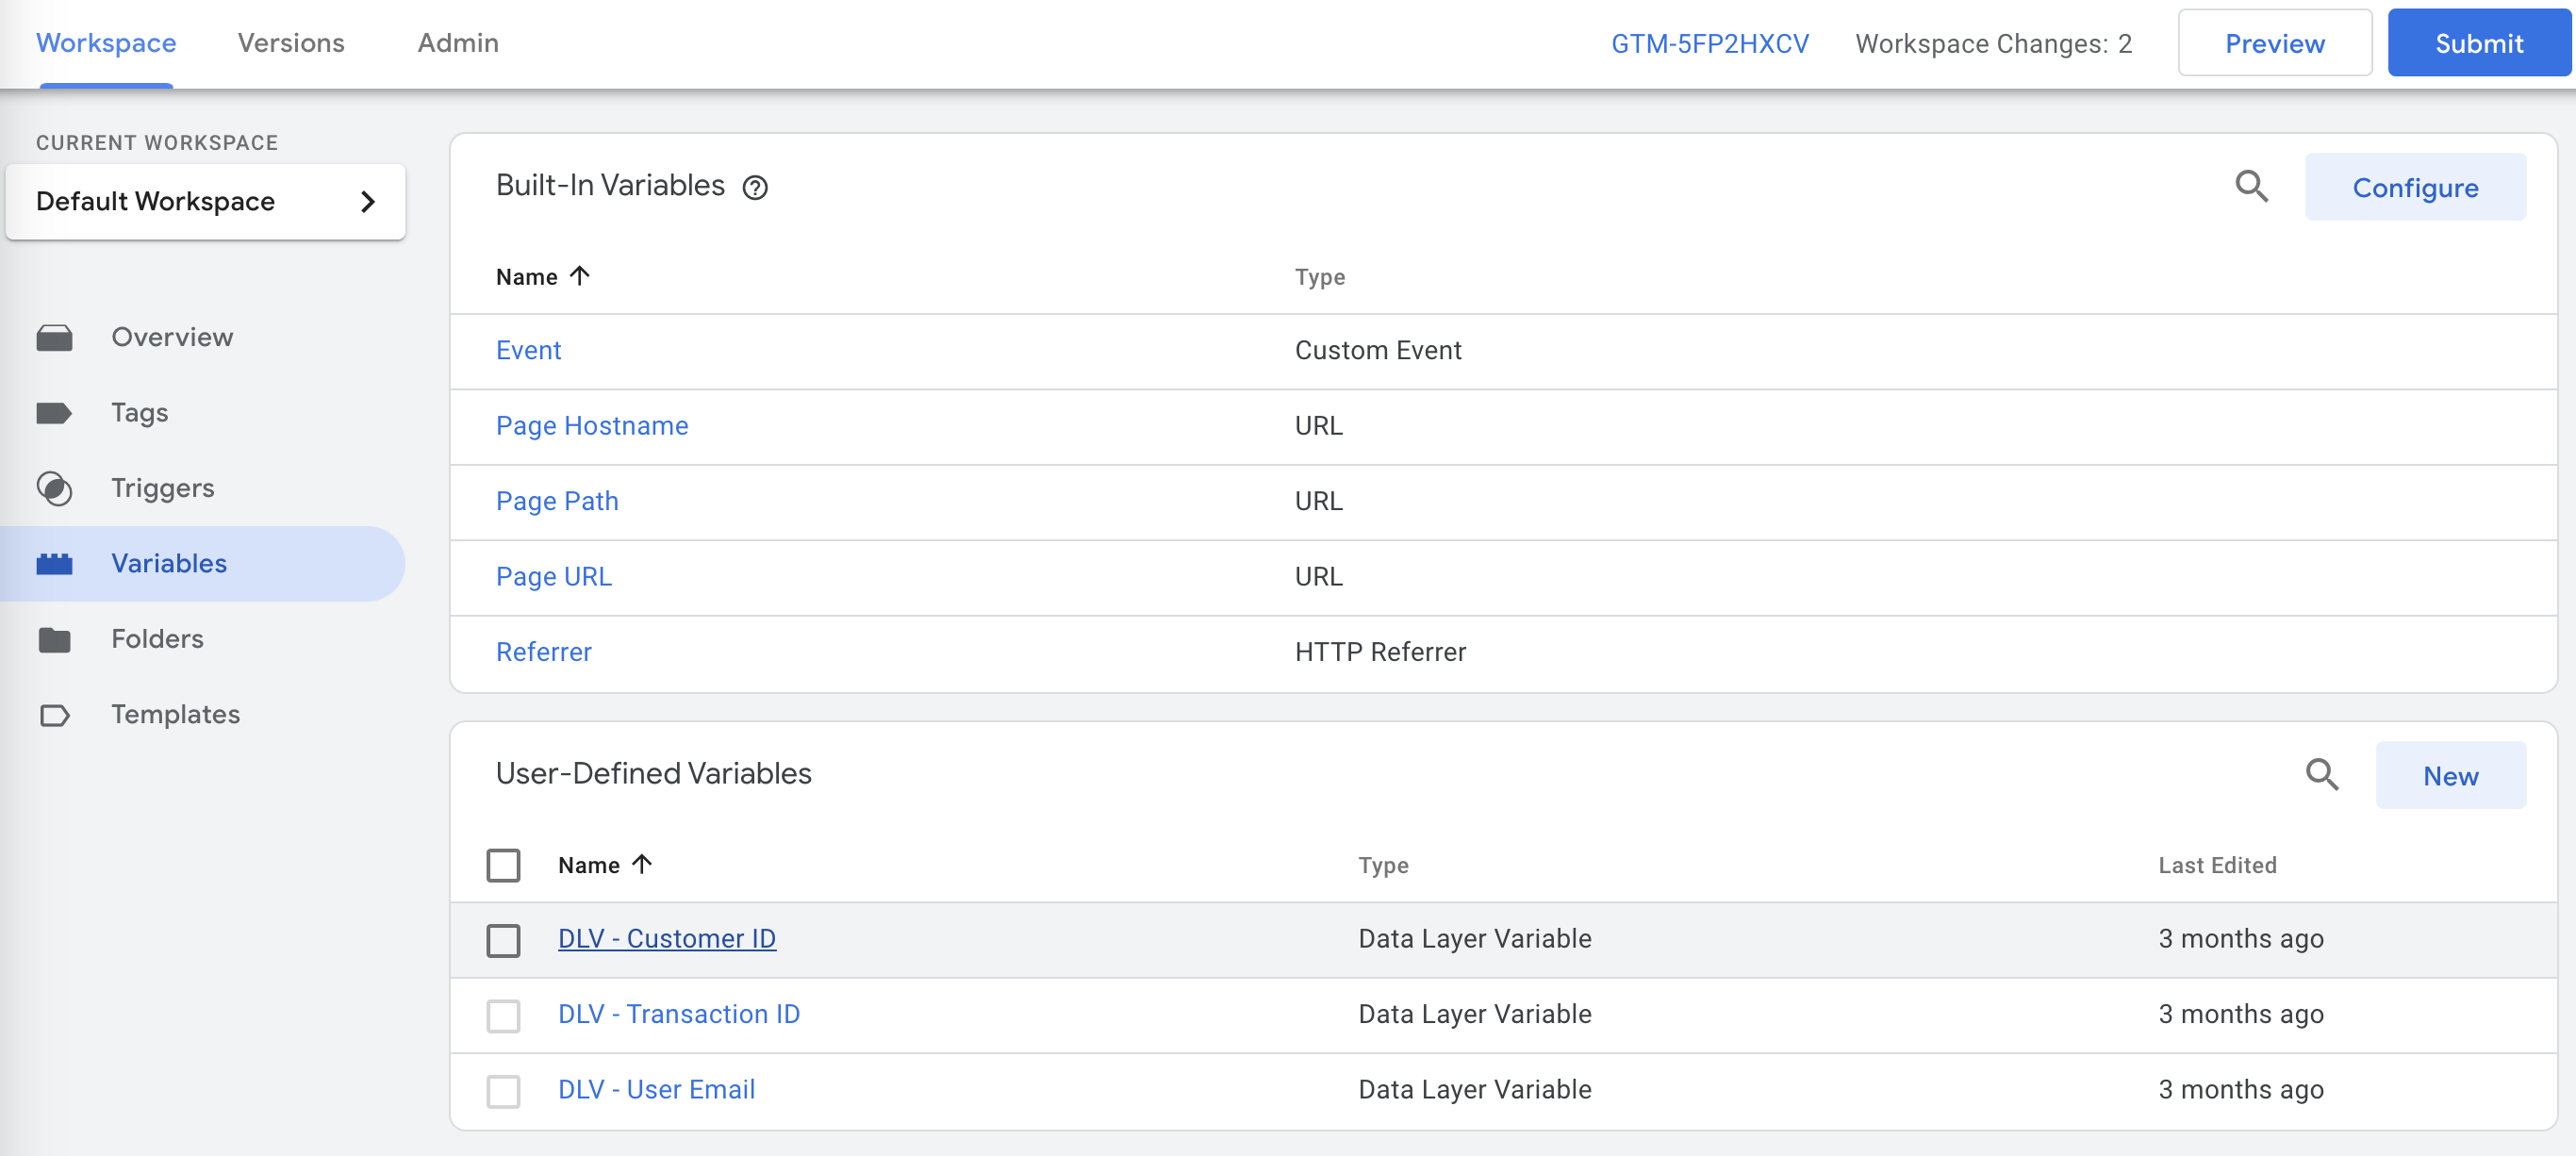
Variables >> User-Defined Variables
Step 2: Create Trigger
We recommend using a 'Custom Event' trigger, which allows you to define a specific event trigger in your GTM data layer. If the page where Fairing will load has a unique URL, a Page View trigger can be used instead.
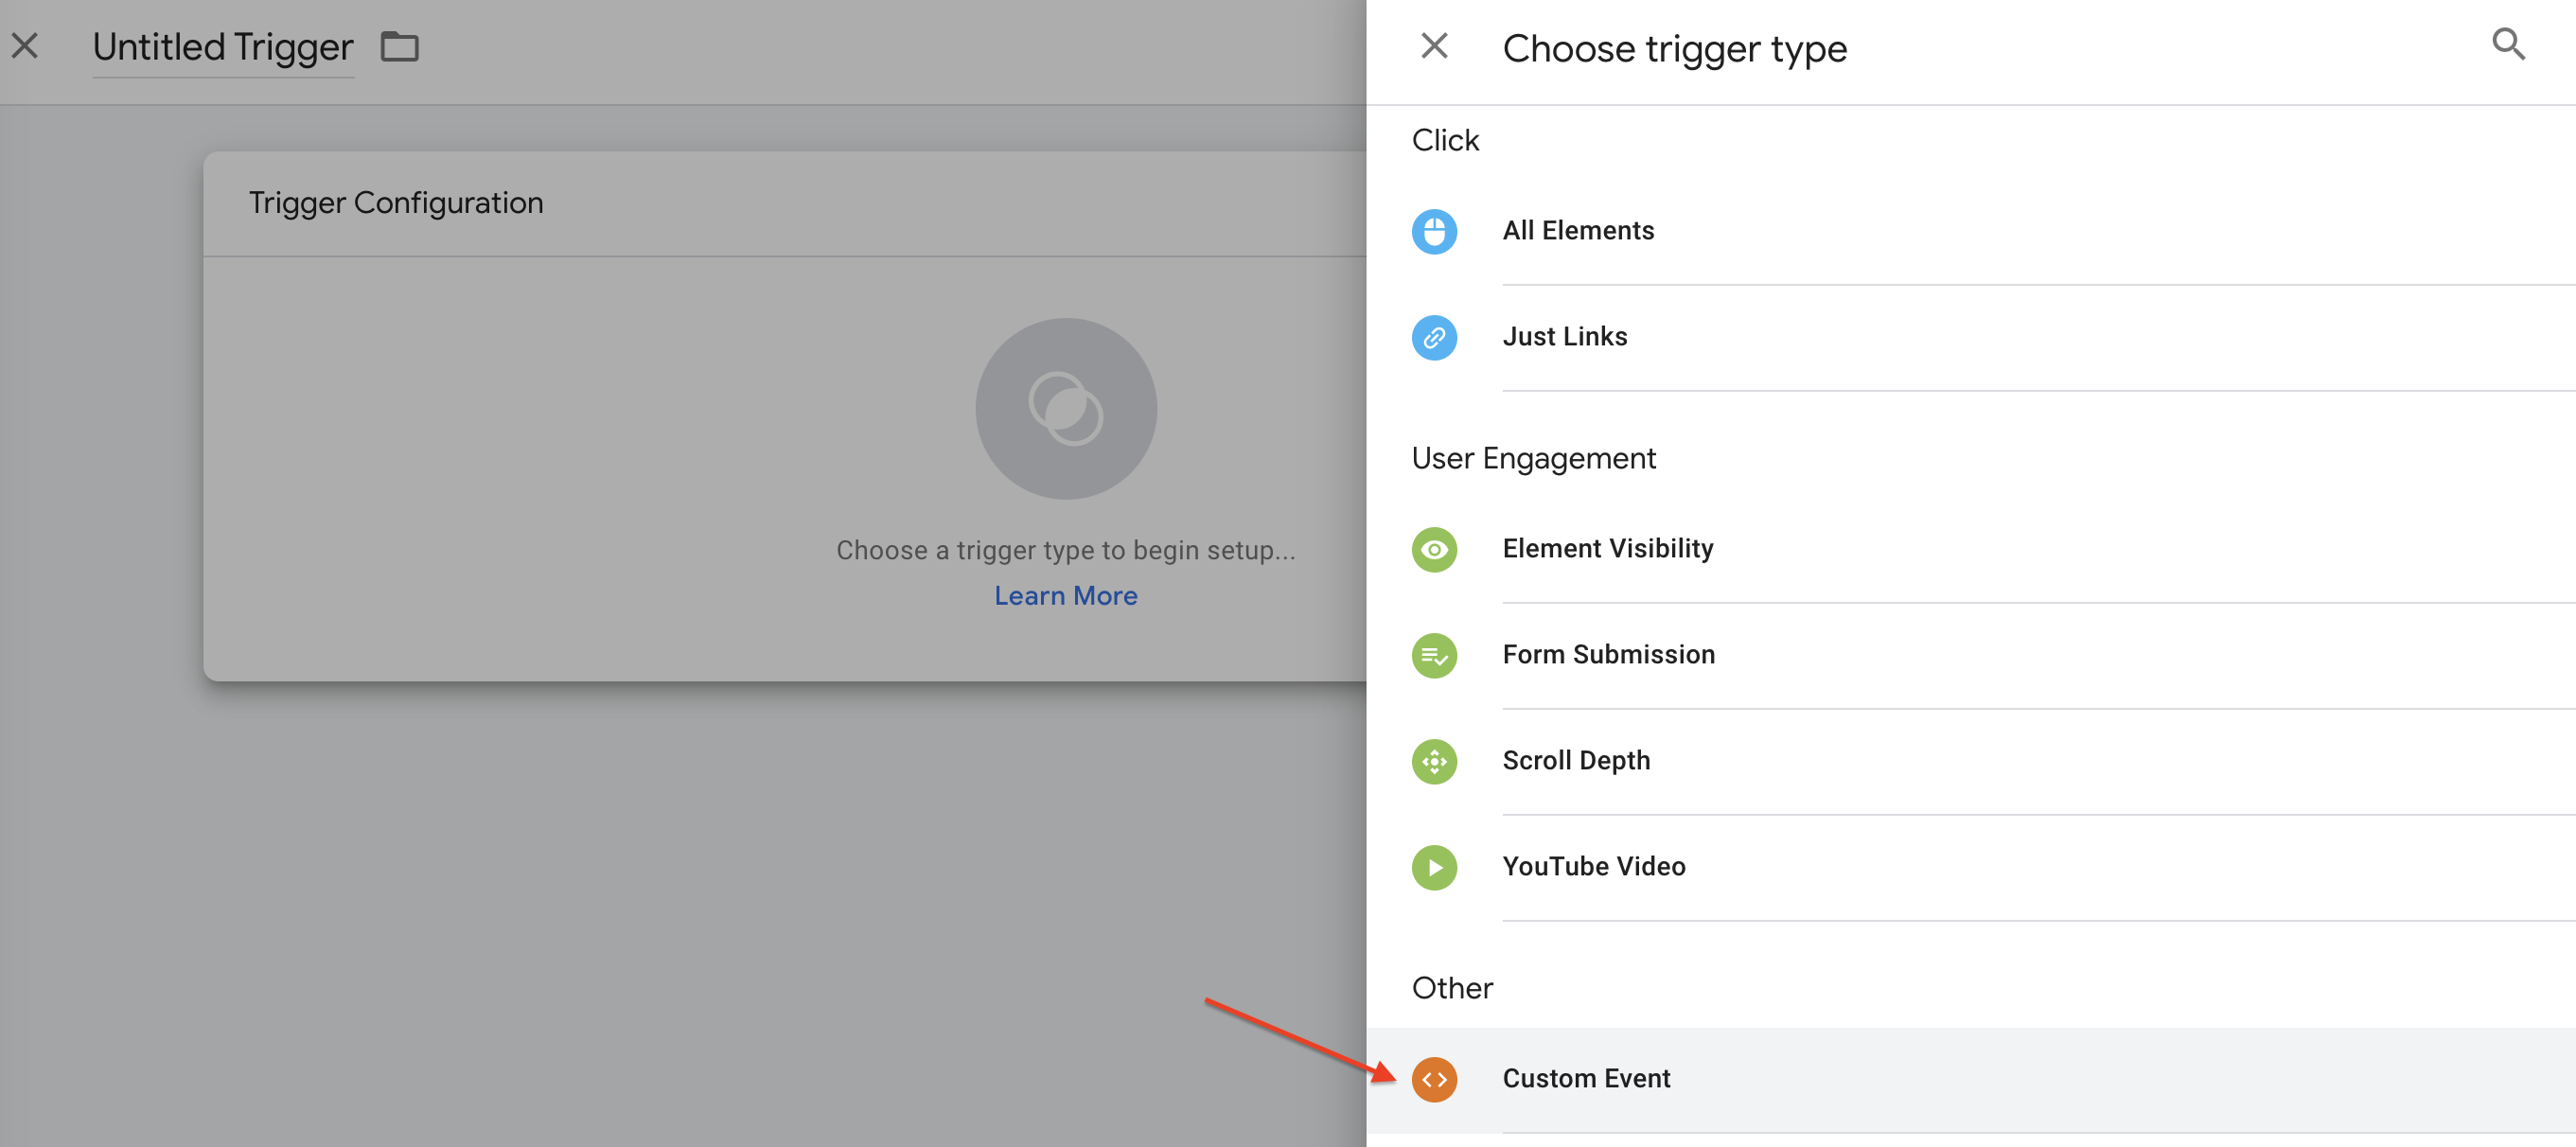
Triggers >> New >> Custom Event
Populate the 'Event name' with the event you defined in your data layer. Select 'Some Custom Events' and choose 'Page Path contains' and enter the page path applicable to the page you want Fairing to load on. The Page Path is the value in the URL that comes after the hostname, but before the query parameters.
Name your trigger and Save.
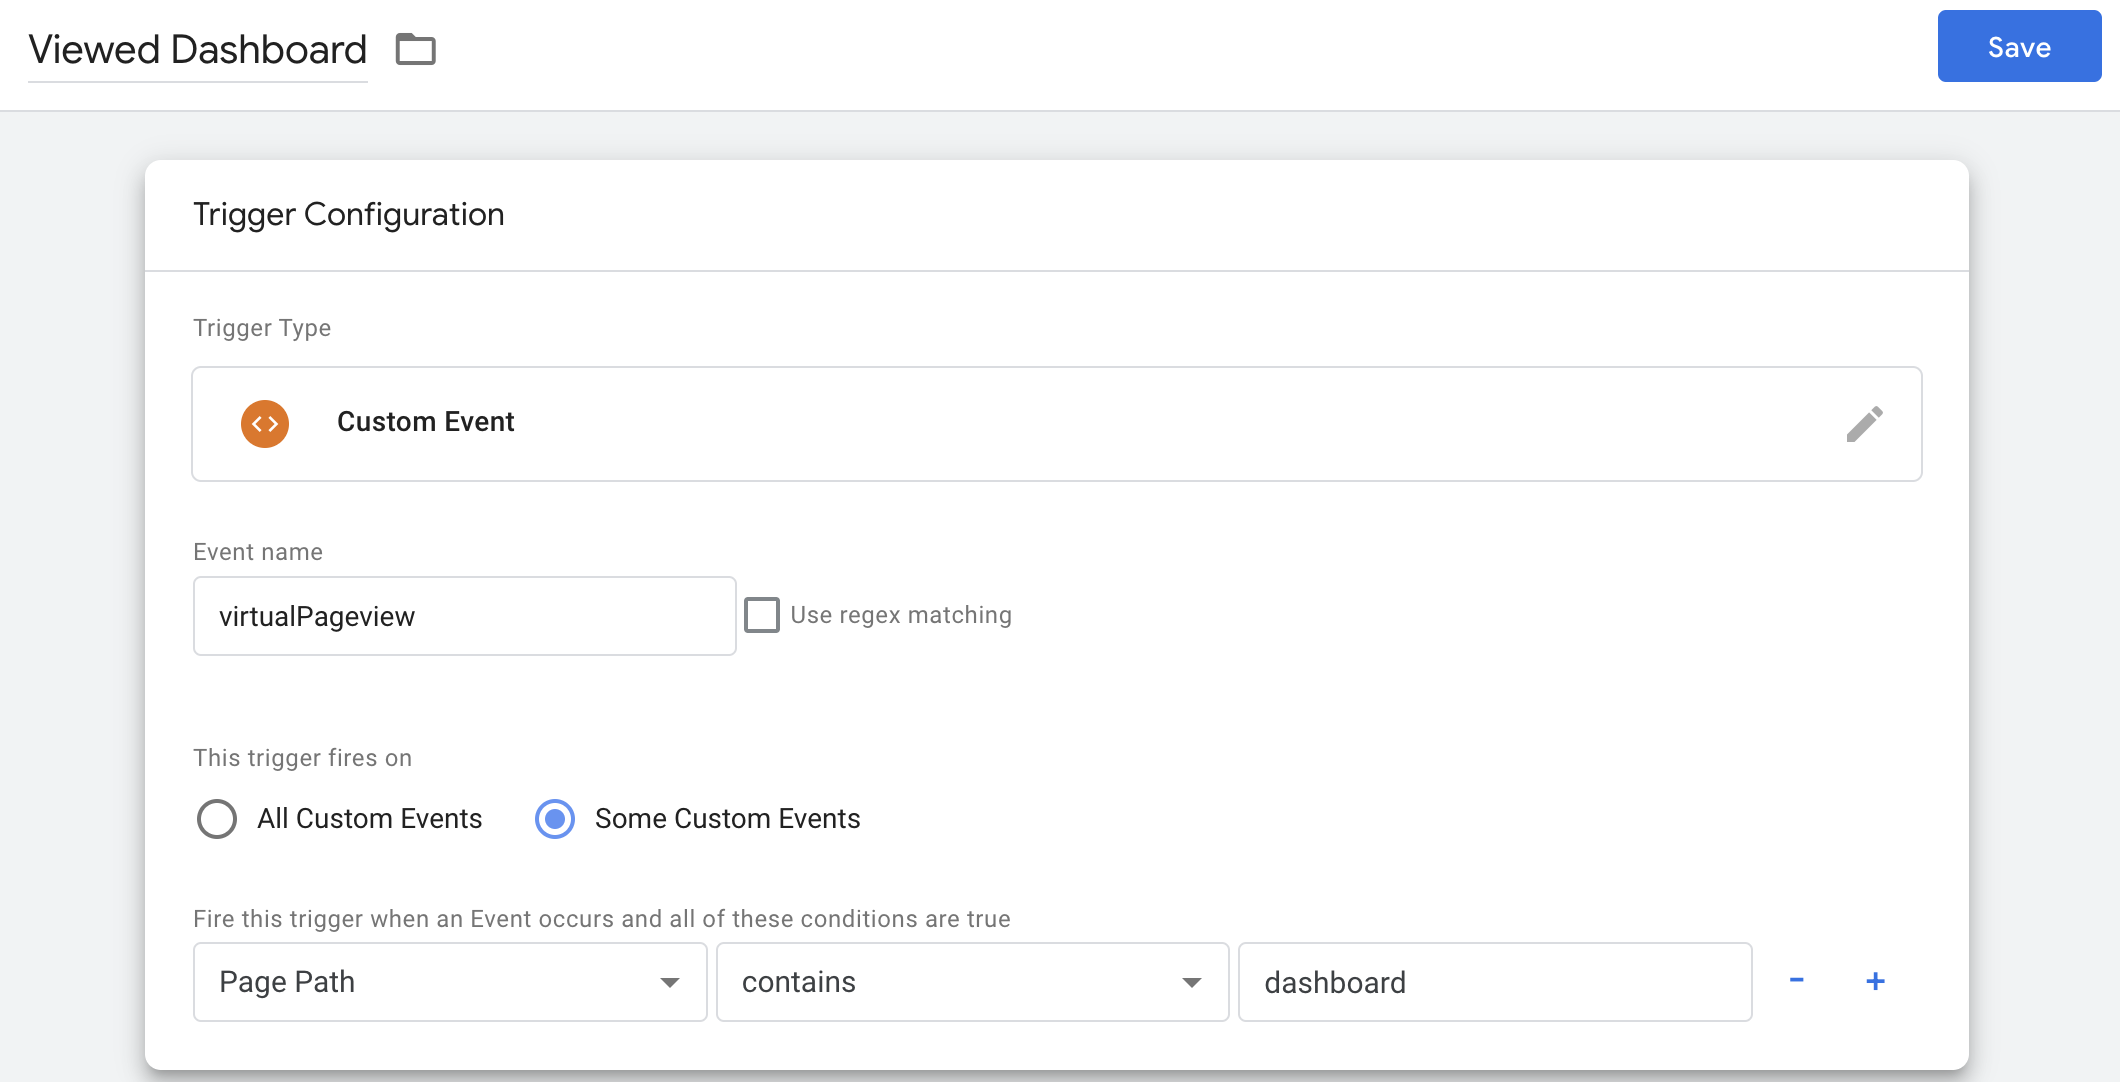
Custom Event Trigger Configuration
Step 3: Create Tag
Create a new Tag to fire the Fairing snippet based on the Trigger created in Step 2. Go to Tags >> New.
For Tag Configuration, select Tag Type = Custom HTML. Paste the Fairing snippet from our Customer Snippet docs into the HTML box.
- Replace "PUT API KEY HERE" with your Fairing API Key (Account >> Publishable Key in your Fairing account).
- Replace "PUT CUSTOMER ID HERE" with the GTM Variable you created in Step 1 - start typing {{ and your User-Defined Variables will display in a drop down.
- Replace 'const' in the Fairing script with 'var' (GTM does not support newer Javascript features)
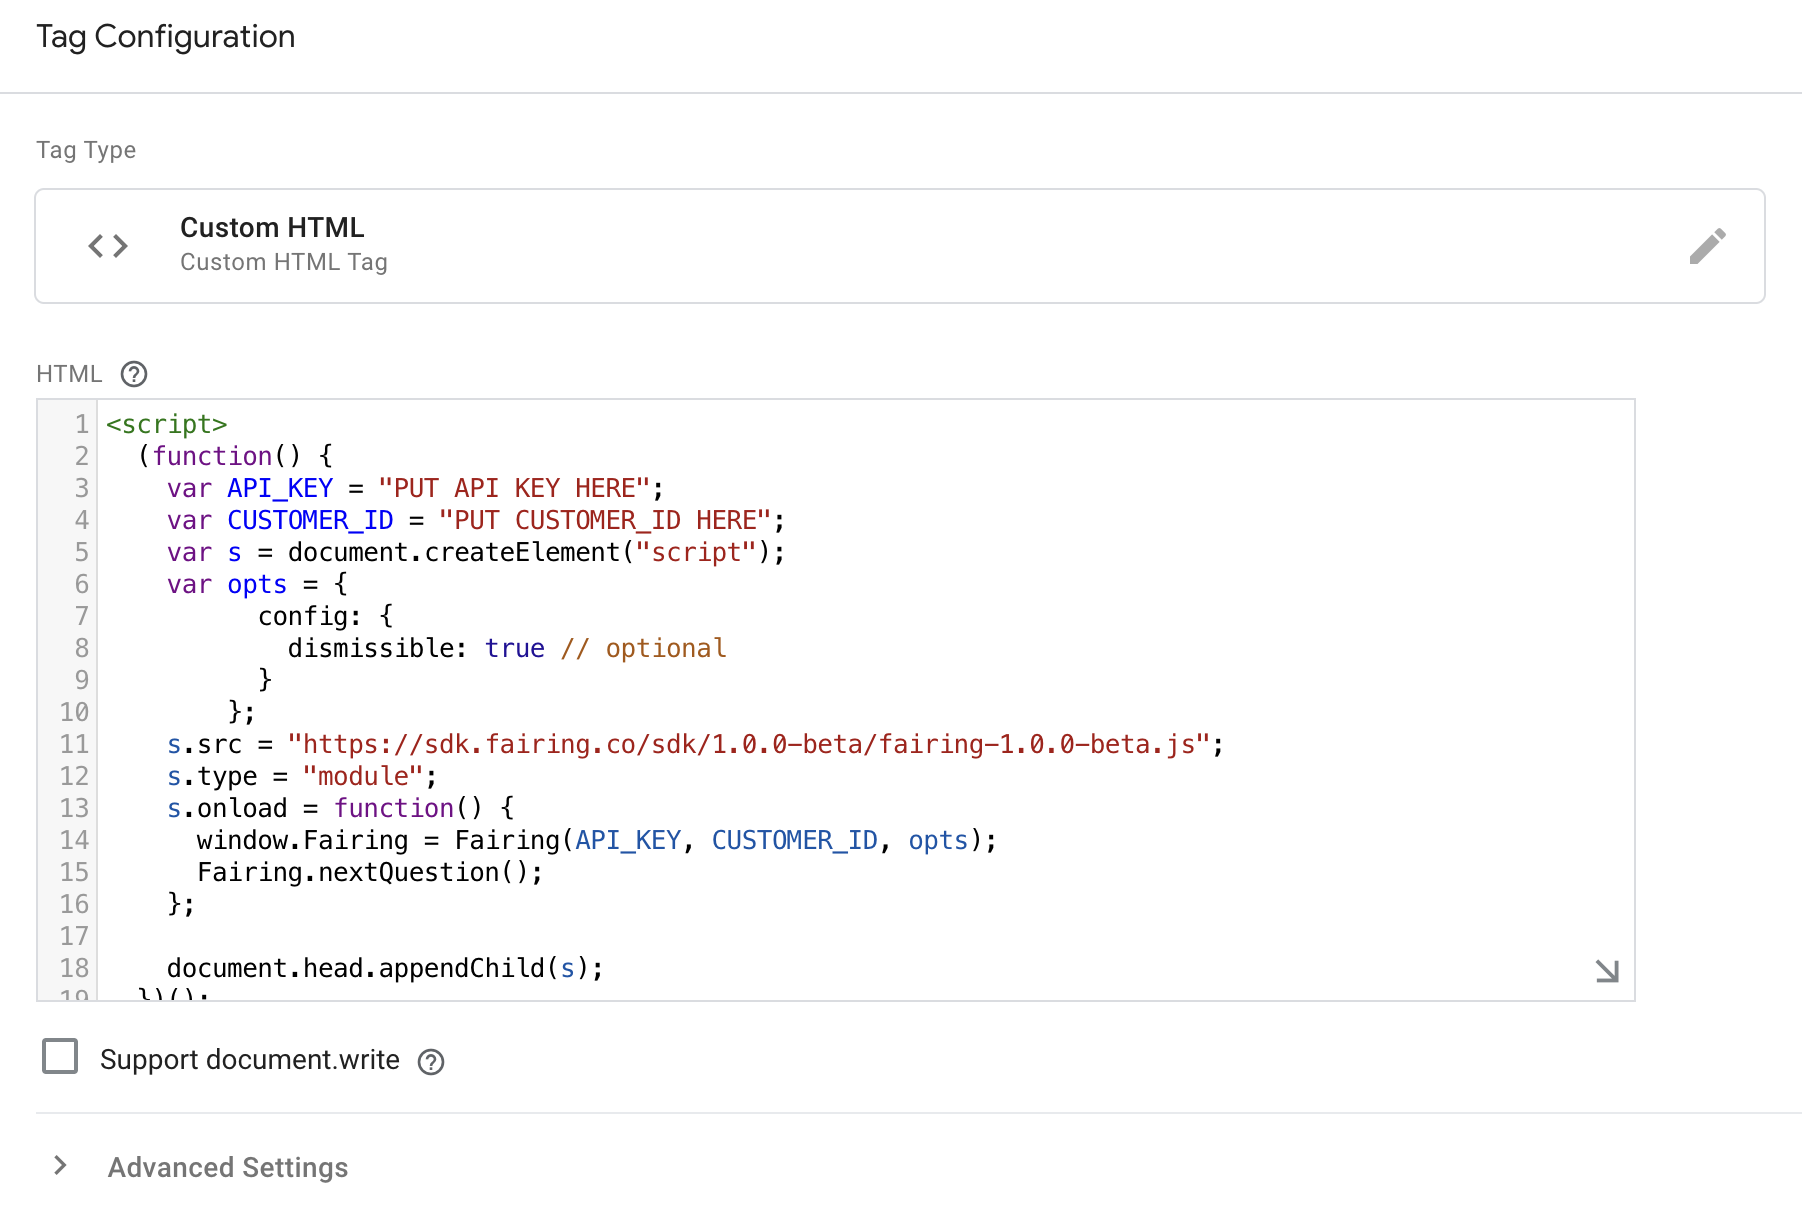
Tag Configuration
In the Triggering section, select the Trigger you defined in Step 2.
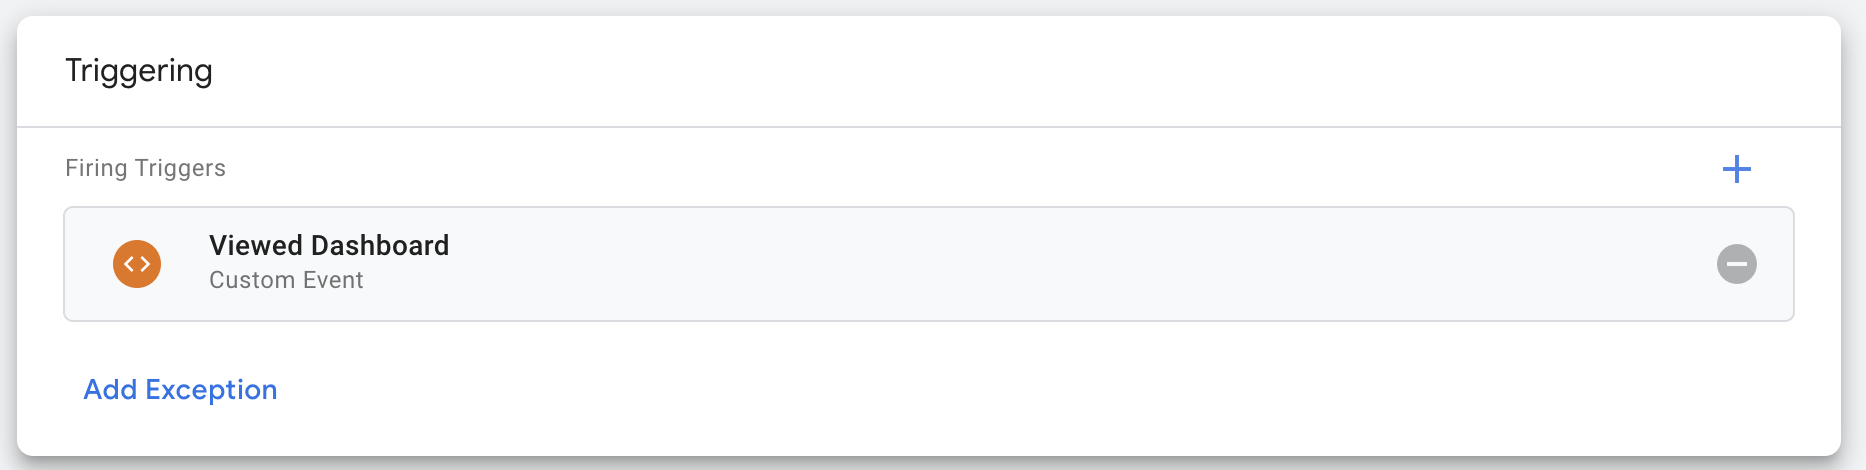
Triggering
Save the trigger.
You can Preview your changes first and then Submit once everything looks as expected! Reach out to the Fairing team if you have any issues.

Preview / Submit
Save customer_id variable to sessionStorage
Depending on your GTM setup, the page the variable is inputted on, may not be the page Fairing loads on. Therefore, GTM must be configured so that the customer_id variable is available to be read on subsequent pages. We recommend using sessionStorage to do this.
localStorage vs sessionStoragelocalStorage will persist across browser sessions and data remains stored until explicitly cleared. sessionStorage is automatically cleared when the browser tab is closed and is not persisted across sessions. For Fairing's purpose, sessionStorage is sufficient.
Step 1: Create a Form Submission Trigger
Create a trigger where Trigger Type = Form Submission. Set the trigger to fire on 'Some Forms' and input the Page Path/URL where the customer_id value is inputted on your site (operation equals or contains for more flexibility).

Form Submission Trigger
Step 2: Create Tag to set variable in sessionStorage
Create a new Tag that finds your customer_id variable and sets it to sessionStorage. Set the Trigger to the Form Submission Trigger created in Step 1. Now when your form is submitted, the variable Fairing needs for customer_id will be saved in sessionStorage and available to be read from on subsequent pages.
<script>
  var email = document.querySelector("#email").value;
  sessionStorage.setItem('email', email);
</script>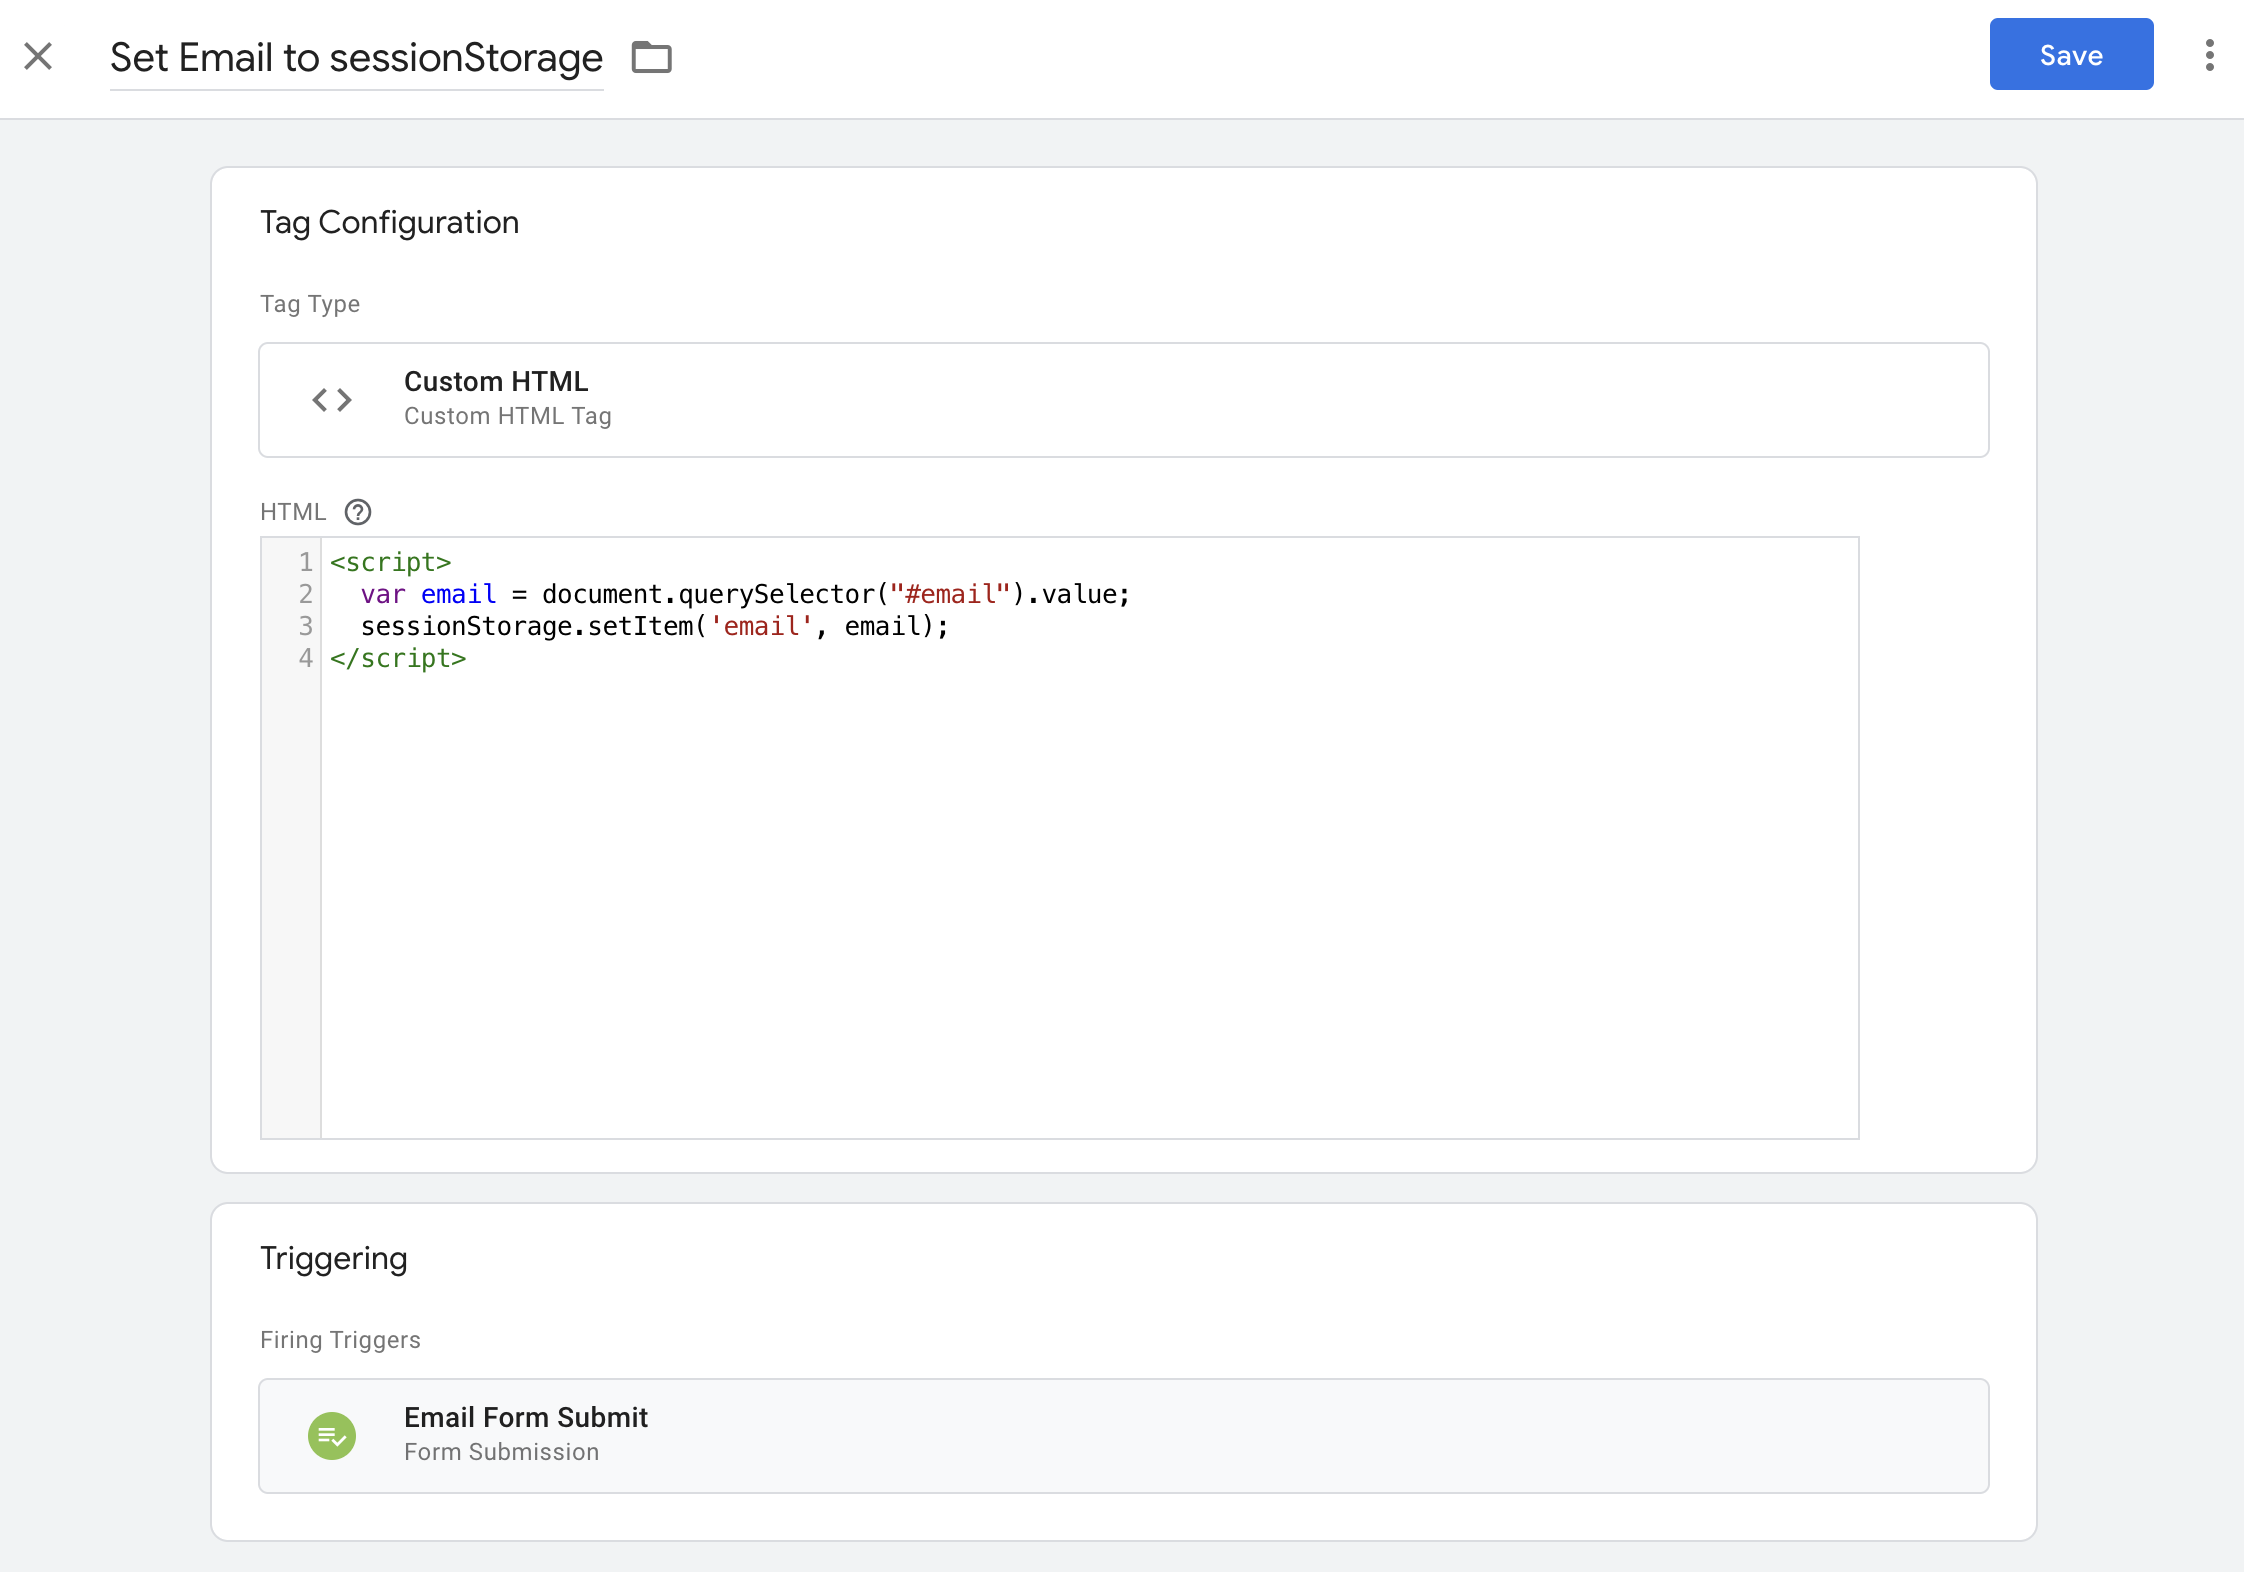
Create Tag
Replace "#email" with the id of the input field in your code. The id value is case-sensitive.
<input type="email" id="email" name="email" required>Step 3: Create your customer_id variable
Create a variable that retrieves the #value you set to sessionStorage in Step 2. Ensure this is the variable that your Fairing Tag is reading for customer_id.
function() {
  return sessionStorage.getItem('email');
}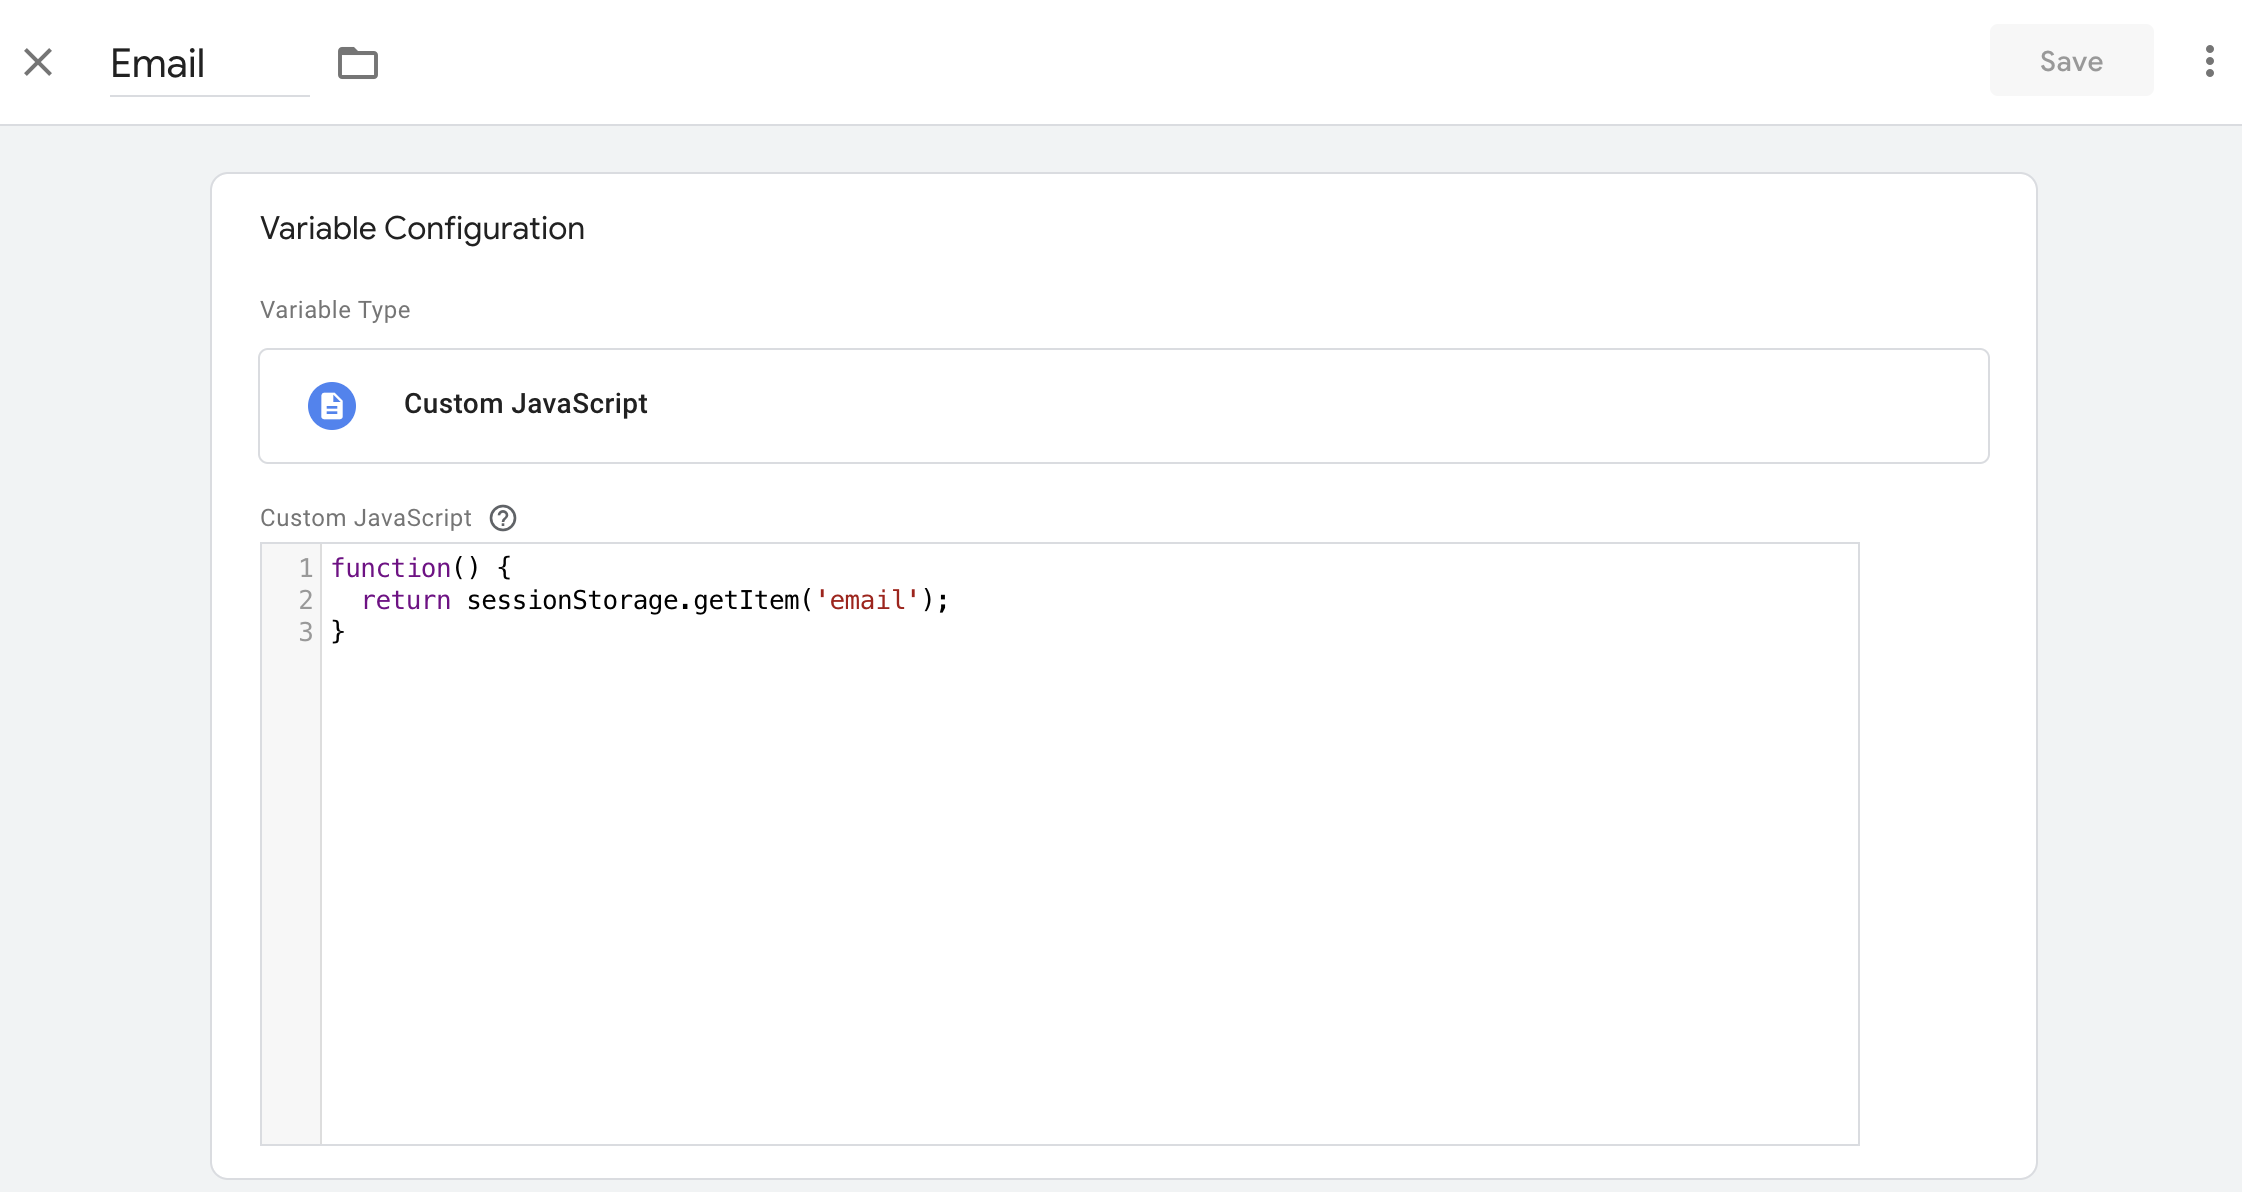
Customer_id variable
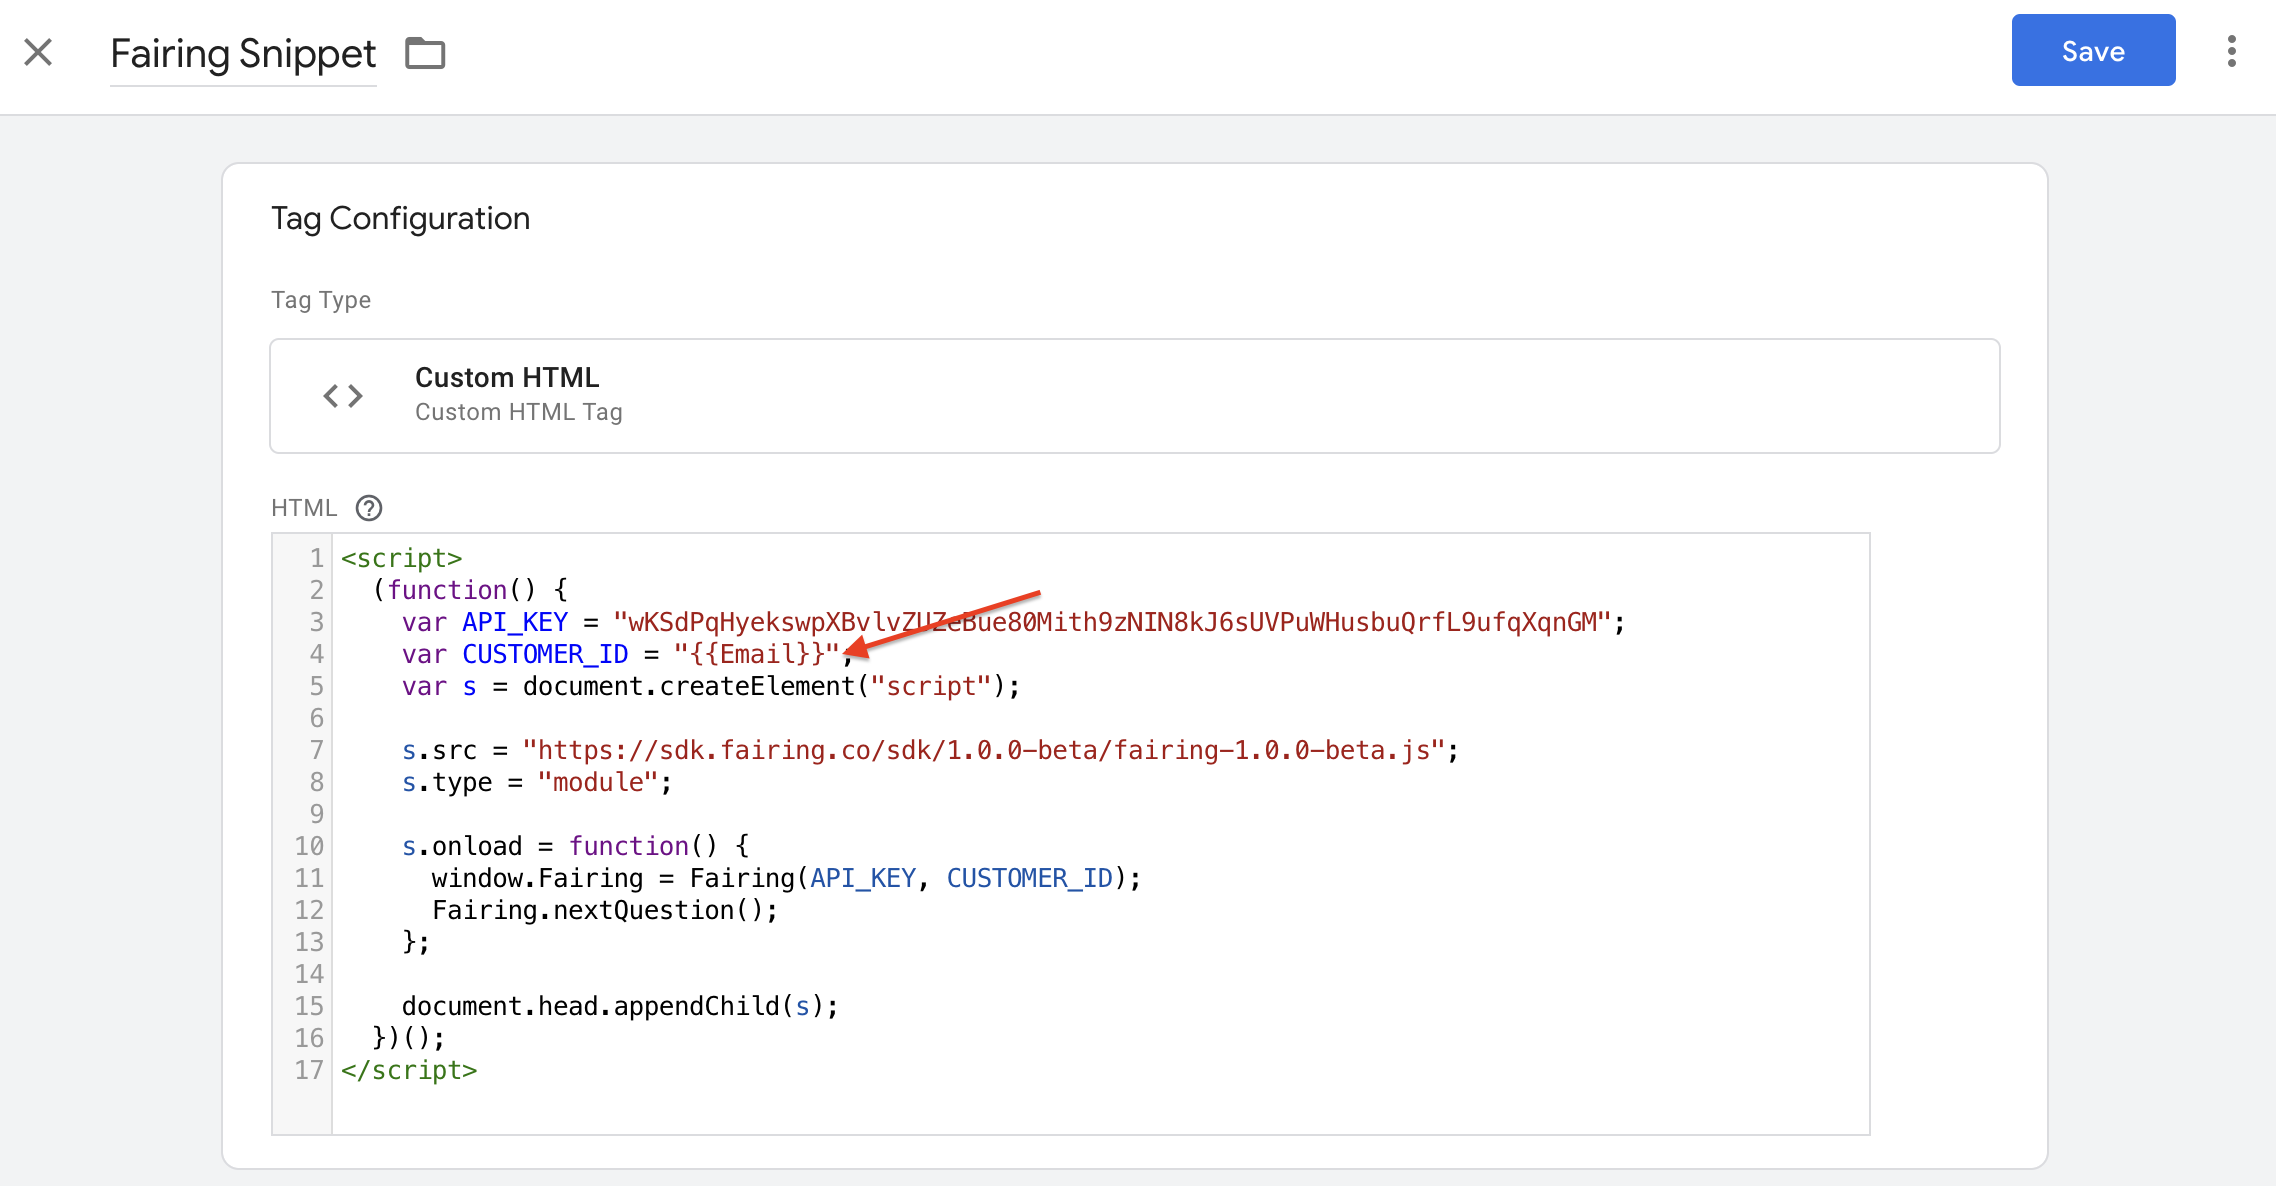
Fairing Tag
Updated 3 months ago