
Yotpo SMS & Email
Integrate your Fairing response data with Yotpo SMS & Email.
Connect
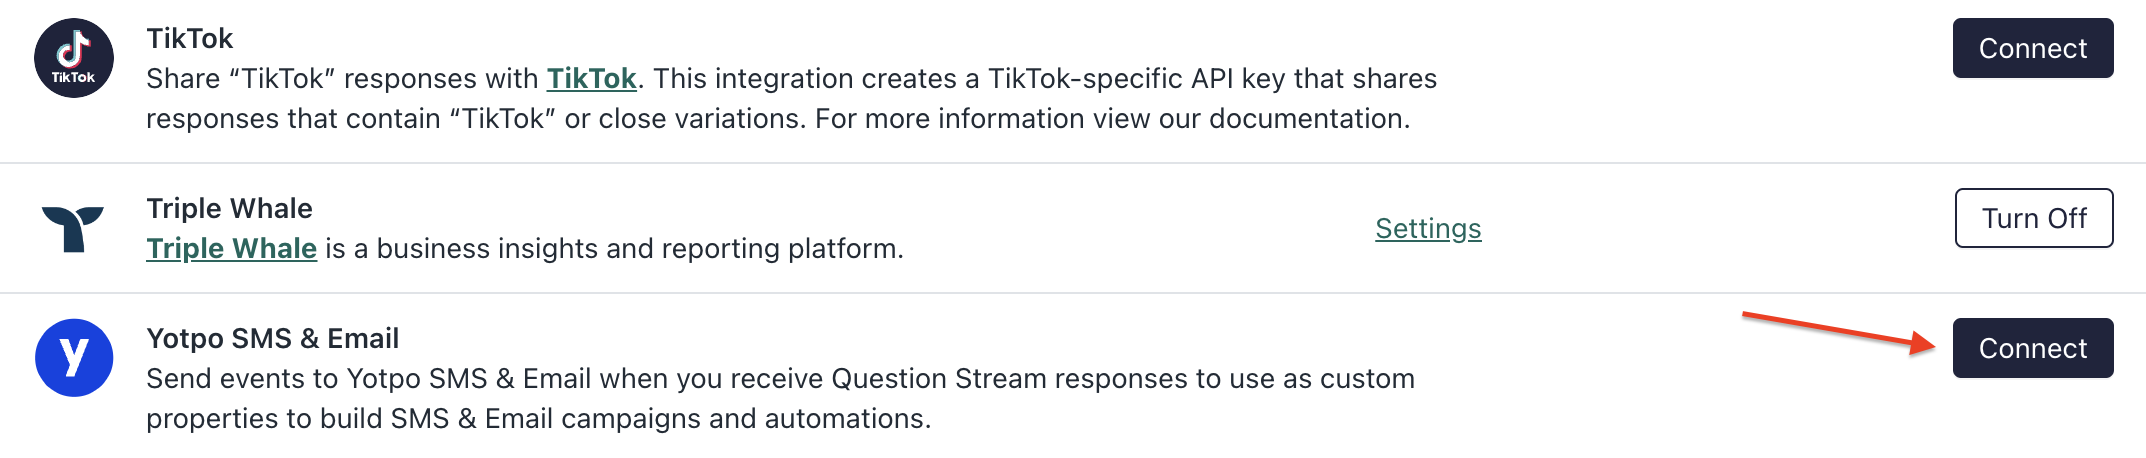
To enable your Yotpo SMS & Email integration, click the Integrations tab in your Fairing app. Locate Yotpo SMS & Email and click "Connect."
On the following screen, you will need to establish an OAuth connection to your Yotpo account by clicking 'Connect.' Once a connection has been successfully established, you will be re-routed to the Yotpo SMS & Email integration setup page in Fairing.
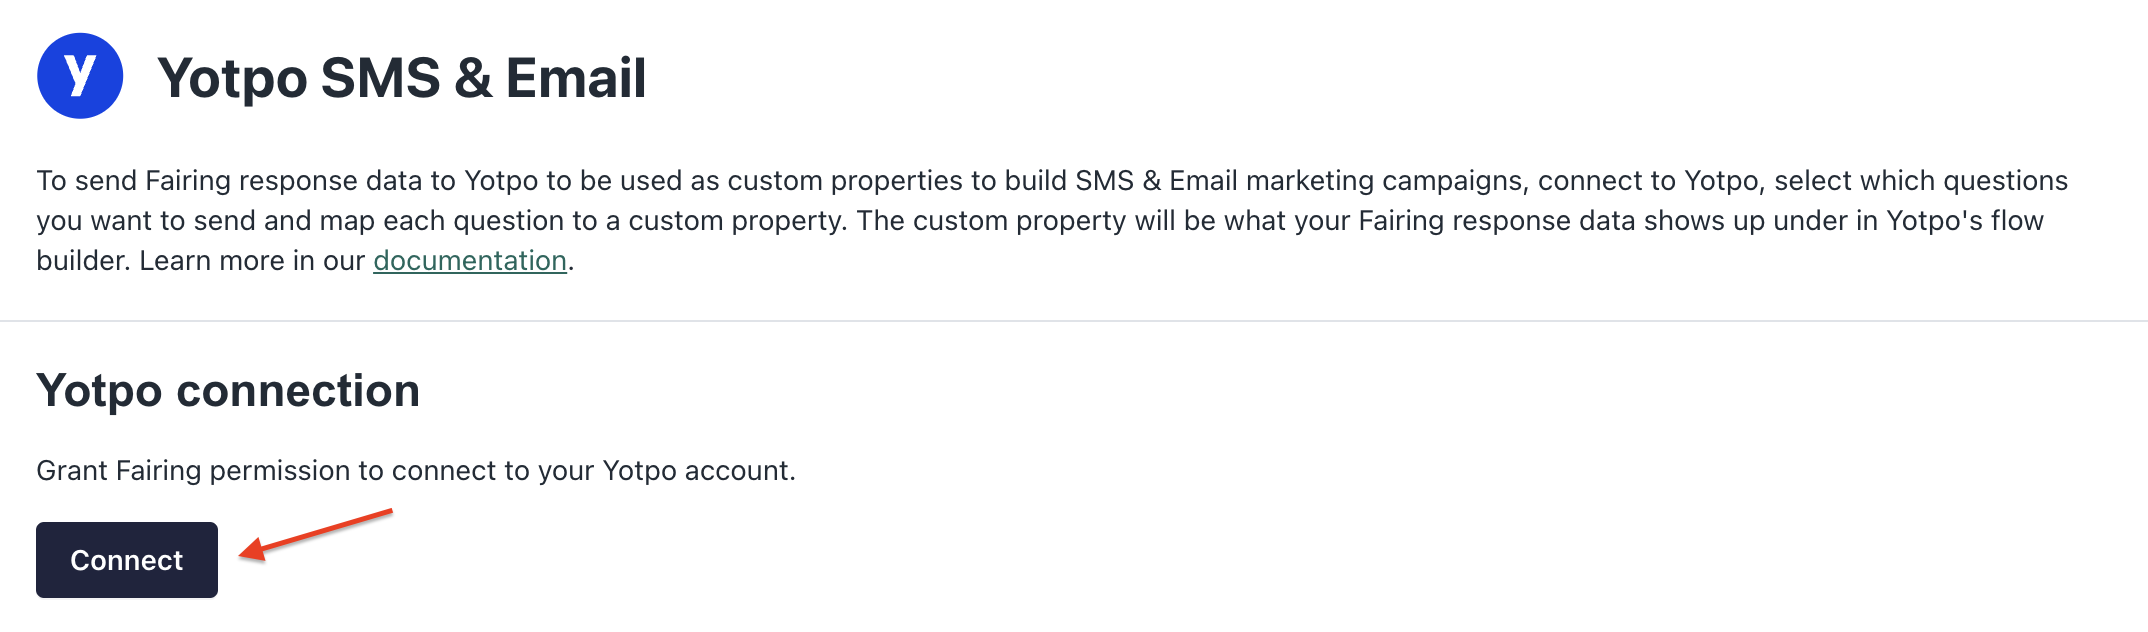
OAuth Connect
Setup
You have the option to choose which questions/responses are sent to Yotpo as well as how the custom property names appear in Yotpo. The default state for the setup is that all Fairing questions (both active and inactive) are added and the Yotpo custom property string matches the question title. All custom property names are automatically appended with 'Fairing:' so for example your 'How did you hear about us?' question as a default will be mapped to 'Fairing: How did you hear about us?' as a custom property.
You can overwrite the default custom property name with either a suggested custom property name or you can add a new property name. To add a new property name, type in the property name and hit enter.
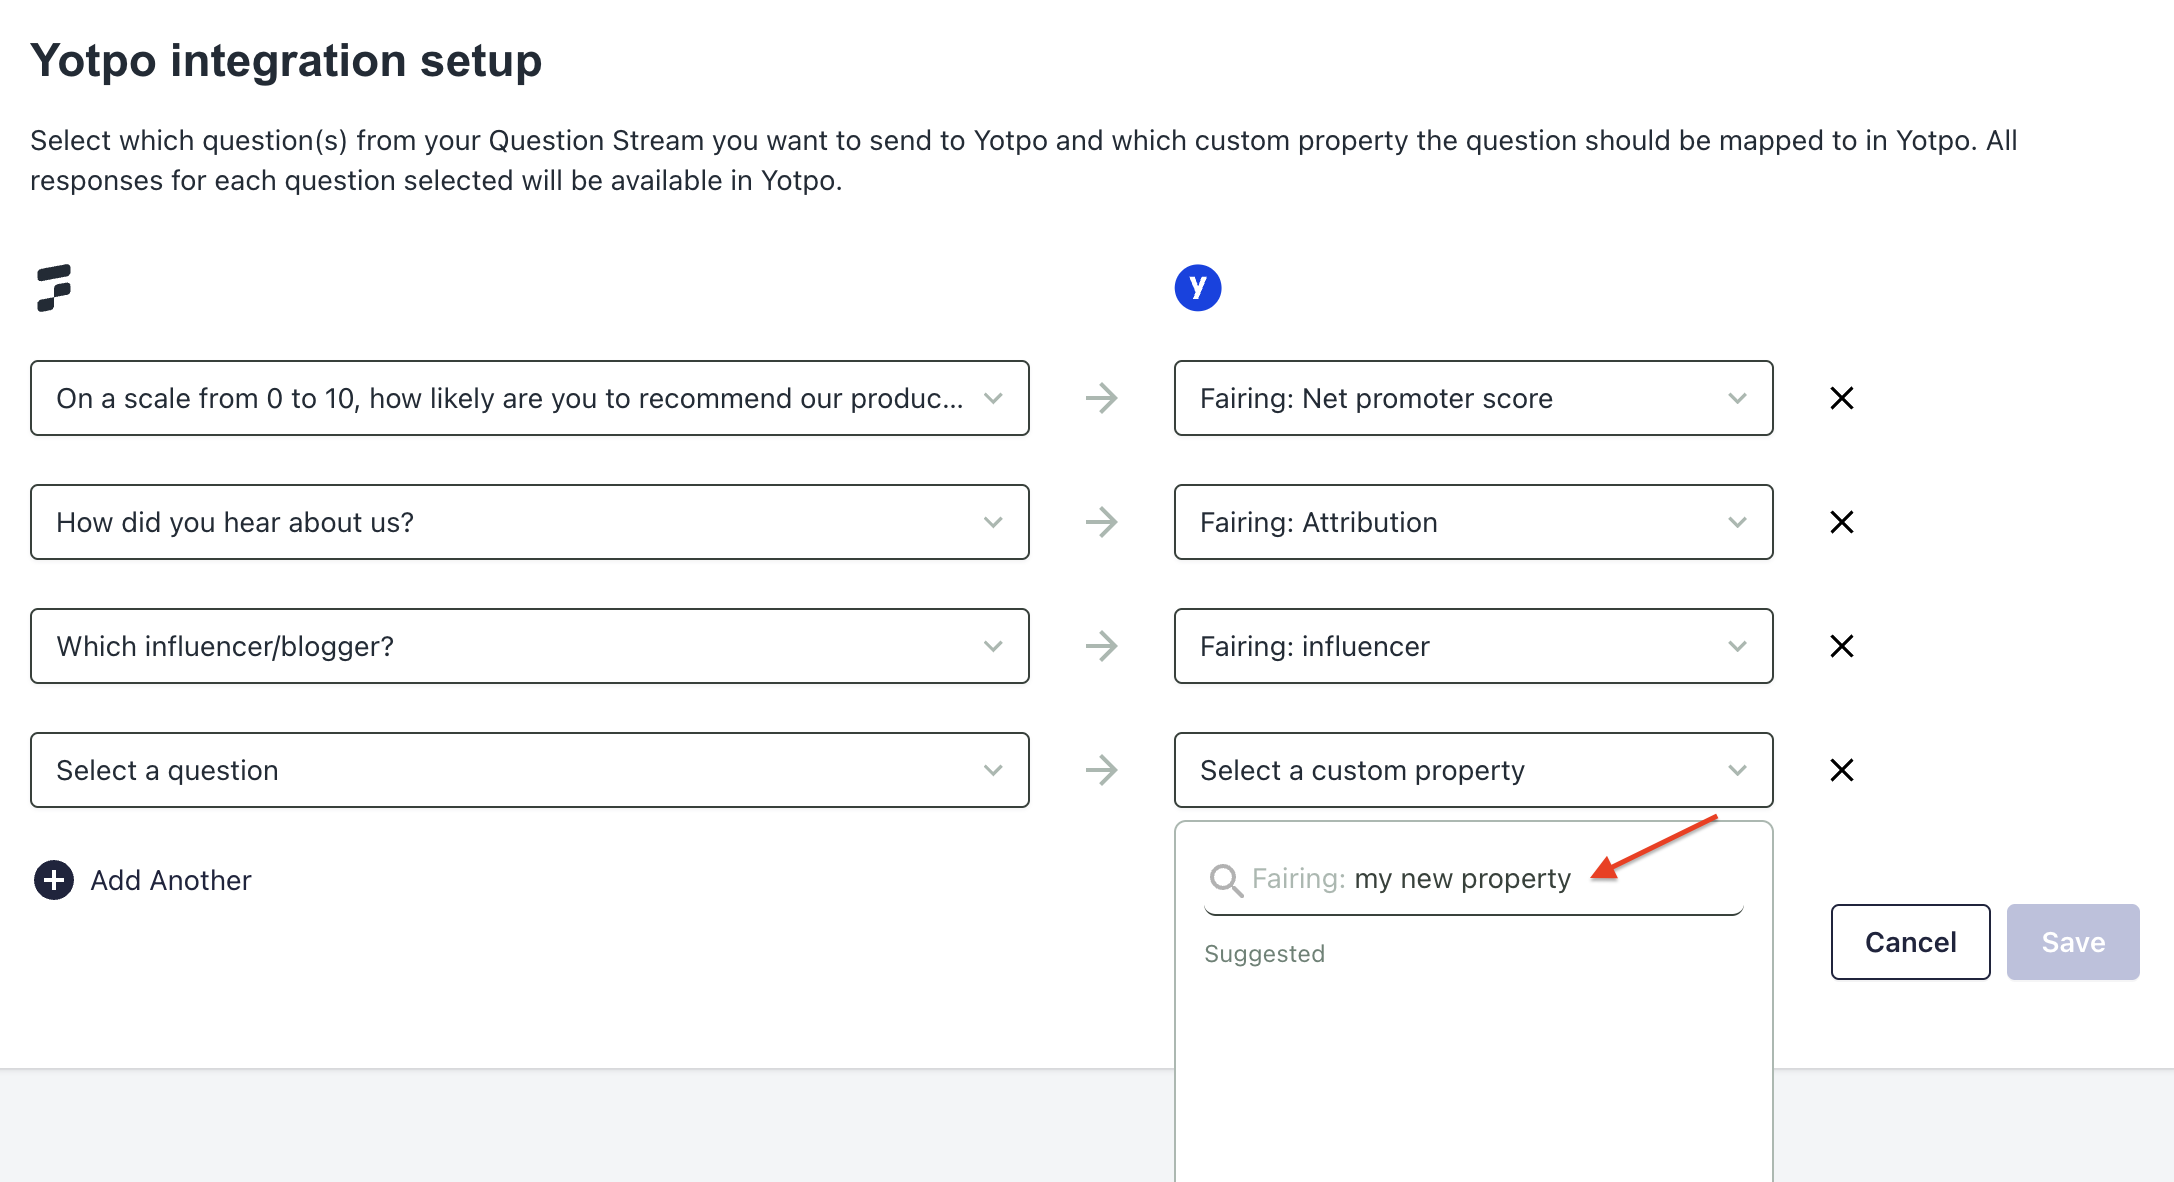
Add new custom property
Always click 'Save' before navigating to a new page, otherwise your question to custom property mapping updates will be lost.
If you add an inactive question to your Yotpo integration setup, you will see a warning that no events will be sent for the property. Once the question has been switched to active, the events will automatically begin sending.

Inactive question
Viewing Response Data in Yotpo
In Yotpo, your Fairing response data will be available as a trigger when building SMS & Email flows.
When building a flow in Yotpo - first select 'Fairing Question Answered' as your trigger.
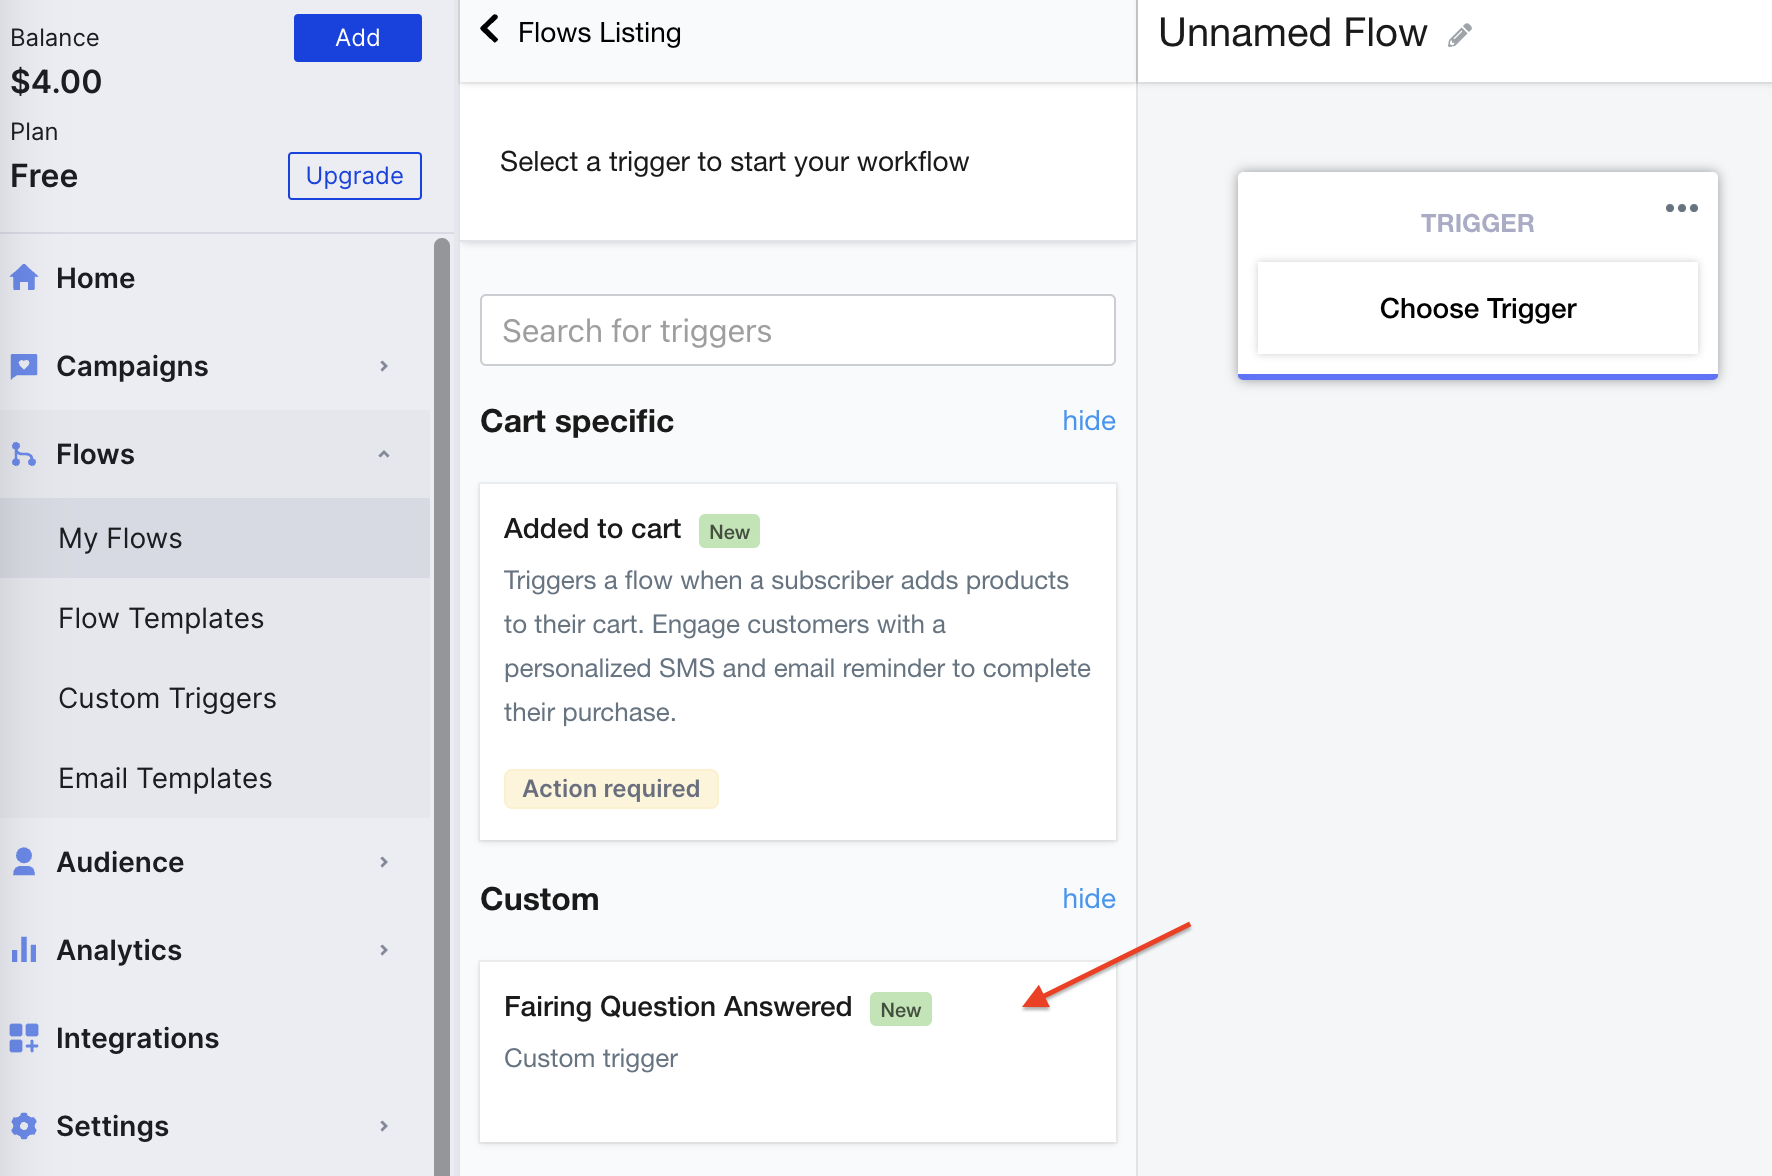
Fairing Question Answered
Then select 'Add Condition.' In the left hand panel select Condition = Prompt from the list of Custom conditions. Select contains or is equal to as the operation and then enter the question prompt in the open text field. After the question has been defined, you can add additional conditions to target your flows based on different responses provided.
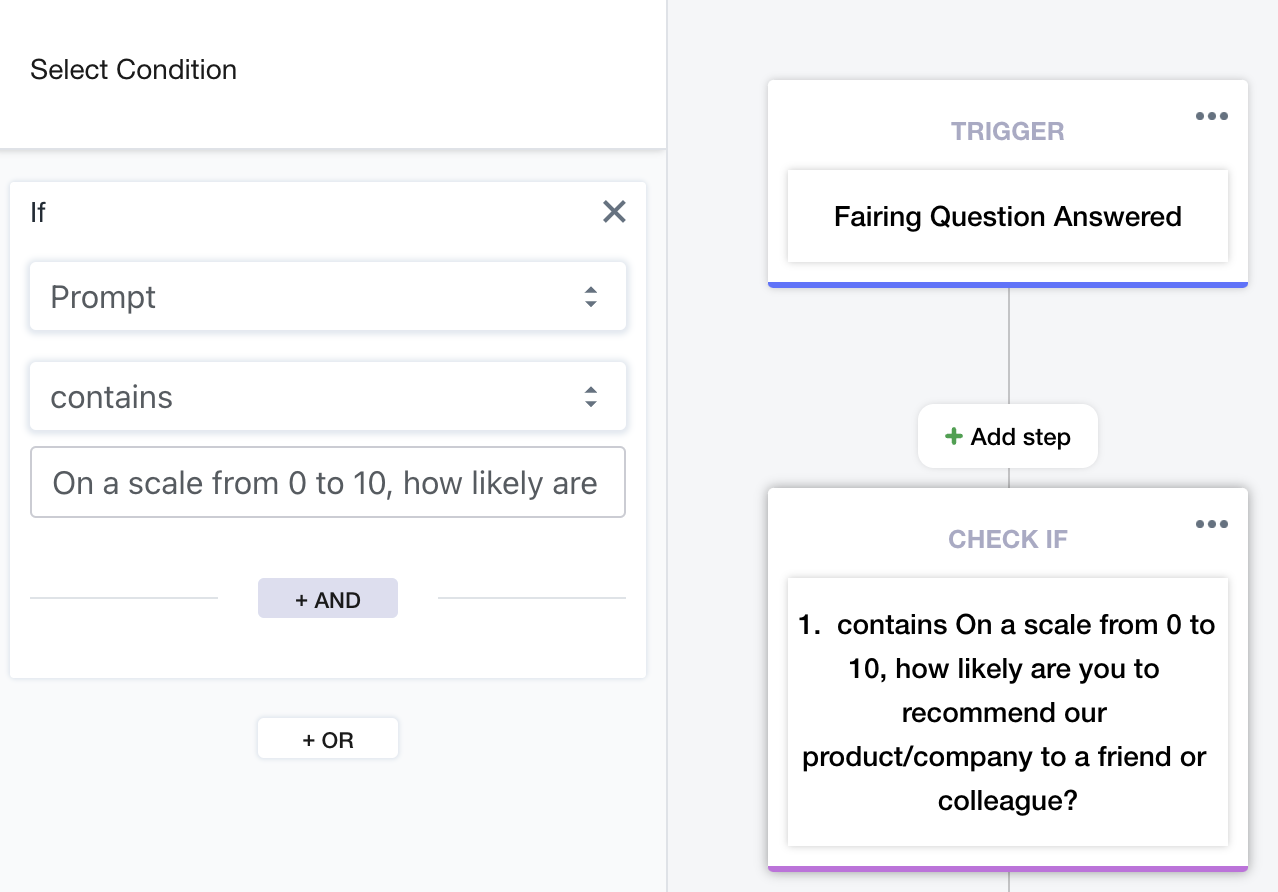
Prompt Custom Condition
To add additional conditions based on the customer's response to a question, select 'Add Condition.' In the left hand panel select Condition = Custom Attribute and then under 'Select Custom Property' all of the custom properties you previously defined in the integration setup will appear.
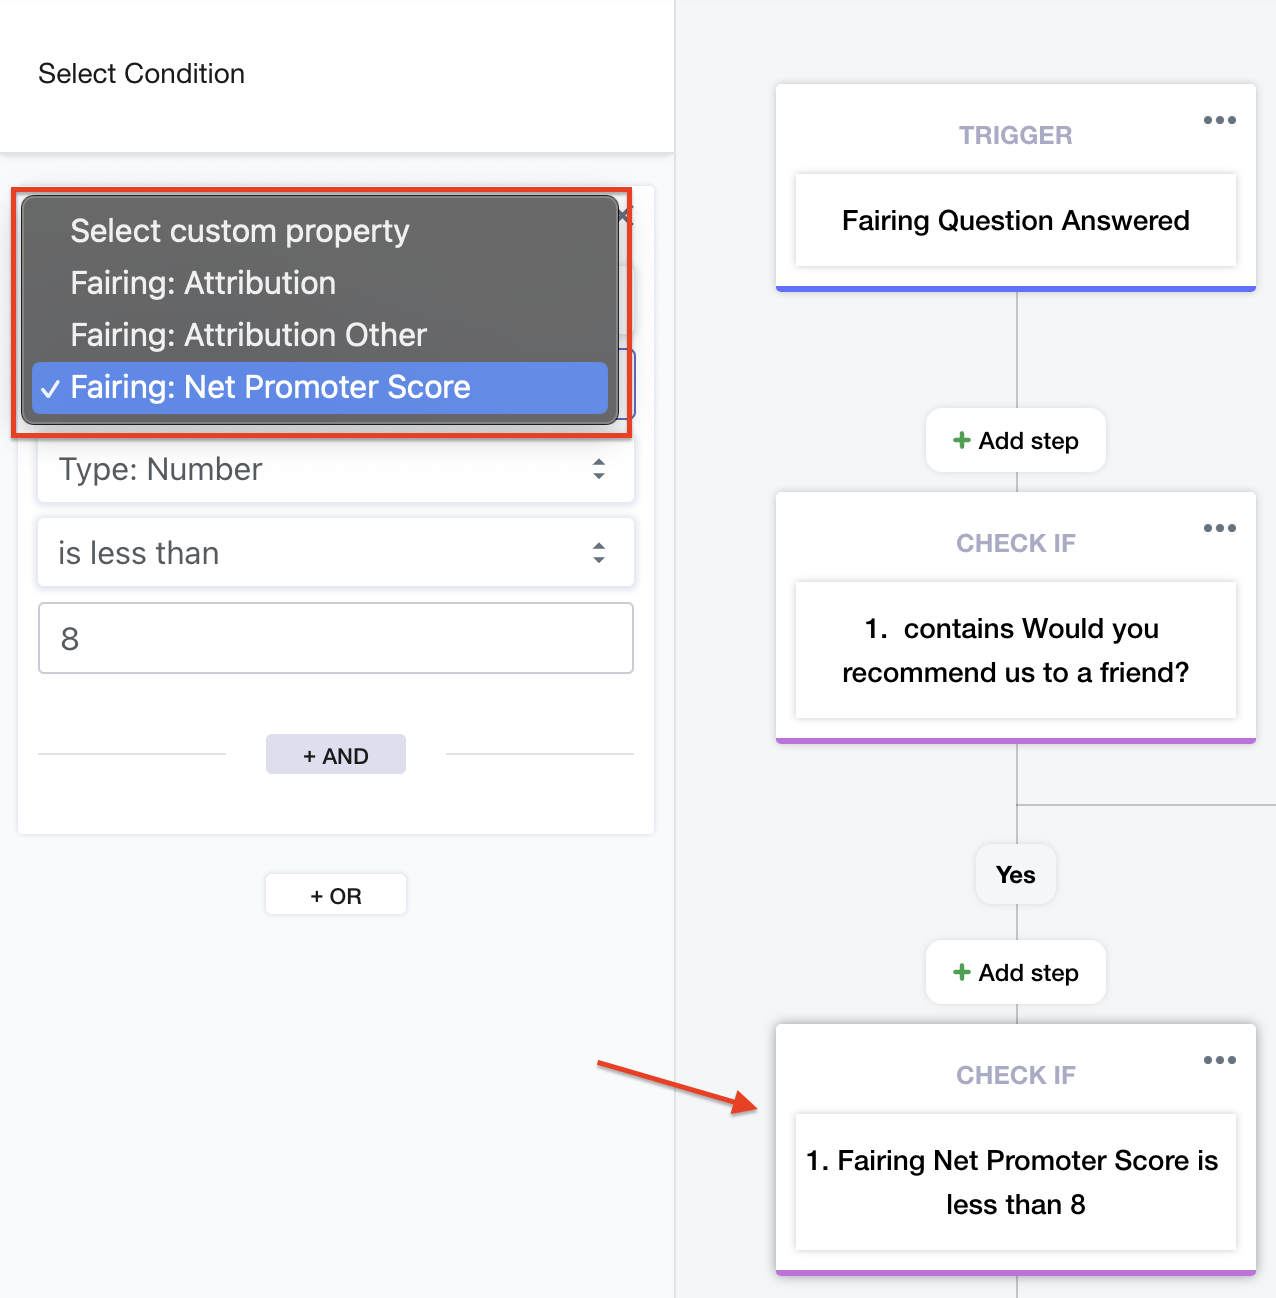
Custom Attributes
You can build various conditions based on the expected responses for each property. For example, you could build an SMS/Email flow based on different NPS scores you receive.
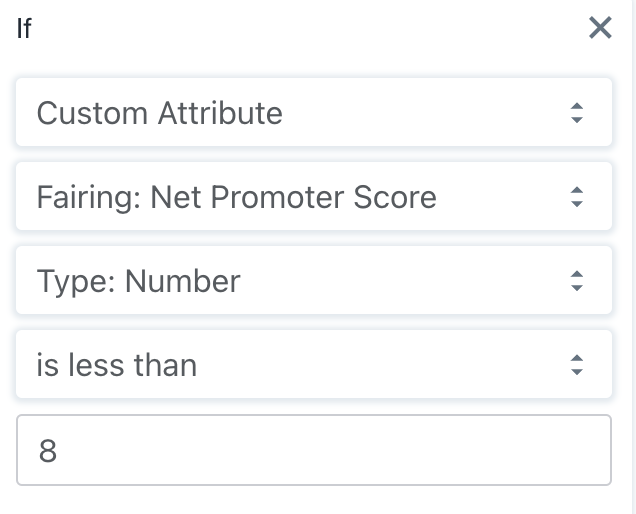
Example Condition
Note: It is recommended that you build one flow with branching logic for all the SMS & Emails you want to send based on Fairing question/responses.
Sample Event
See below for a sample event sent to Yotpo SMS & Email. A separate event is sent per response received.
{
  "customer_event": {
    "customer": {
      "custom_properties": {
        "Fairing: Attribution": "Instagram"
      },
      "email": "[email protected]"
    },
    "event_properties": {
      "customer_id": "6994948980896",
      "order_id": "5449510846624",
      "prompt": "How did you hear about us?",
      "question_id": 2313
    },
    "event_source": "fairing",
    "event_time": "2023-10-16T15:29:58.763110Z",
    "event_type": "fairing_question_answered",
    "external_event_id": "J-A9iNYJ87IODSm8x1K1z"
  }
}
Disconnect/Pause
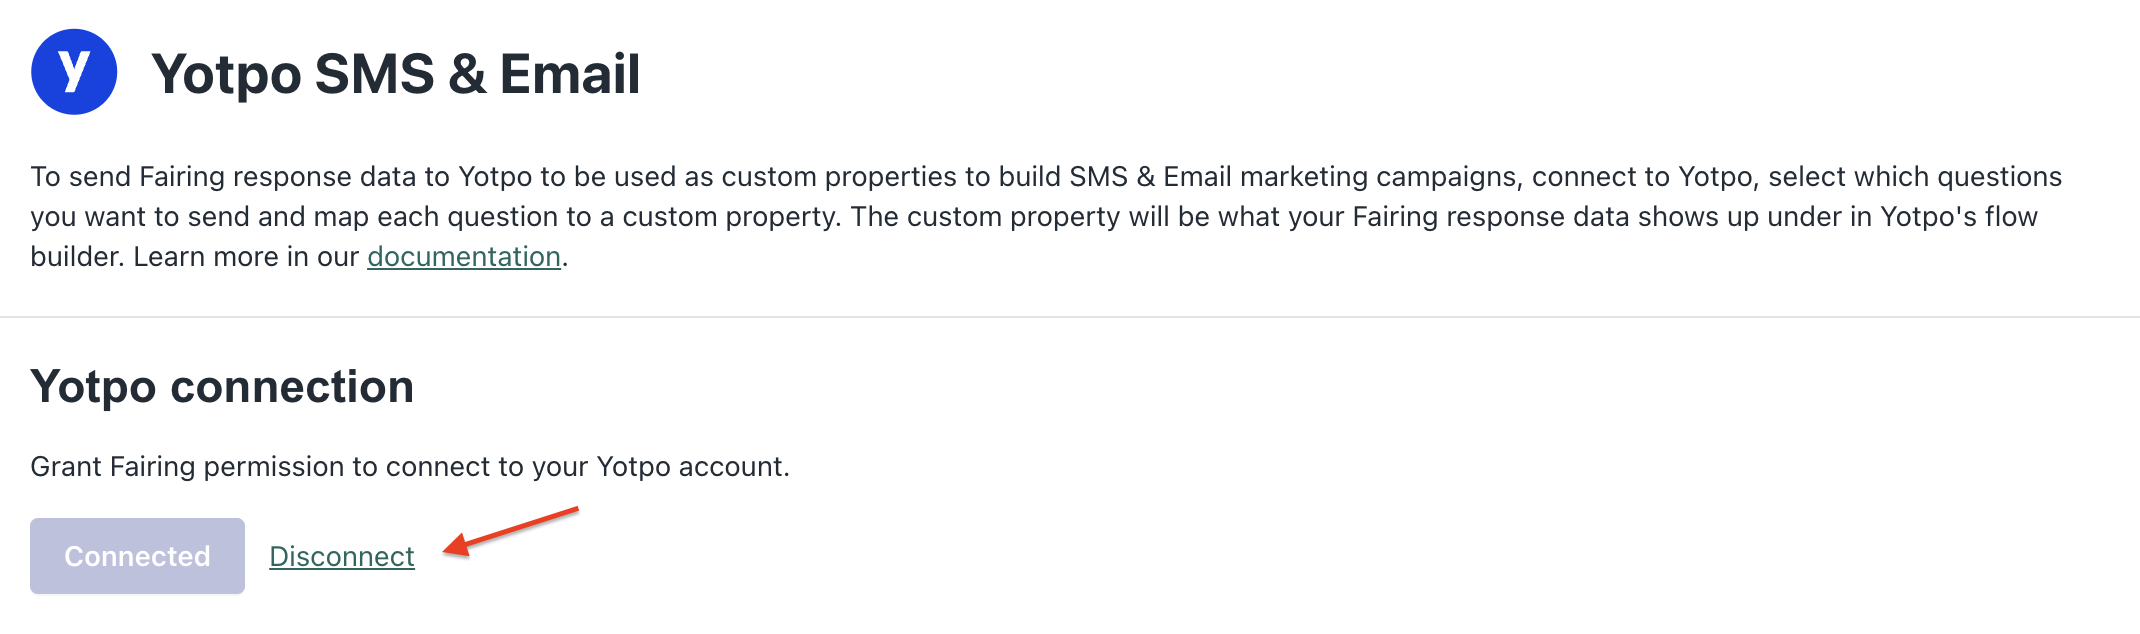
You can disconnect the Yotpo SMS & Email integration at any time by clicking 'Disconnect' on the integration setup page. Upon confirming the action, the integration will immediately stop sending events. Your Fairing question to Yotpo custom property mappings will remain intact in the setup section in case you want to turn the integration back on in the future.
Disconnect
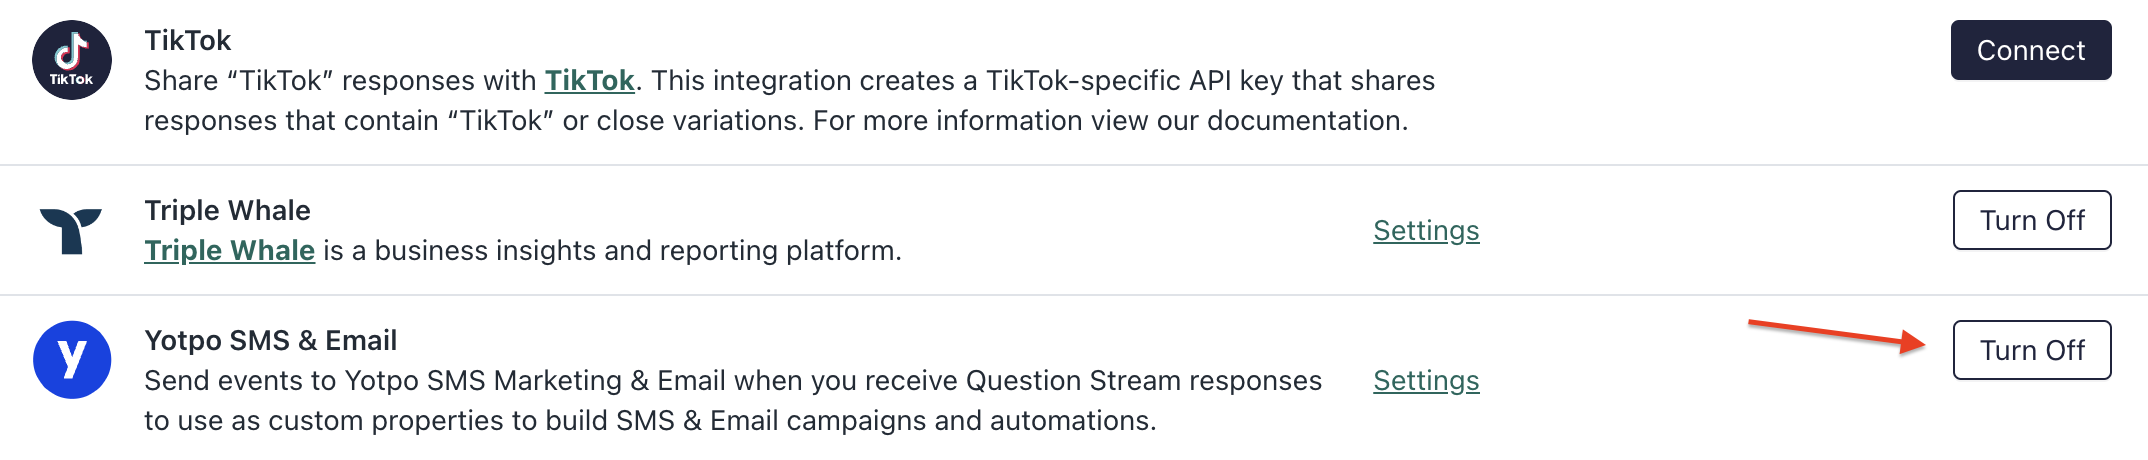
You also have the option to 'Pause' (Turn Off), the integration instead of disconnecting the integration. To do so, you can click 'Turn Off' on the main integration page. Once turned off, the button will switch to 'Turn On' and can be turned back on at any time.
Turn Off/Pause