Google Analytics (GA4)
Send question views and response data to Universal Analytics and GA4.
Google Analytics Integration Setup: Shopify Script Tag (i.e. not Shopify Checkout Extensions)
To enable Fairing's Google Analytics integration, click the Integrations tab and turn on Google Analytics.
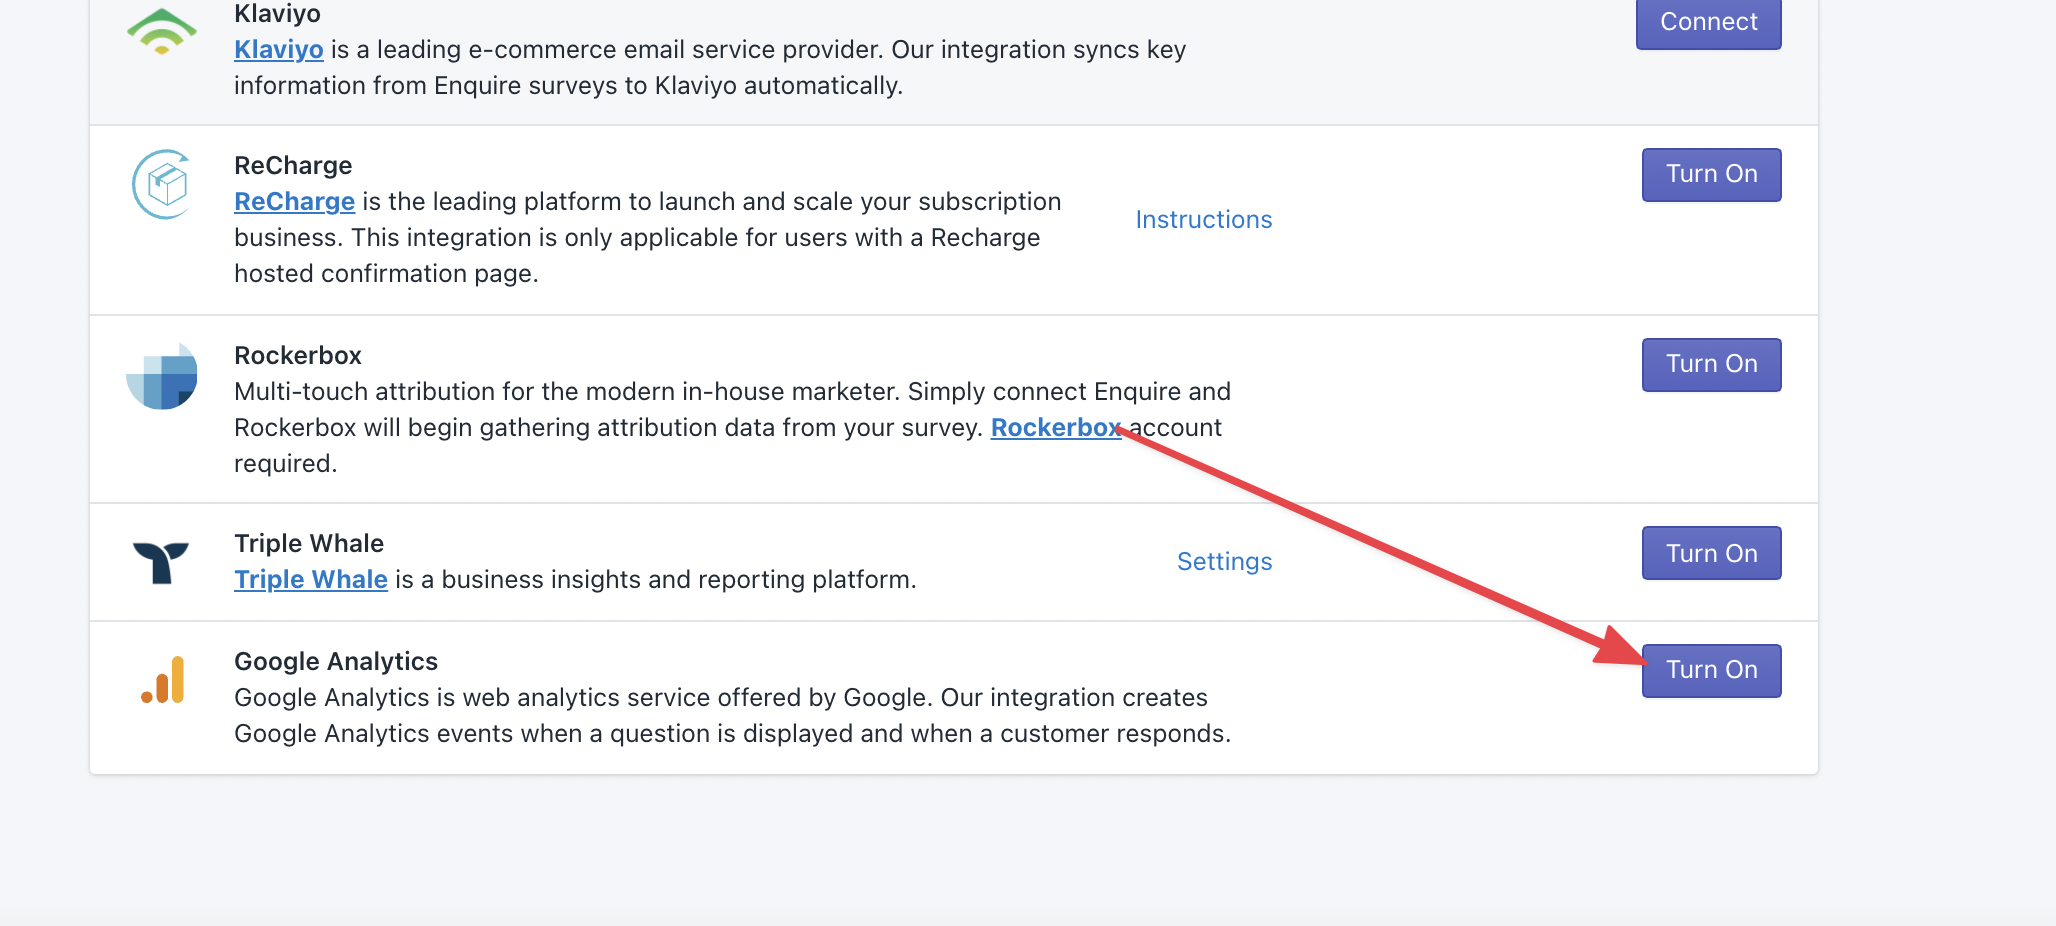
Once enabled, we send events to your Google Analytics account every time a user views or submits a question in the below formats. For our integration to work, you'll need to have Google Analytics already integrated.
Google Analytics Integration Setup: Shopify Checkout Extensions
- Create a new Custom Pixel from your Shopify Admin (Go to Settings >> Customer Events)
- Click 'Add custom pixel'
- Put the following javascript code into the code block
- NOTE: Replace 'G-XXXX' with your GA4 ID. You can find your GA4 ID in GA4 by going to Property settings >> Data collection and modification >> Data Streams >> Click applicable stream >> copy ‘Measurement ID’
//Initialize GTM tag
var f = document.getElementsByTagName('script')[0];
var j = document.createElement('script');
j.async = true;
j.src='https://www.googletagmanager.com/gtag/js?id=G-XXXX';
f.parentNode.insertBefore(j, f);

window.dataLayer = window.dataLayer || [];
function gtag(){dataLayer.push(arguments);}
gtag('js', new Date());
gtag('config', 'G-XXXX');

analytics.subscribe("fairing_question_view", event => {
  gtag("event", "fairing_question_view", {
    order_id: event.customData.orderId,
    question_id: event.customData.questionPrompt,
    question: event.customData.questionId,
  });
});

analytics.subscribe("fairing_question_response", event => {
  gtag("event", "fairing_question_response", {
    order_id: event.customData.orderId,
    other: event.customData.other,
    question_id: event.customData.questionId,
    question: event.customData.questionPrompt,
    response: event.customData.response,
  });
});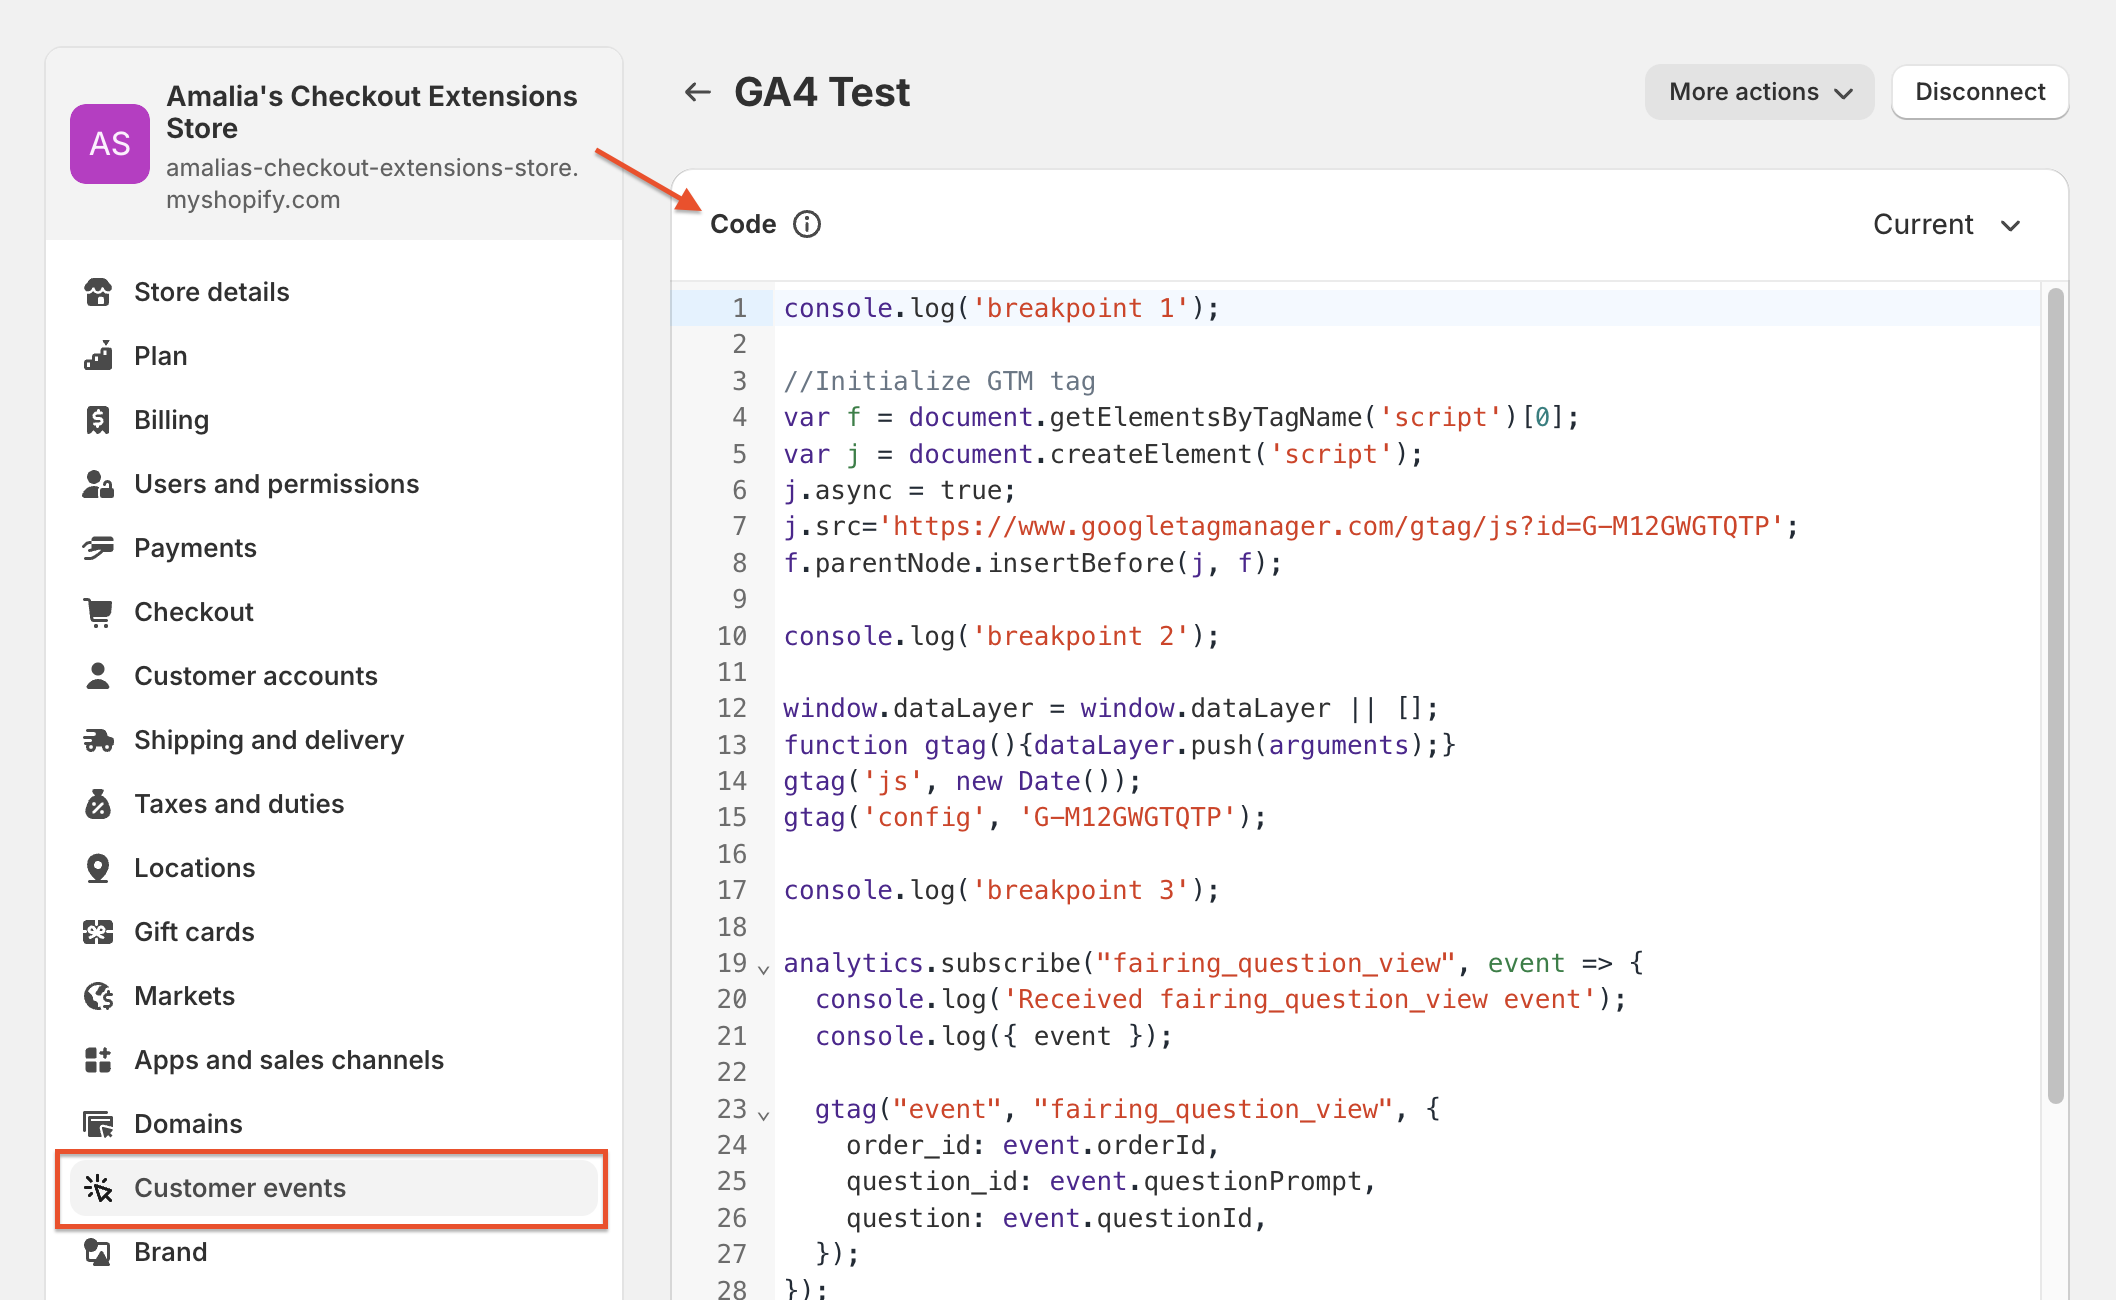
Settings >> Customer Events
- Click 'Save' in top right and then 'Connect' (Connect will not become active until Save is clicked)

Save Custom Pixel
Note: Web Pixels are available on both Thank You and Order Status Page
GA4
Create a Custom Dimension
Universal Analytics
We continue to support sending events to Universal Analytics. To note, Universal Analytics is being deprecated on July 1st, 2023 so we recommend integrating GA4 asap.
Viewed Survey:
- Event Category: Fairing
- Event Action: Survey Viewed
- Event Label: [Question Asked]
Submitted Survey
- Event Category: Fairing
- Event Action: Survey Submitted
- Event Label: [Question Response]
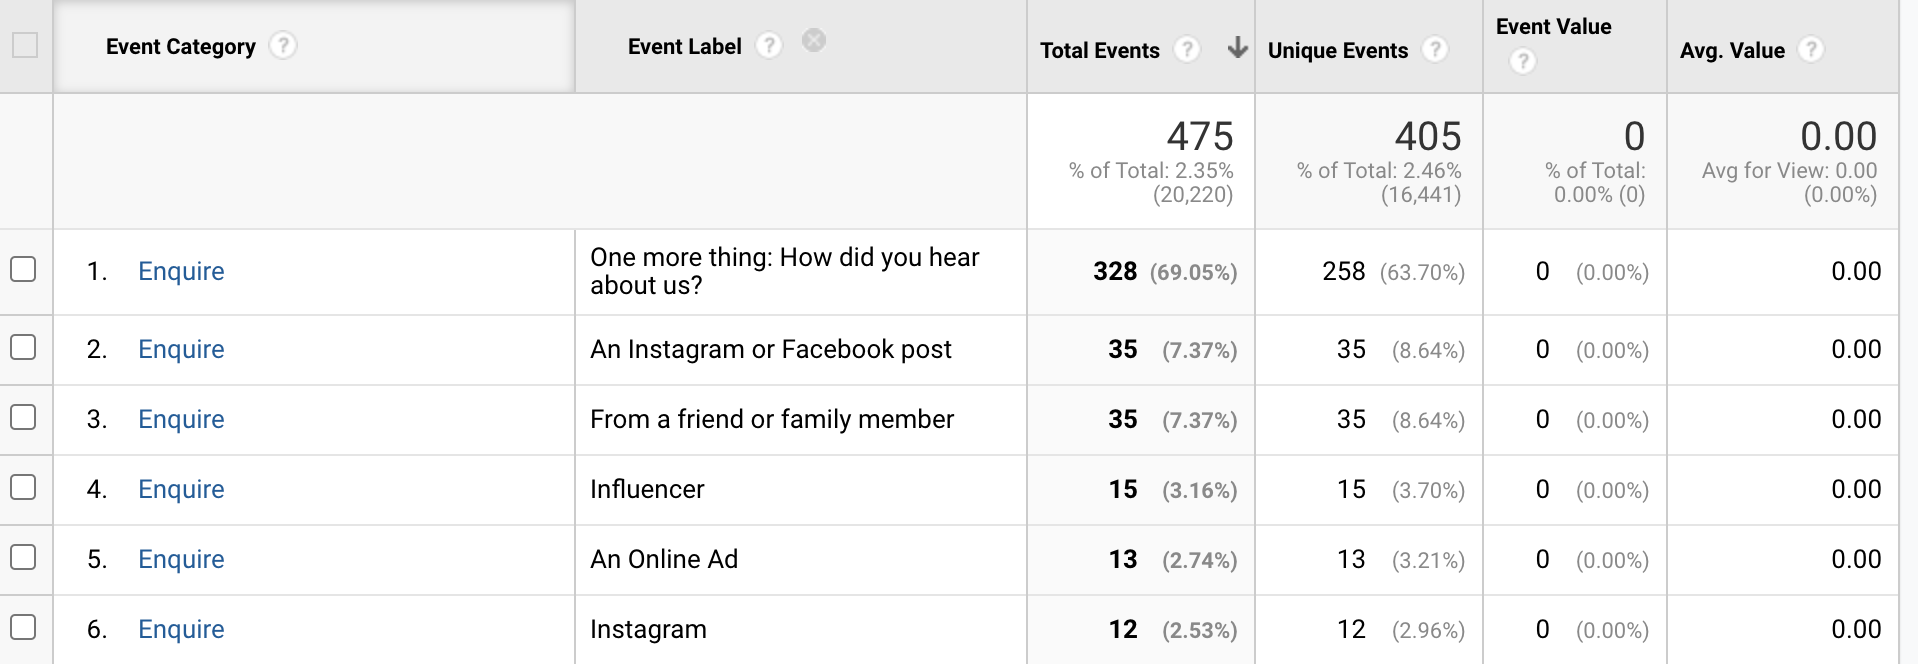
Event Category NameThose who've installed prior to December 1, 2022, will see Enquire as their Event category name. If you'd like this switched to Fairing, contact support.

Step 2: Creating A Custom Segment
If you're unfamiliar with segments in Google Analytics, they allow you to create groups of users or sessions who fit a specific criteria or filter. For example, you can use segments to analyze users who've added an item to their cart vs. those who not. As a marketer, this is valuable as you can start to pull out trends and other insights from the group that's completed the desired action.
If you want to learn more about custom segments in Google Analytics, we recommend taking a look at Google's support documentation here.
Creating a Segment With Fairing Data
Follow the below instructions to learn how to create a custom segment with Fairing data. If you'd prefer to simply click a button to create the segment, you can do so with this template.
To create a segment with your Fairing data, start by going to any explorer view in Google Analytics. Acquisition --> All Traffic --> Source/Medium is a popular one.
Next, click on "+ Add Segment" located next to All Users.

Click "Add Segment"
On the following screen, you'll be shown a list of all current segments. To create a new one, simply click "+ New Segment.
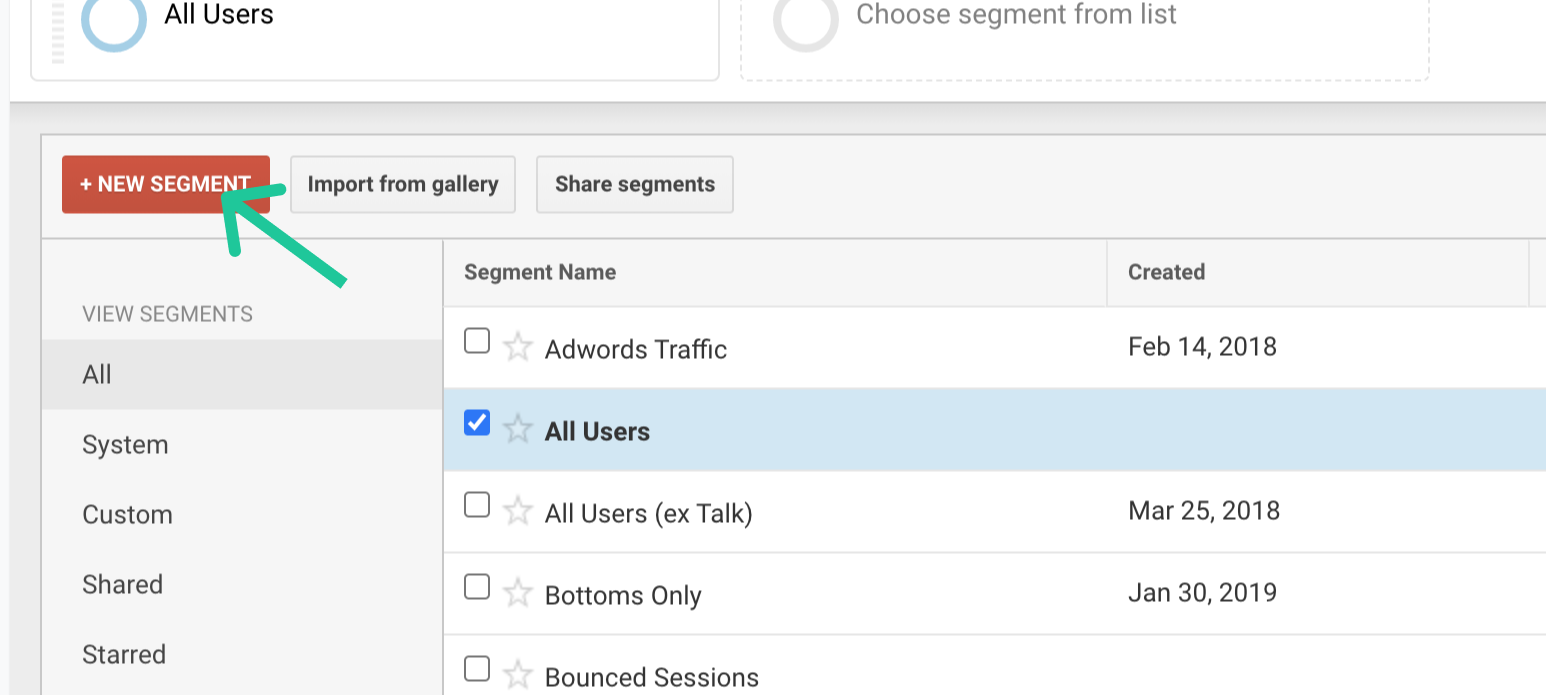
After you've clicked "+ New Segment," you'll be presented with a screen to select which filters you want appended to your segment. Under Advanced, select Conditions, and from the dropdown menu, select Event Label and type in "Fairing." Next, click "+ Add Filter' and create another filter with Event Action, and type in "Submitted Survey." Give your new segment a title and hit Save. You now have a segment of users who've submitted your survey that you can analyze throughout Google Analytics.
Step 3: Analyzing Data With Segments
To start analyzing your Fairing enriched Google Analytics data browse to various explorer views and under Secondary Dimension, select Event Label.
If you'd like to drill down into an individual source, add it via the advanced search.

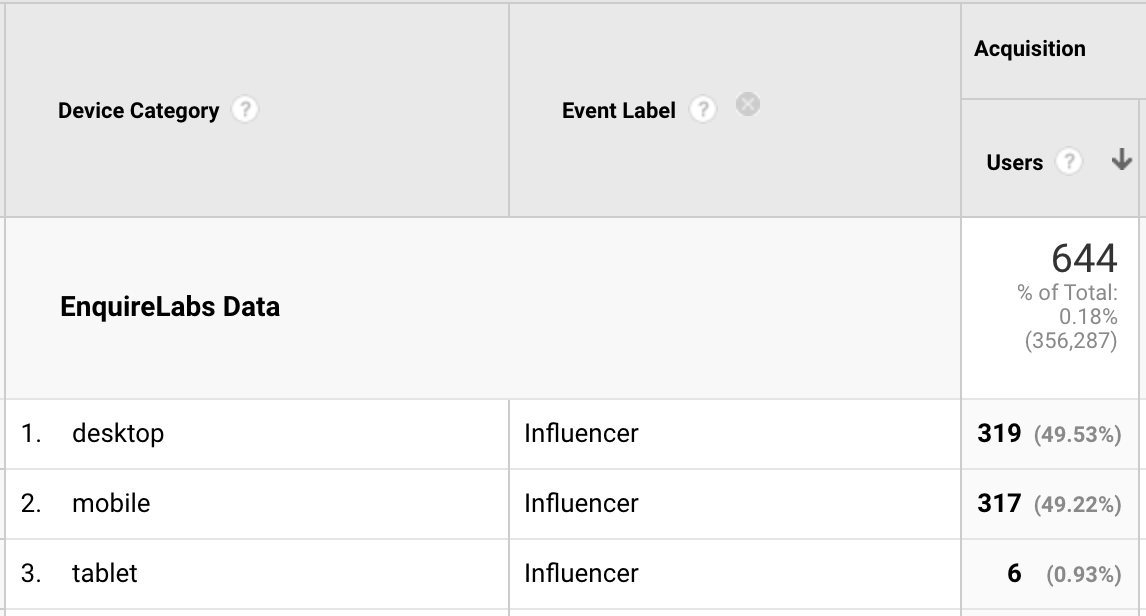
A great example is analyzing device category vs. survey response. You can do this Audience --> Mobile --> Overview. In the example below, we can see that the Influencer's convert fairly equally between Desktop and Mobile devices.
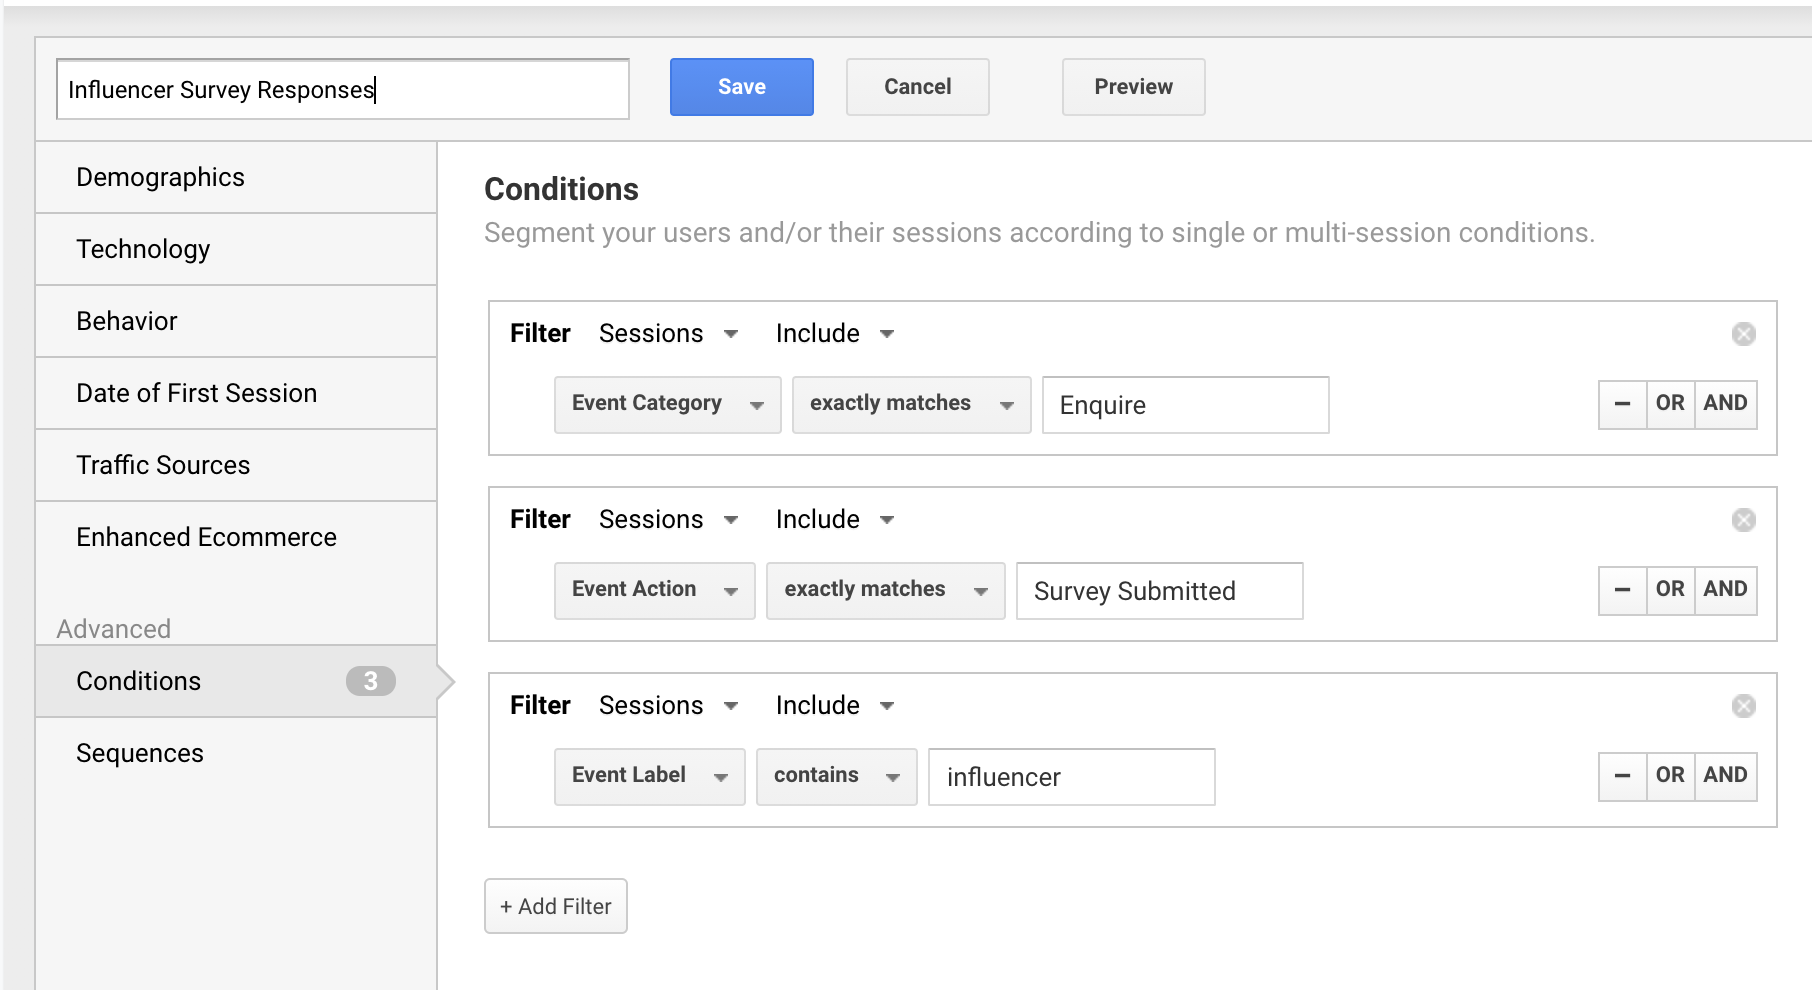
If you'd like to explore a specific response similar to the above, you can also create a segment dedicated to that individual response. To do that, simply add another filter in your segment with Event Label contains influencer.
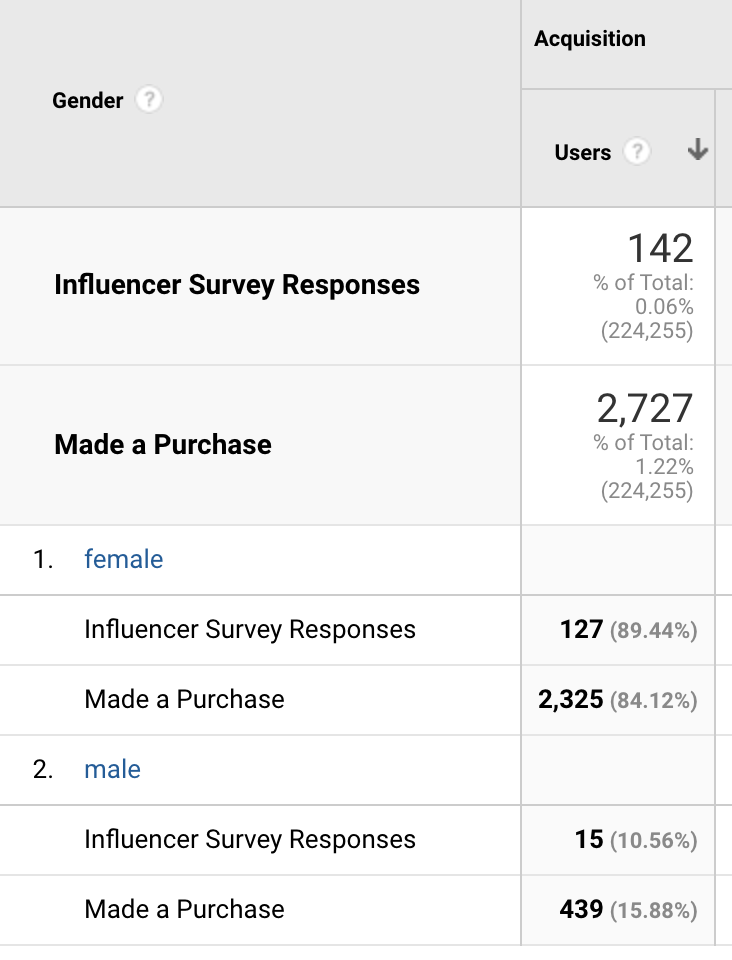
We can then explore various audience insights using that segment compared to our larger Google Analytics segment "Made a Purchase." The example below allows us to understand that females may be a bit more influenced by influencers than males when compared to all users who've made a purchase.
Updated 2 months ago