Google Sheets Extension
The Fairing Google Sheets extension allows you to sync your Fairing response data with Google Sheets.
The Fairing Data Sync Google Sheets extension enables you to easily pull your Fairing data directly into a Google Sheet for further analysis and joining with other data sources.
Google API Services User Data Policy
Fairing's use and transfer to any other app of information received from Google APIs adheres to Google API Services User Data Policy, including the Limited Use requirements.
Getting Started
Step 1: Install Fairing Data Sync
- Visit the Google App Marketplace here
Step 2: Activate the Extension
- Select 'Extensions' from the Google Sheets Header
- Select 'Fairing Data Sync'
- Select 'Sync'
Step 3: Insert your API Key
- You have a unique, revokable API Key under Integrations >> Google Sheets >> Connect/Settings
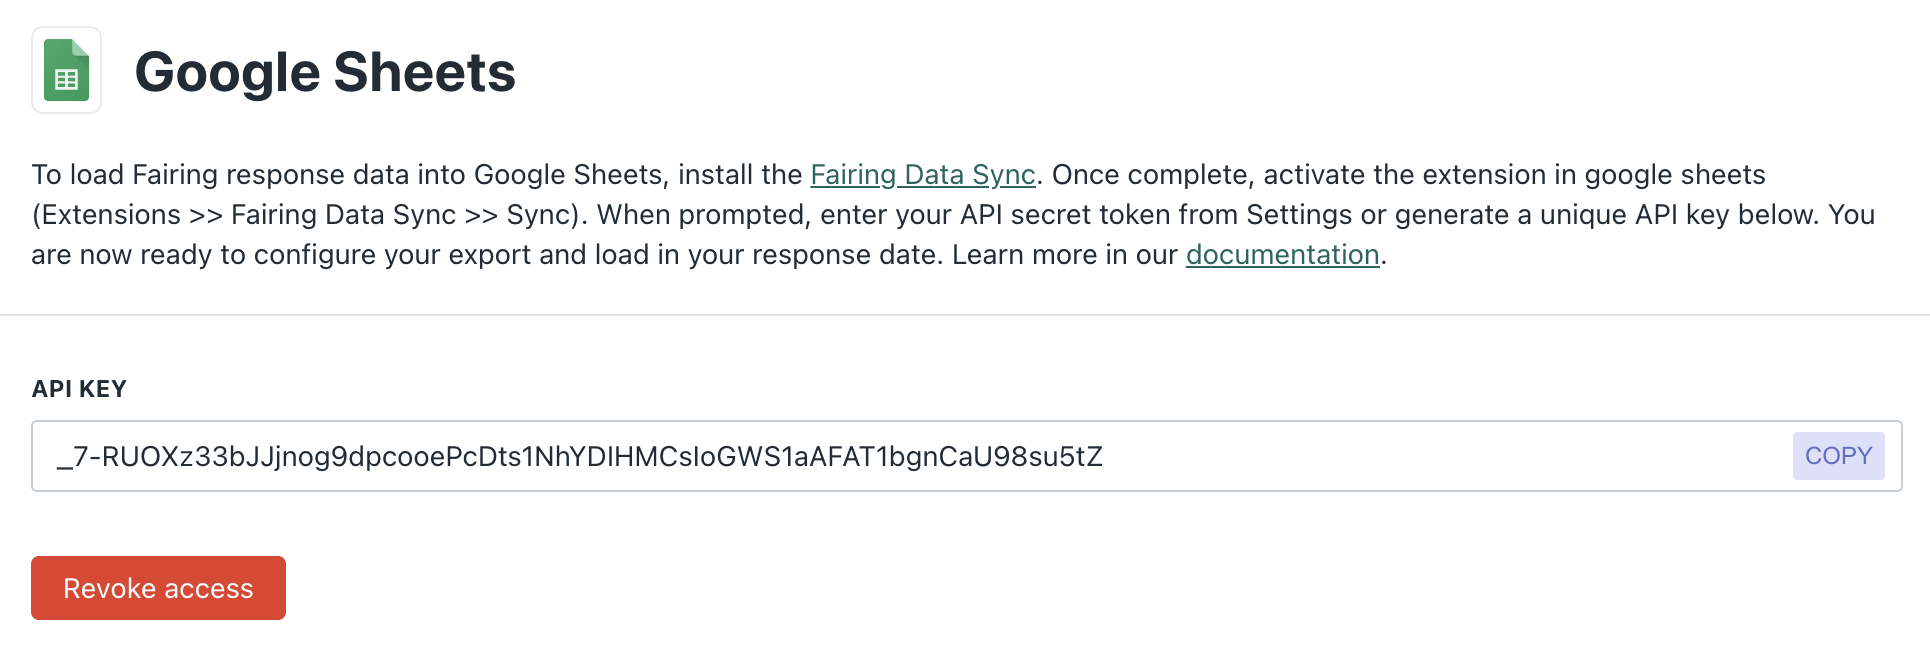
Integrations >> Google Sheets
Note: You can also use the API key on your Fairing Account page under 'Secret Token' (you cannot revoke access for this token)
- Click 'Enable' to generate a unique API key
- You can click 'Revoke Access' at any time to invalidate the token
- You can again click 'Enable' to generate a new unique token
- Enter the API key into the extension panel and click 'Save'
Step 4: Configure Reports
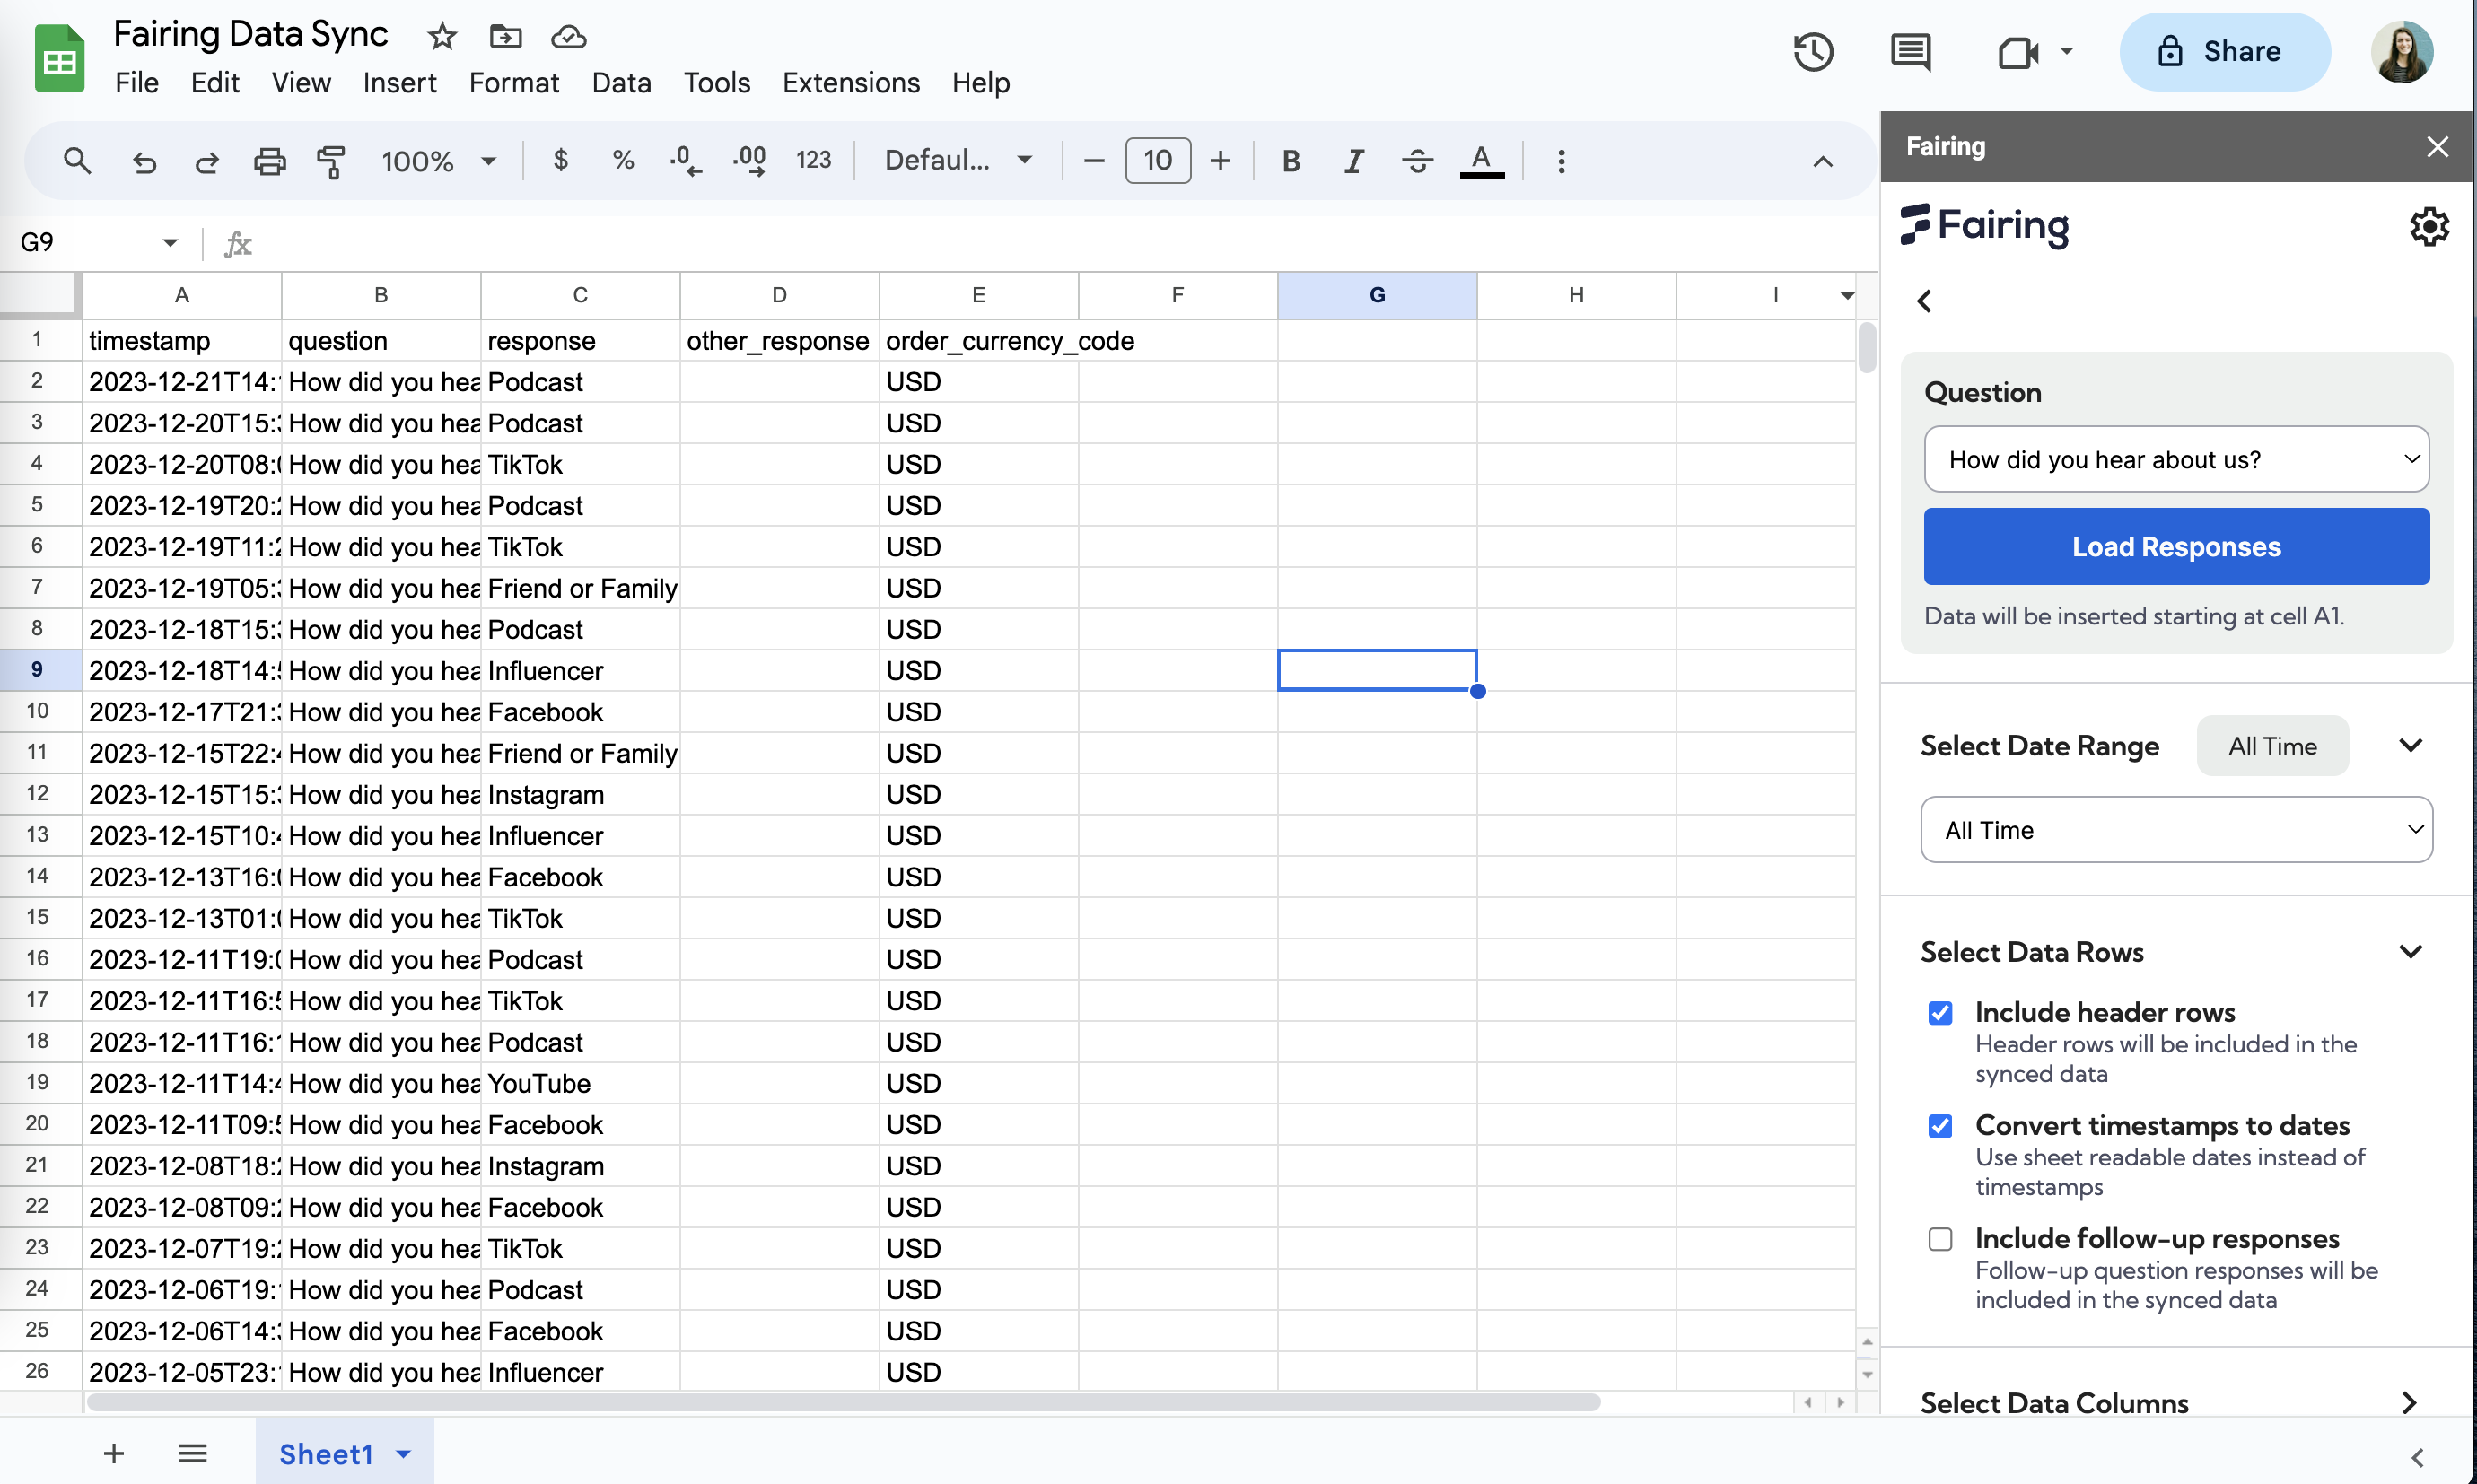
- You can configure a report per sheet, to get started click 'Add new data report'
- For each report you have the option to select the question, date range, and columns
- Once the report settings have been configured, click 'Load Responses' (this will also save the report)
- Note: Data will always appear in A1 for the sheet you are currently on
- Click the back arrow in the top left of the data sync modal to return to see your existing reports or to create a new report
- To remove an existing report, you can X out the report on the main page or override the existing data by creating or editing a report for the same sheet
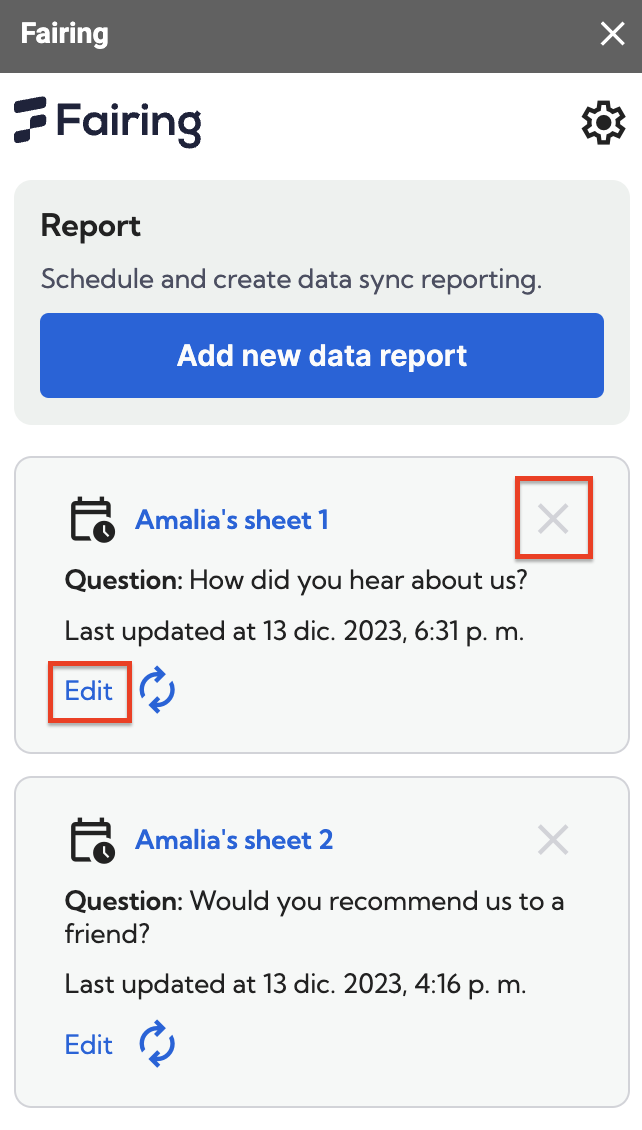
Remove or edit an existing report
Step 5: Refresh Reports
- Click the refresh icon for an existing report to get the latest data
- Note: If the time period is Today, Last 7 days or Last 30 days - the data will be refreshed and overriden with the latest data relative to the date the button is clicked. If the time period is All Time or Year to Date, the data will be refreshed and any new data will be added to the top of the report (existing data will be pushed down).
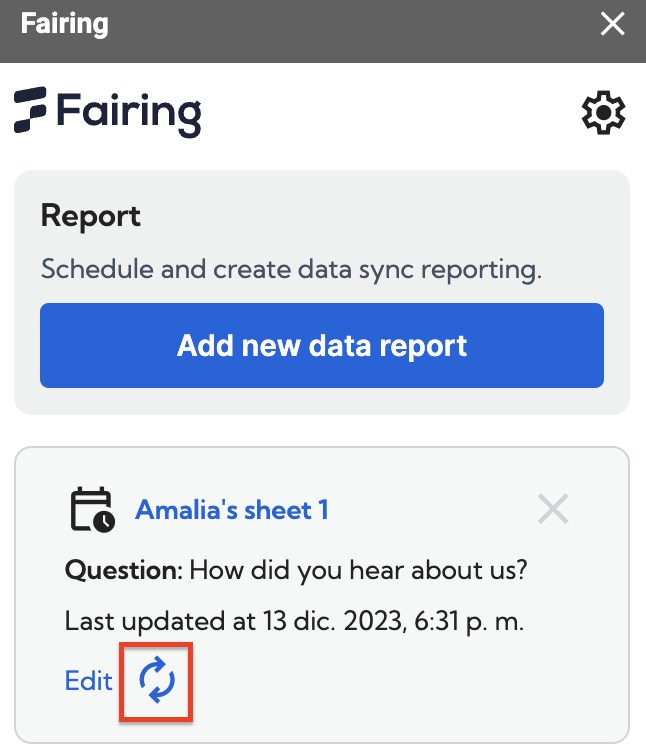
Refresh report data
Step 6: Schedule Reports
- Add a schedule to your document by clicking 'Add Schedule'
- Note: You can only have one schedule per document, each saved report configuration will run on the schedule set
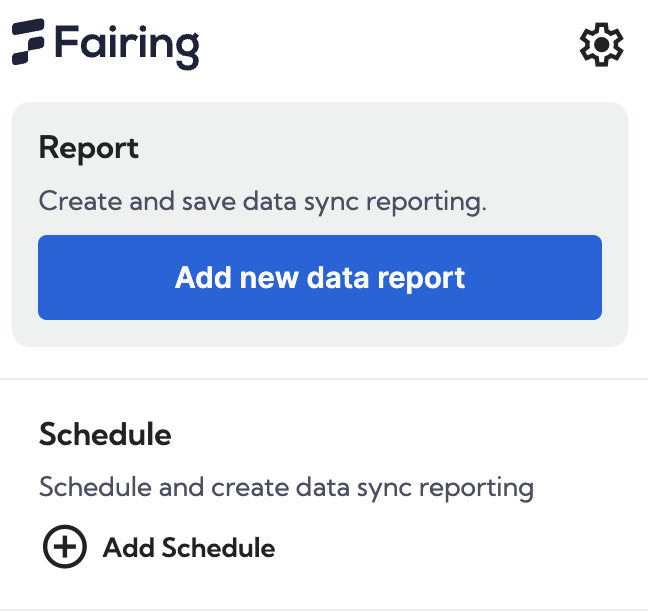
Add Schedule
- You have the option to set a hourly, daily, weekly or monthly sync - depending on the sync frequency, different settings will be available (ex. for weekly you will select the days of the week vs monthly you will select the day of the month)
- Note: Time Zone will always default to the time zone originally set when setting up the Fairing Data Sync
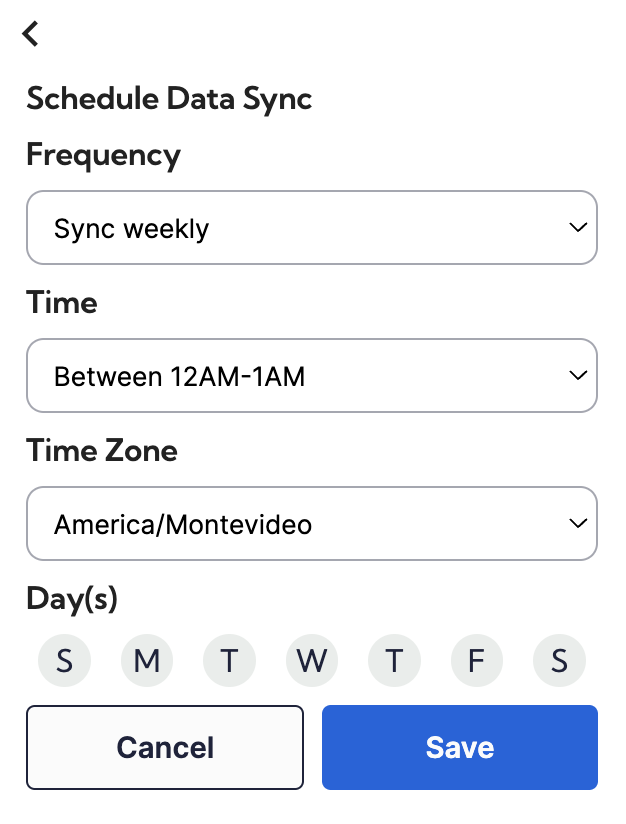
Schedule Settings
- A schedule can be edited or removed at any time
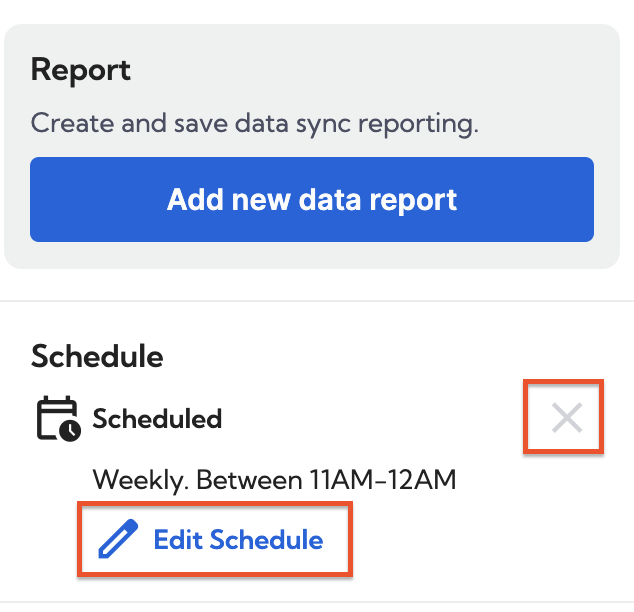
Edit or Delete a Schedule
Troubleshooting
If you are experiencing problems acessing or navigating the Fairing Data Sync, try the below to try to resolve the issue. If none of the below work, do not hesitate to reach out to [email protected].
Refresh the browser window
Often when the 'Sync' button does not appear, the browser simply needs to be refreshed or restarted.
Clear your browser's cache and cookies
If you are experiencing any errors from Google or the extension is not responding to your clicks (ex. nothing happens when you click 'Add new data report'), clearing your browser's cache and cookies can help remove any old permissions that may be causing errors.
Uninstall and reinstall the extension
If neither of the above work for the issue you are experiencing, you can try uninstalling and re-installing the Fairing Data Sync. This helps the extension reset permissions. You can uninstall by going to Extensions >> Add-ons >> Manage add-ons and search for 'Fairing Data Sync.'
Updated 5 months ago