
Shopify Checkout Extensibility
Use the Fairing app block in Shopify Checkout Extensions.
Checkout app extensions make it easy for developers to extend their app code into checkout and customize many aspects of the checkout experience. Shopify provides the tools and resources for building checkout UI extensions on the checkout steps, post-purchase page, and thank you and order status pages.
Not on Checkout Extensibility yet?If you're not on Thank You and Order Status Page Checkout Extensibility yet, you can still integrate Fairing. For instructions, click here.
Add Fairing App Block
Once you have opted in to Checkout Extensibility, go to Shopify >> Settings >> Checkout >> Checkout Customization and click Customize.

Shopify Checkout Settings
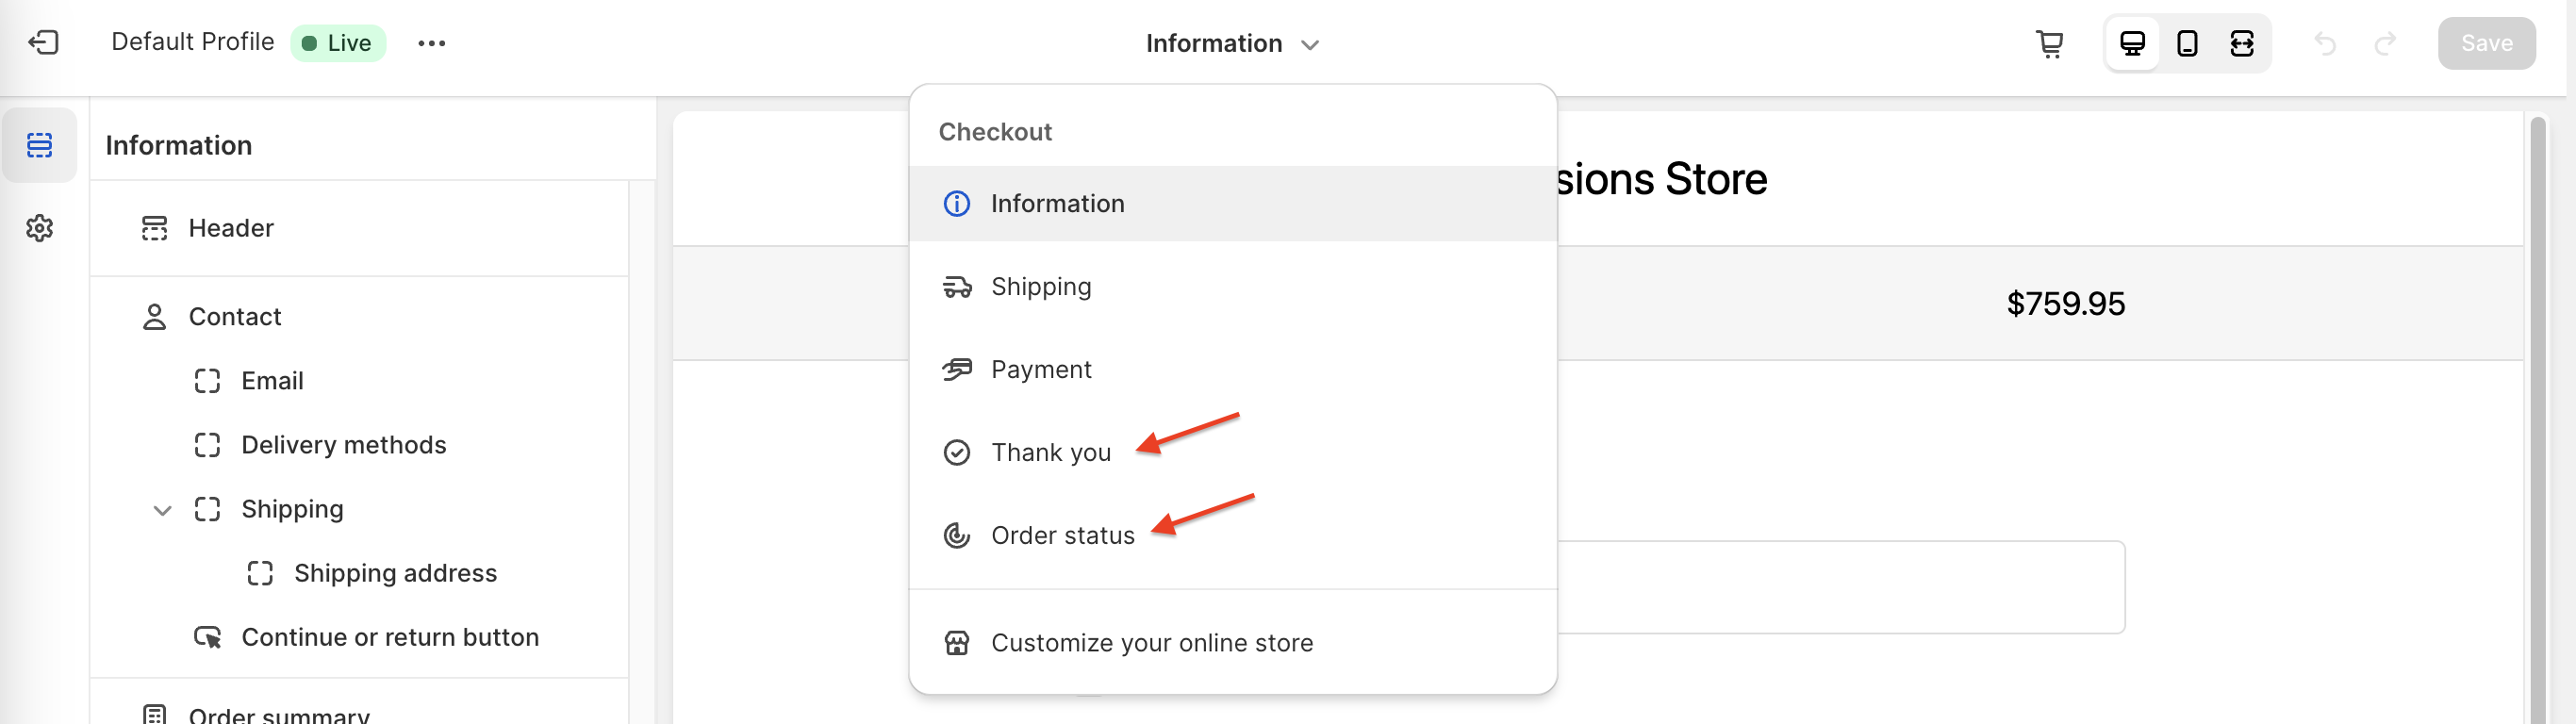
The Fairing app block is available on both the Thank You Page (initial checkout) and Order Status page. You need to configure and add the app block on each page separately.
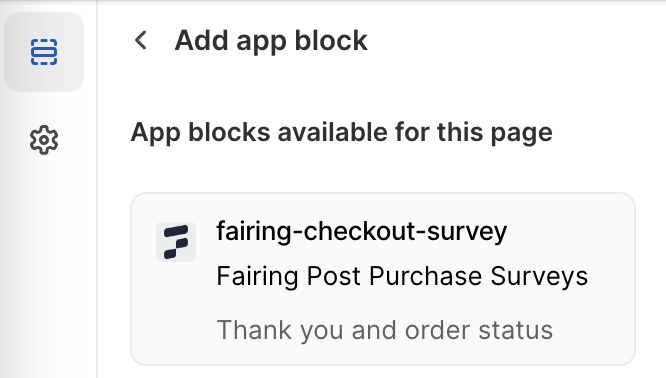
Once on either the Thank You or Order Status page, click 'Add app block' in the bottom left of the Checkout Extensibility Section editor panel. Fairing will appear as an available app block if you are an existing customer. If not already a customer, you can browse the Shopify App Store (bottom left of editor) and install Fairing from there.
Fairing App Block
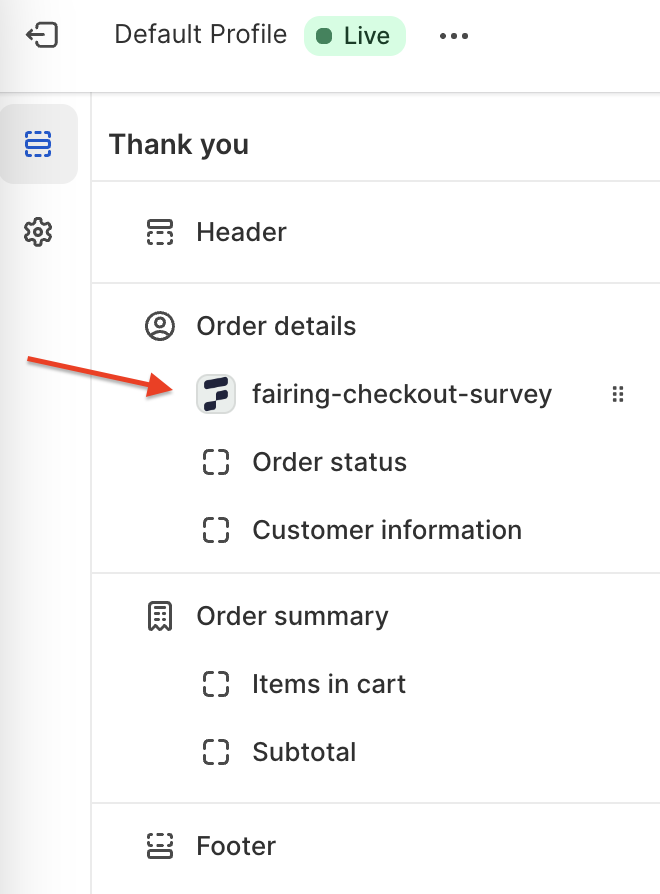
Once added, you can rearrange the order of the different blocks within your Order details section. We recommend putting Fairing above the Order status block to increase your response rate.
Preview
After adding the Fairing app block, on the right side, you can see a preview of the different question types available in Fairing. You can 'respond' to the questions shown, no data will be captured, this is just a preview to get a feel for Fairing.
Success Message
To configure the success message shown at the end of the Fairing Question Stream, first click on the Fairing app block. Once in the Fairing app block settings, you can add a Success Message Title, Subtitle, Image and/or a CTA button. You can also set the alignment of the success message to either left, center or right. By deafult, the alignment will be left. In order to preview the success message, toggle the Preview success message section to 'True.' When 'False' is selected, you will see the Fairing question preview shown above in the video.
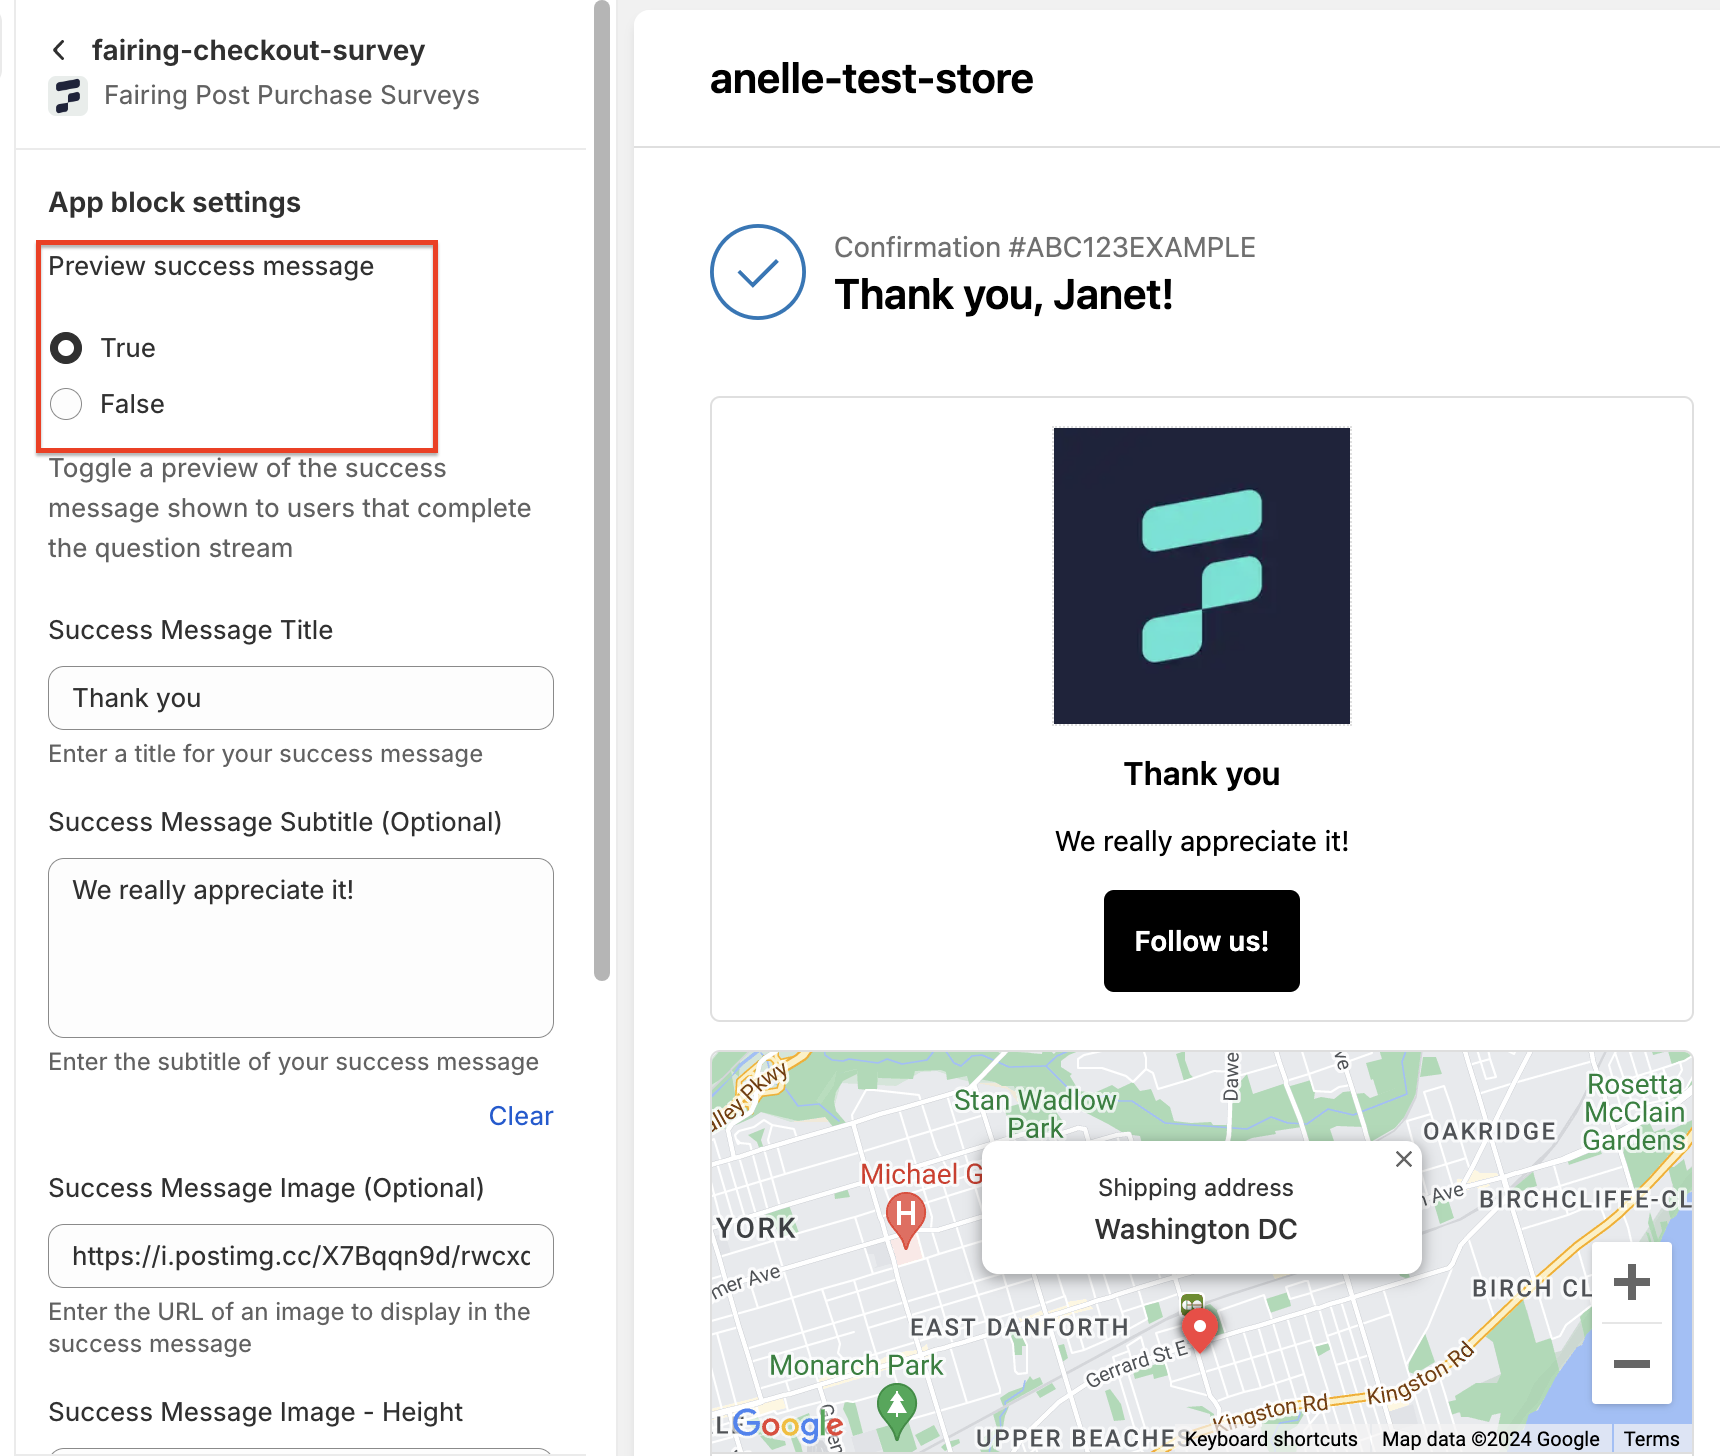
Preview Success Message = True
To add an image - copy a link to an image you are hosting into the Success Message Image (Optional) box. You can set the height of the image in Success Message Image - Height. We recommend 150 - 250 pixels. Adding an image to your success message is optional.
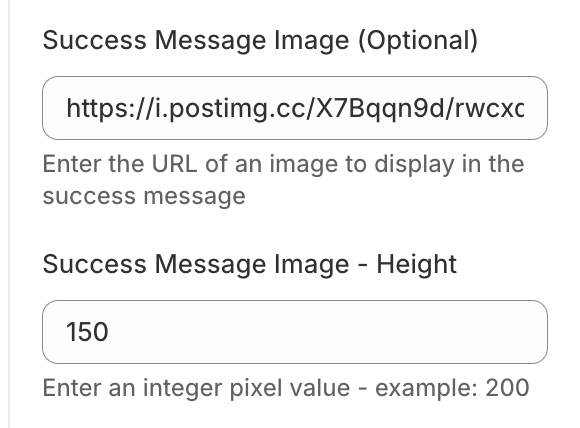
Image Settings
To add a CTA button, you will need to add the Success Message CTA Text (Optional) and the Success Message CTA Link (Optional). You cannot adjust the style of the CTA button. Adding a CTA button to your success message is optional.
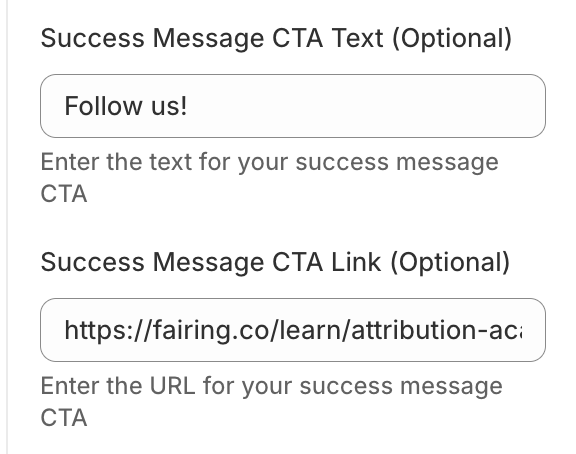
CTA Settings
You must configure a success message for both the Thank You and Order Status page separately. Before navigating between the two different pages, make sure to click 'Save' and return to the Checkout Extensibility Sections by clicking the back button. The left side panel will become out of sync with the page you are on on the right side if you switch pages without returning to the Sections list and re-clicking on the Fairing app block.
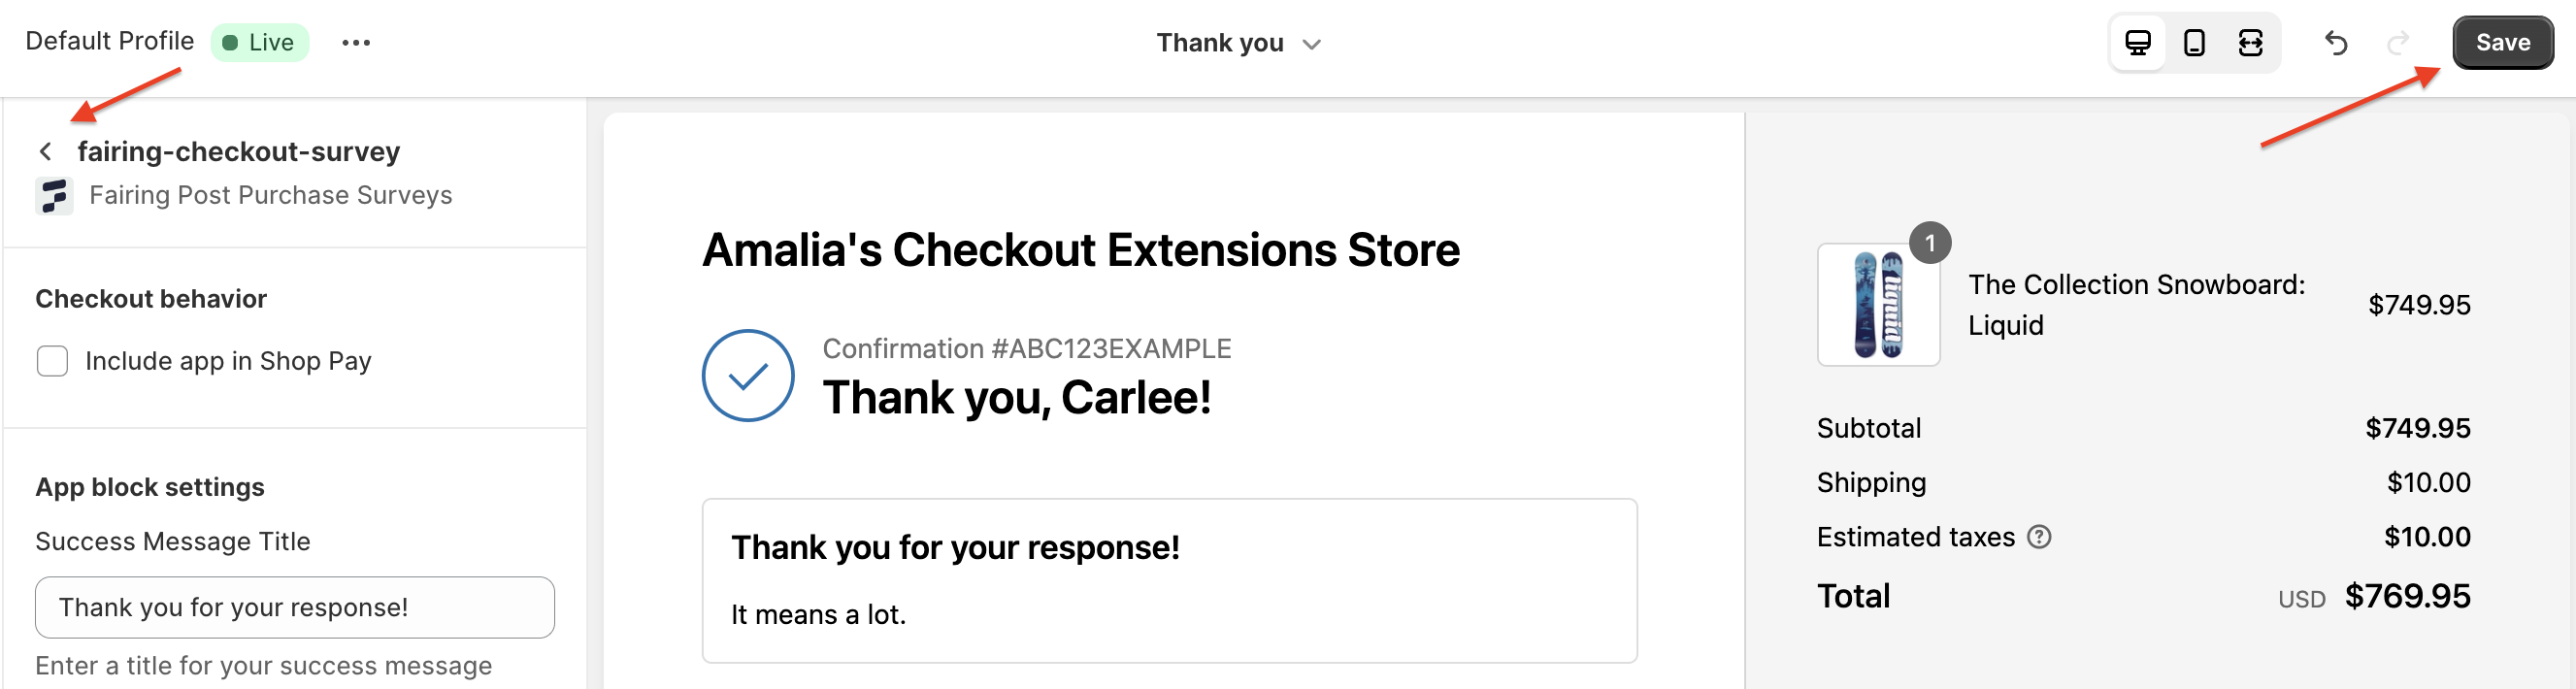
Save Success Message
Note: If you also have a success message configured in the Fairing app, the Checkout Extensibility success message will always take precedent (even if left blank).
Updated about 1 year ago