Setting Up Your Survey
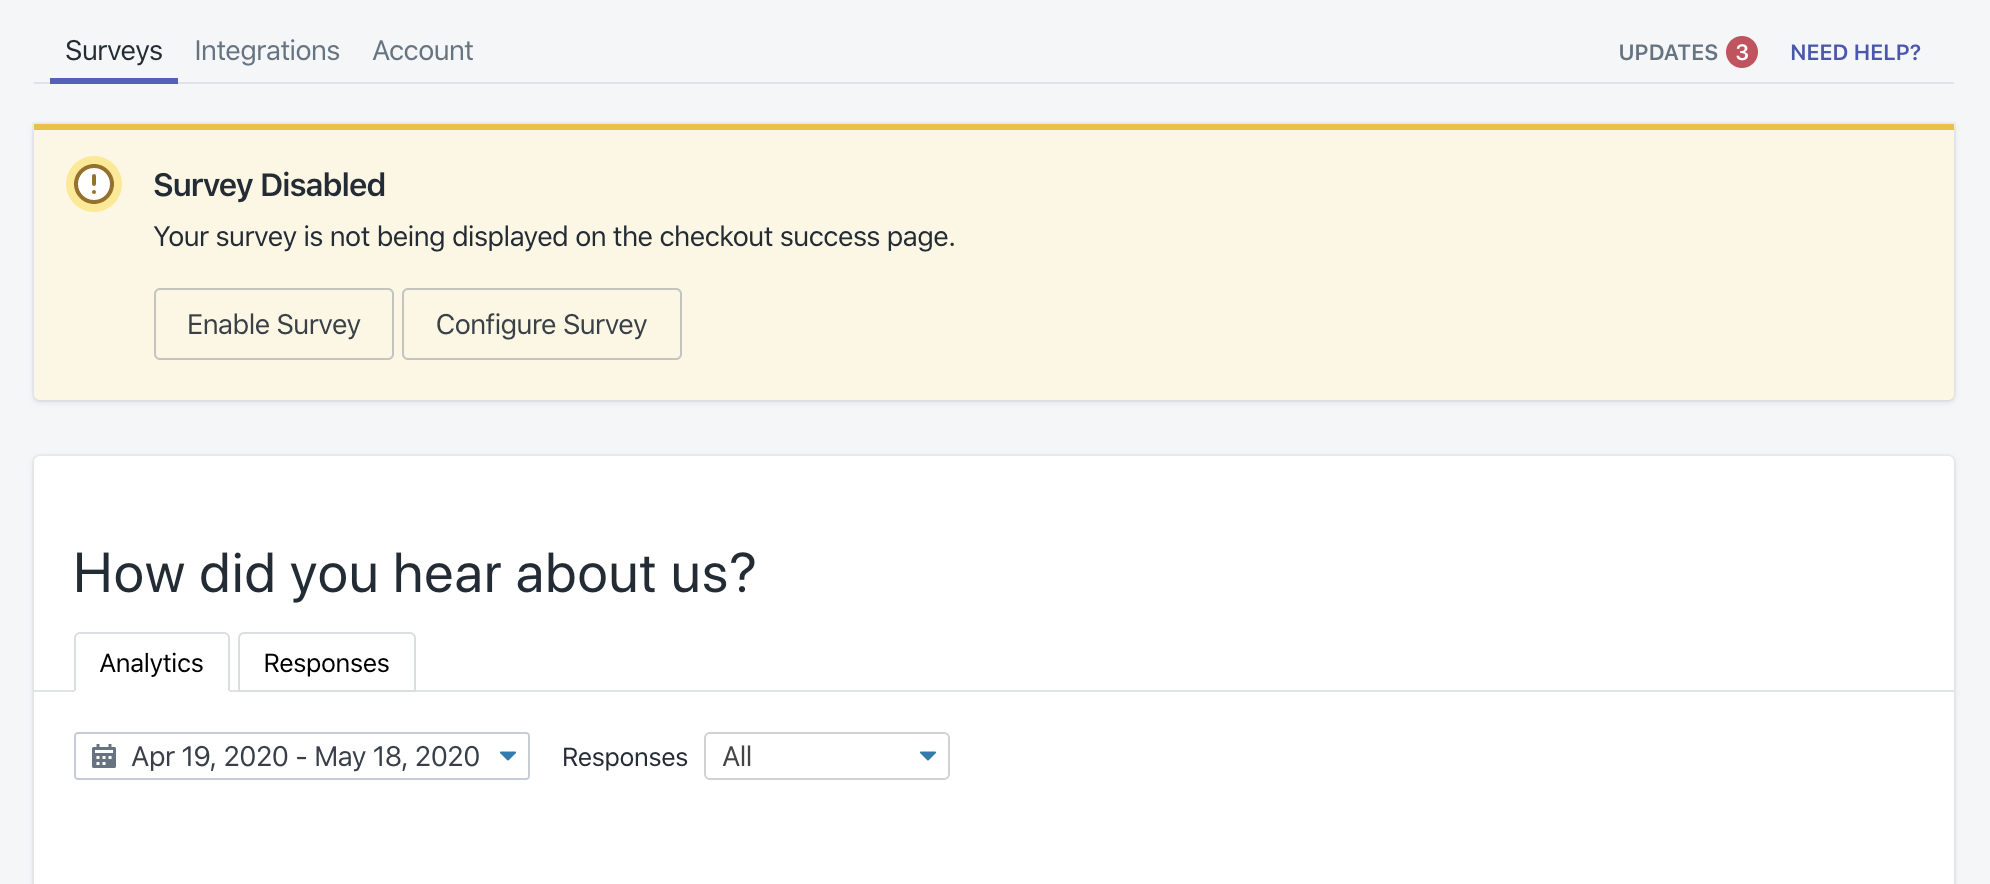
After you've installed EnquireLabs, you'll be presented with the below screen. Click "Configure survey" to get started. Your survey won't be shown to customers until you click "Enable Survey."

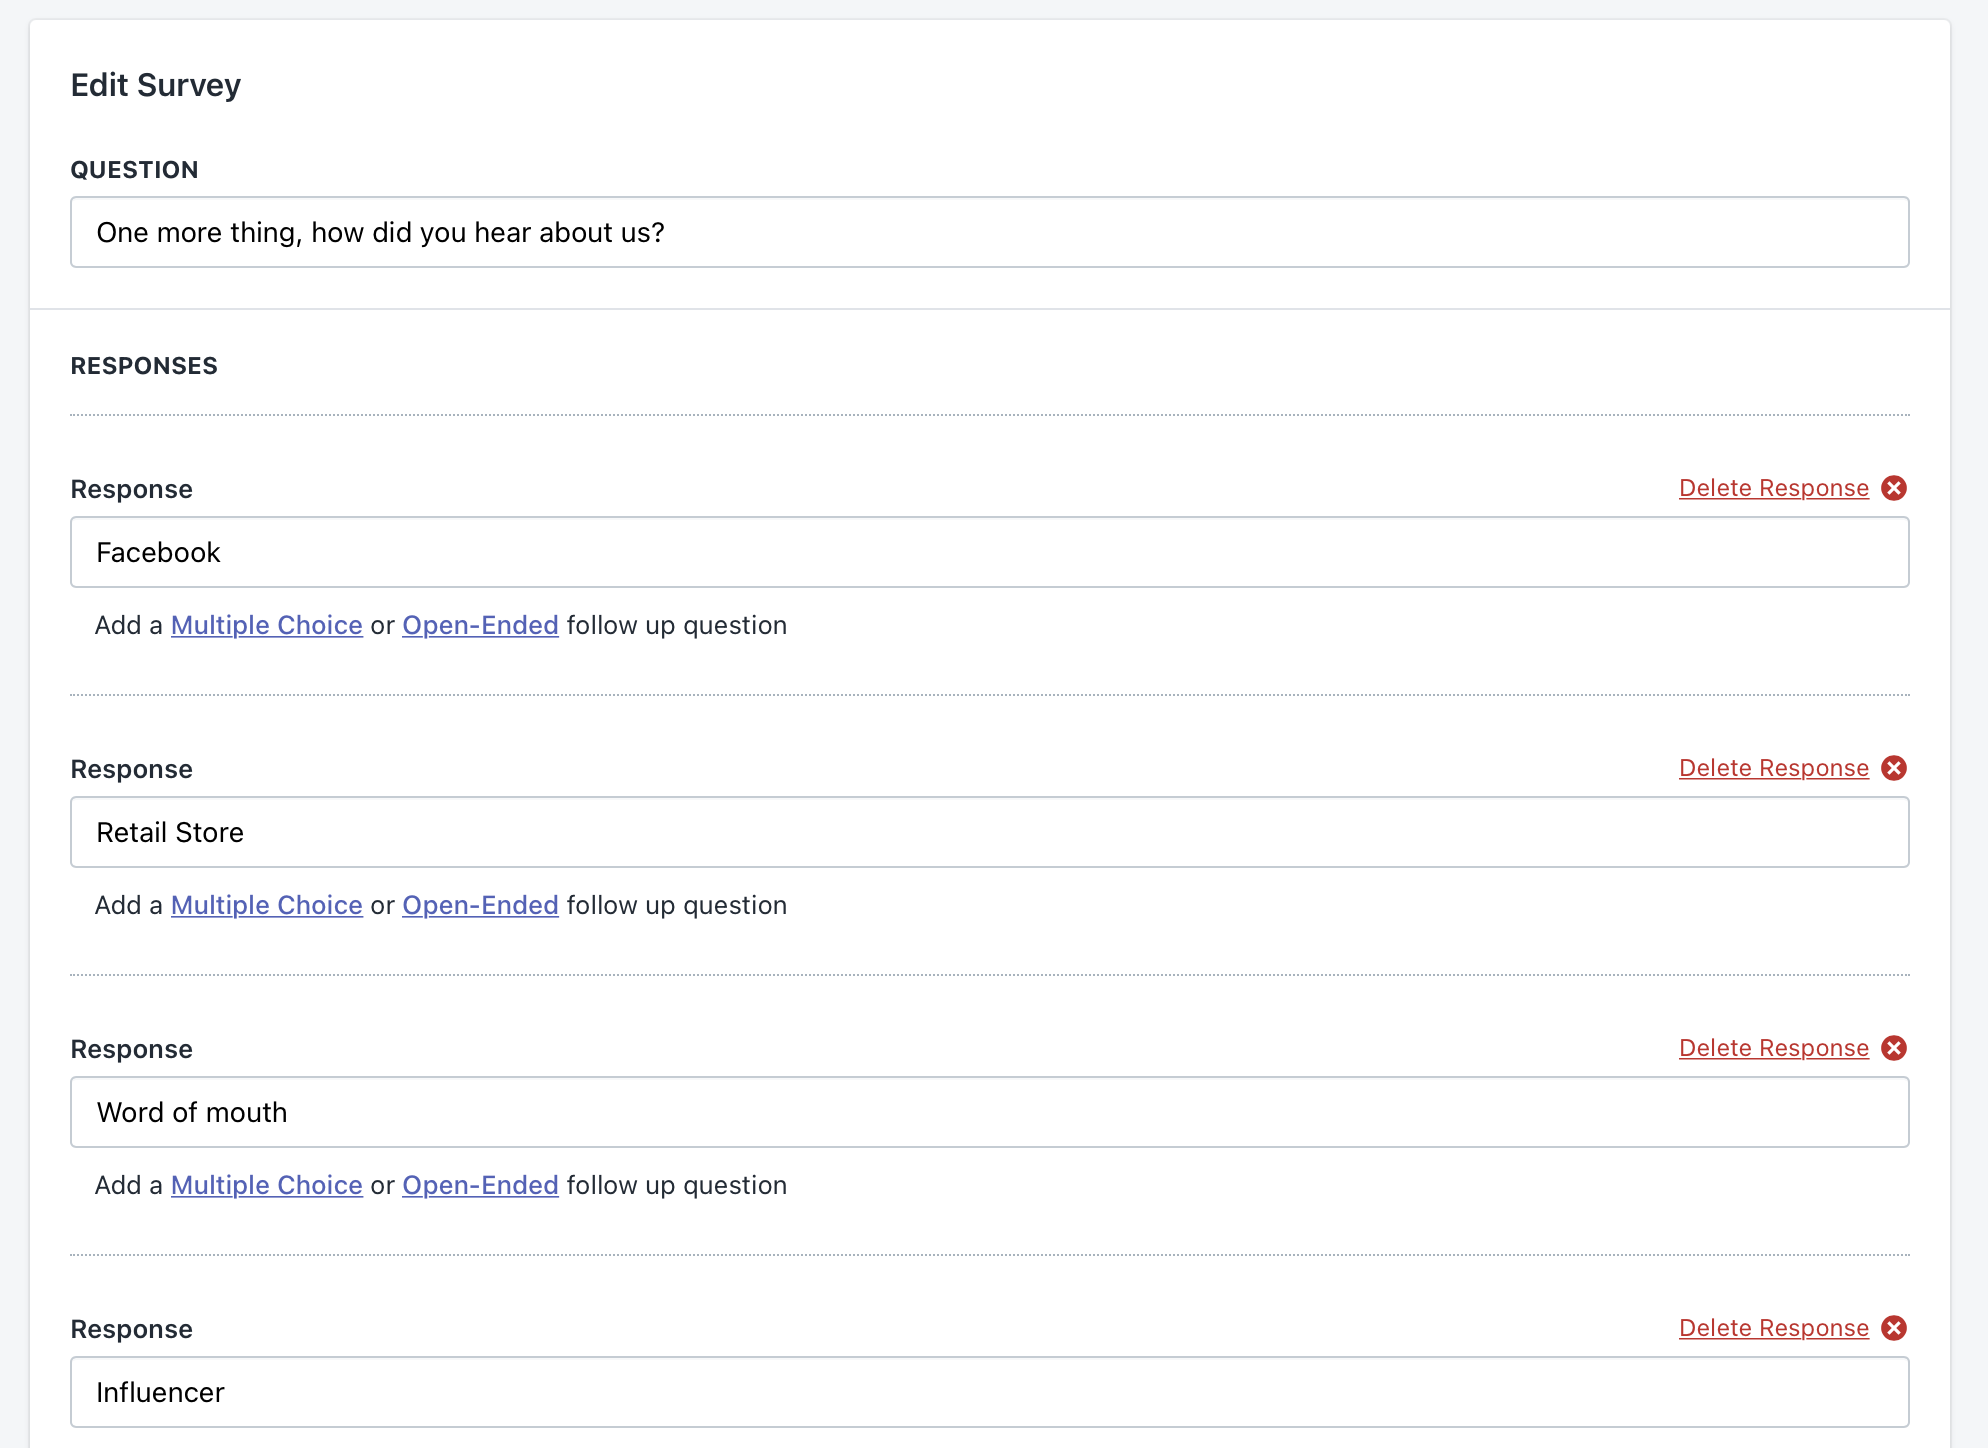
On the following screen, you'll customize your survey question. If you're on our Pro plan, you have access to our two-step response clarification feature, click here for more detailed instructions on setting that up.

Survey configuration page
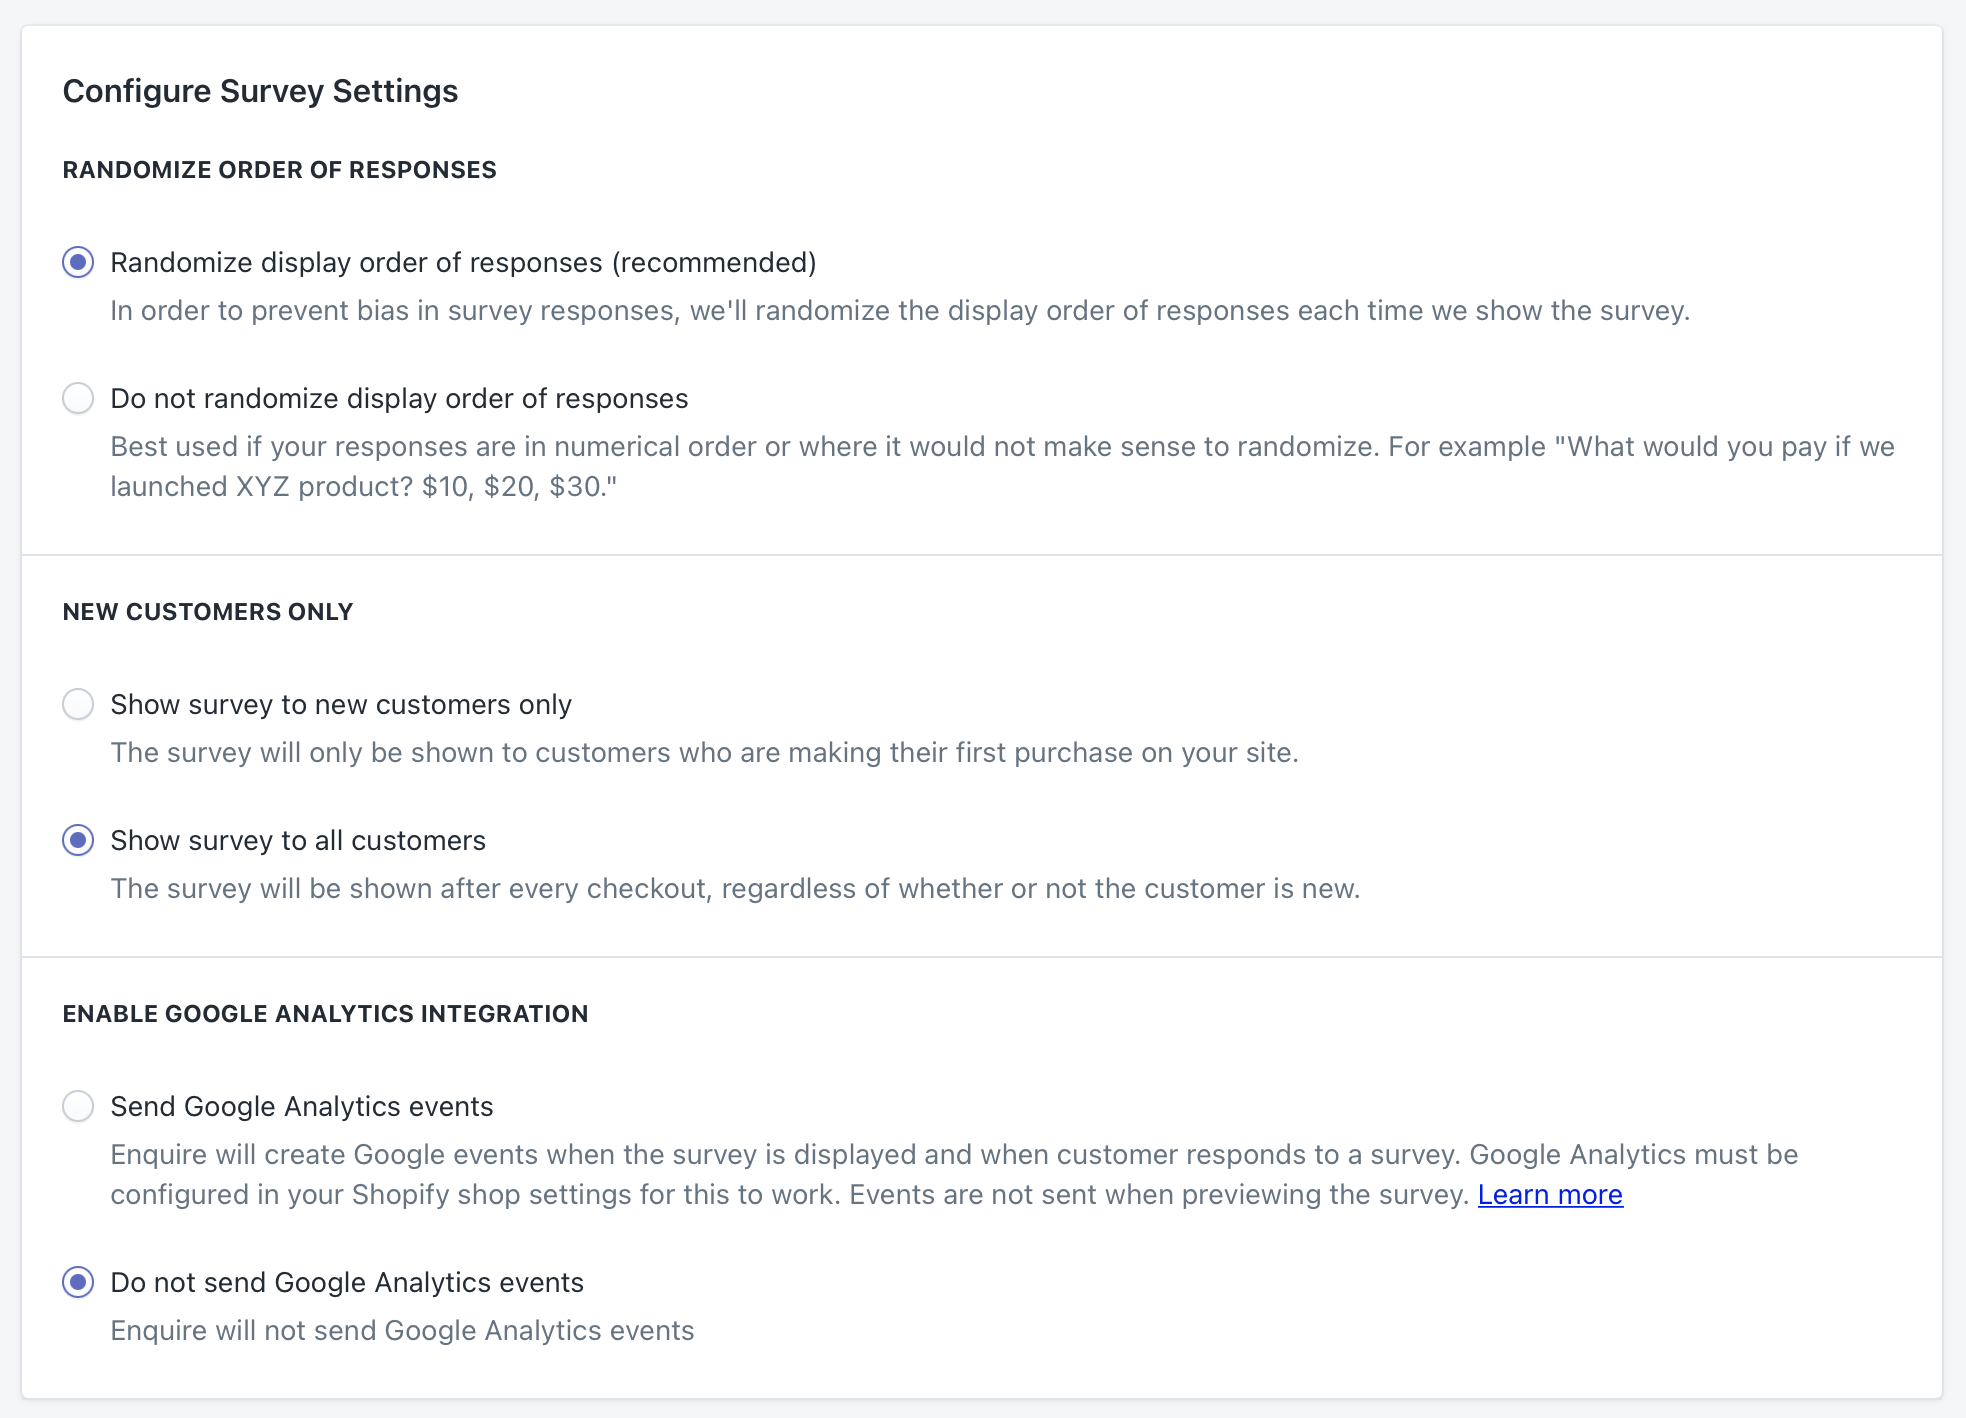
After inputting survey response options, scroll down to view the following survey toggles.
Randomize Order of Responses
We recommend you leave this enabled to remove response order bias. This type of bias occurs when the order of your response options influences the customer to select a certain response. By randomizing your responses list, you remove this bias.
New Customers Only
When enabled, New Customers Only allows you to only show your survey to new customers. This toggle is powered by Shopify's "customer orders count" variable. If no previous orders exist, we'll display your survey.
Enable Google Analytics Integration
When enabled, we'll send Google Analytics events when your survey is viewed and submitted. For more information on this integration via our Google Analytics documentation.

Once you've finalized your survey setup, click "Open Preview" to preview your survey before going live. We generate this preview by appending it to your latest order – if you have a new store with no previous orders, your preview won't work given we won't have an order to place it on.
Once satisfied with your survey preview, you can click Enable to set your survey live.
Updated 12 months ago
